Caleb Turner
Begin with a thorough cleaning of your synthetic rattan ensemble. Use a mixture of warm water and mild soap, scrubbing gently with a soft brush to remove any dirt or grime. This sets the perfect foundation for transformation.
Next, select a high-quality spray or brush-on coating specifically designed for plastic surfaces. Ensure it is resistant to UV rays and weather changes to maintain longevity. It’s advisable to choose a color that complements your outdoor space, elevating the overall aesthetic.


Before application, ensure the surface is completely dry. Hold the spray can or brush at an angle of 6-12 inches from the surface. Apply in thin coats, allowing each layer to dry fully before adding the next. This approach prevents drips and ensures even coverage, resulting in a smooth finish.
Finally, let the newly coated pieces cure for at least 24 hours before exposing them to elements. This will help seal the color and protect against fading, ensuring your revamped pieces stand out for seasons to come.
Painting Techniques for Synthetic Rattan Seating
Thoroughly clean the surfaces with soapy water to remove dirt and grease. Allow them to dry completely before proceeding. Use a high-quality primer designed for plastic materials, applying it evenly for optimal adhesion.
Select a color that complements your surroundings and is suitable for exterior use. A spray paint formulated for synthetic surfaces is ideal, ensuring even coverage and a smooth finish. Multiple light coats work best; let each layer dry before applying the next. This method minimizes drips and enhances durability.
If intricate patterns are present, use a brush for precision in hard-to-reach areas. For larger sections, an applicator can expedite the process. Be patient and maintain a consistent technique to achieve a professional look.
After finishing, protect the new layer with a clear sealer to extend longevity and resist fading from UV exposure. Allow ample drying time before using the items again to ensure the coating sets well.
After the project, clean any tools used immediately to maintain them for future tasks. Store leftover materials properly for future touch-ups.
Choosing the Right Type of Paint for Plastic Wicker
Select a high-quality spray option that adheres well to synthetic materials. Products marketed as all-purpose or specifically designed for plastics are ideal.
Look for paint with UV protection to prevent fading from sunlight exposure. This feature helps maintain the finish over time.
Consider paint formulated with a flexible compound. This characteristic allows the surface to withstand changes in temperature and minimizes cracking during expansion and contraction.
Check for compatibility with your existing coating. If there’s a layer already on the surface, choosing a product that can bond with or effectively cover it is important.
Review finishes to match your desired aesthetic. Options range from matte to glossy, each providing a different look and feel.
Examine drying times and application methods on the label. Fast-drying formulas ease the process, while spray options generally provide even coverage without brush strokes.
Prioritize low-VOC (volatile organic compounds) formulas if working in an enclosed area. This choice improves indoor air quality during application.
- Outdoor-rated for durability
- Residue-free after drying for maintenance ease
- Available in a wide range of colors
Test a small area first to gauge adhesion and appearance before proceeding with the entire project. This step helps ensure satisfaction with the result.
Preparing the Surface for Painting: Cleaning and Sanding
First, I thoroughly clean the surface to eliminate dust, dirt, and grime. I use a mixture of warm water and mild soap applied with a soft cloth or sponge. Ensuring the material is completely dry is crucial after rinsing. Any residual moisture can hinder adhesion.
Next, I focus on sanding. I opt for fine-grit sandpaper, typically around 220-grit, to gently scuff the surface. This produces a texture for the coating to adhere better. I take care to sand in the direction of the weave to avoid scratches that could affect the appearance.
After sanding, I dust off the furniture with a clean, dry cloth to remove all particles created during the process. A tack cloth can also be effective to pick up any lingering dust. Ensuring a smooth, clean surface will significantly enhance the final finish.
| Step | Action |
|---|---|
| 1 | Mix warm water and mild soap. |
| 2 | Clean with a soft cloth or sponge. |
| 3 | Dry completely before proceeding. |
| 4 | Use 220-grit sandpaper to scuff the surface. |
| 5 | Sand in the direction of the weave. |
| 6 | Dust off with a clean cloth or tack cloth. |
Applying Primer for Synthetic Seating
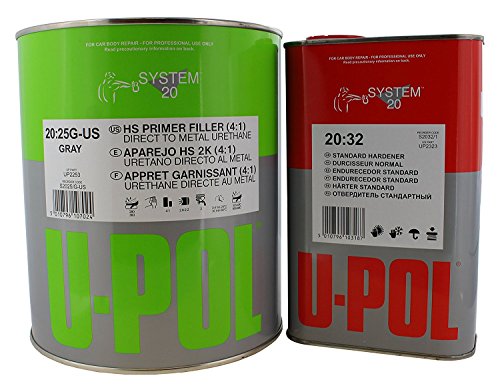
I recommend selecting a high-quality primer specifically formulated for non-porous materials. This ensures better adhesion and a smoother finish. Follow these steps for optimal application:
-
Choose the Right Environment: Work in a well-ventilated area with mild temperatures. Avoid high humidity, as it can compromise adhesion.
-
Shake the Primer: Prior to use, shake the primer canister thoroughly to ensure a uniform consistency.
-
Use Proper Tools: Utilize a high-density foam roller or a soft-bristle brush. These tools minimize brush marks and achieve even coverage.
-
Apply a Thin Layer: Start with a thin coat, working in manageable sections. Overloading the surface can lead to drips or uneven areas.
Trending Now Rust-Oleum Universal Clear Topcoat SprayIdeal for a variety of surfaces and materialsThis all-surface topcoat provides a durable, clear finish that protects against rust and fading, making it ideal for any project. It dries quickly and is easy to apply.
-
Follow Manufacturer Instructions: Refer to the guidelines on curing time before applying additional layers or moving to the next step.
-
Inspect the Surface: After the primer has dried, check for any imperfections. If needed, lightly sand with fine-grit sandpaper and clean off any dust before applying the next coat.
Waiting the recommended time before proceeding with your chosen topcoat is essential for achieving a durable finish. Proper primer application is key to ensuring long-lasting results for your outdoor seating transformations.
Techniques for Painting Plastic Wicker Evenly
To achieve a uniform finish on synthetic rattan, I recommend using a spray application method. This approach minimizes brush strokes and allows for better coverage, especially in the intricate weave of the material.
Before starting, ensure the spray nozzle is clean and adjust it to achieve a fine mist for an even distribution. Hold the can approximately 10 to 12 inches away from the surface. This distance is crucial to prevent drips and runs, ensuring that the coating layers remain thin and manageable.
Applying Multiple Thin Coats
Rather than attempting to cover everything in one pass, I prefer to use multiple light coats. This helps avoid accumulation that can lead to uneven texture. After the initial layer has dried, inspect for any missed spots or inconsistencies. Lightly sanding between each coat can enhance adhesion and smoothness, allowing subsequent layers to bond better.
Using a Foam Brush for Touch-ups
For areas that require precise detailing or touch-ups, a high-density foam brush comes in handy. This tool effectively controls the amount of material applied, ensuring that I can fill in gaps without oversaturating the surface. Dabbing rather than sweeping helps maintain the fine textures characteristic of composite fibers.
Regularly shaking or mixing the paint, especially the spray cans, ensures that components remain well-blended, which is important for consistency throughout the application process. Implementing these techniques will result in a smooth, professional-looking finish, enhancing the overall appearance of my outdoor pieces.
Achieving a Durable Finish with Sealer
Applying a quality sealer provides long-lasting protection against the elements. After ensuring the surface has completely cured, I choose a water-based, UV-resistant sealer for optimal results. This type prevents discoloration and maintains the vibrancy of the finish over time.
Using a spray application method allows for even distribution. I keep the nozzle at a consistent distance of about 6 to 12 inches from the surface, avoiding heavy pooling. Light, even coats create a reliable barrier without compromising the aesthetic.
I apply multiple thin layers, typically two to three, allowing sufficient drying time between applications. This layering enhances durability, preventing wear from sun exposure and moisture. A light sanding between coats improves adhesion and smoothness, creating a refined finish.
After the final layer, I let the piece cure for at least 24 hours in a dry, shaded area to ensure the sealer hardens properly. This step significantly contributes to the longevity of the finish, allowing the seals to bond effectively with the surface.
Regular touch-ups remain a key aspect of maintenance. Inspecting the finish periodically ensures any areas that show wear can be promptly resealed, preserving both protection and appearance. Following these guidelines guarantees a resilient finish that withstands outdoor conditions.
Tips for Touching Up Scratches and Chips
Begin by identifying the areas that need attention. For superficial scratches, use a fine-grit sandpaper to smooth the edges, ensuring that the affected area is even. Wipe away any dust created in this process with a damp cloth.
Color Matching
To achieve a seamless repair, select a color that closely matches the original shade. Consider bringing a sample to the store or using a color-matching app for precision. Test the chosen color on an inconspicuous section first. Allow it to dry to see how well it blends.
Application Technique
For minor dings, I employ a small brush or a cotton swab to apply the touch-up compound. Carefully fill in the chip, layering the product as necessary for a smooth finish. Once dried, lightly sand the patched area again and blend it with surrounding surfaces to eliminate any noticeable edges. Finish with a clear sealant to safeguard the repair and enhance durability.
Maintaining Your Painted Plastic Wicker Furniture
Regular cleaning is key. I use a mild soap mixed with water and a soft cloth to wipe down the surfaces. This prevents dirt buildup and keeps the finish looking fresh. For tougher stains, a soft-bristled brush provides a deeper clean without damaging the coating.
Ensure to rinse thoroughly to avoid soap residue. I also avoid harsh chemicals, as these can degrade the finish over time. Instead, I opt for natural solutions or specialized products designed for maintaining surfaces like mine.
Inspecting for scratches or chips periodically is crucial. Small imperfections can be touched up easily with the same color I originally used. I’ve found it effective to keep a small bottle of the touch-up paint on hand for quick fixes.
During the offseason, I store my pieces in a dry location or cover them with breathable fabric to prevent moisture accumulation. This simple step protects against mold and preserves the look of my work. If I leave them outside, I ensure they are positioned away from elements like heavy rain or direct sunlight to minimize fading and damage.
Every few months, I apply a light coat of exterior-grade sealer. This boosts durability and enhances resistance to UV rays. I focus on areas that receive the most exposure to elements. Following the manufacturer’s instructions allows me to achieve the best results.
Finally, I document any changes or repairs I make. Keeping track helps me maintain consistency in care and ensures that I always have the necessary supplies ready for future maintenance.