Caleb Turner

To seamlessly incorporate a vertical passageway in your upper-level project, consider a spiral design. This type consumes significantly less floor space than traditional models, allowing for more versatile layouts in tighter areas.
Elevating functionality and aesthetics, floating steps present another innovative choice. By attaching the treads directly to a wall, this style not only offers an airy feel but also minimizes the footprint, maintaining an open atmosphere in limited spaces.
Don’t overlook the importance of headroom. Carefully measuring the height and adjusting the pitch ensures compliance with building regulations while providing comfort during ascend and descend. Aim for a height-to-tread ratio that balances safety with usability.
Making use of multi-functional designs is another practical approach. Dual-purpose units, which incorporate storage solutions or seating, maximize utility without compromising style, keeping your project both functional and visually appealing.
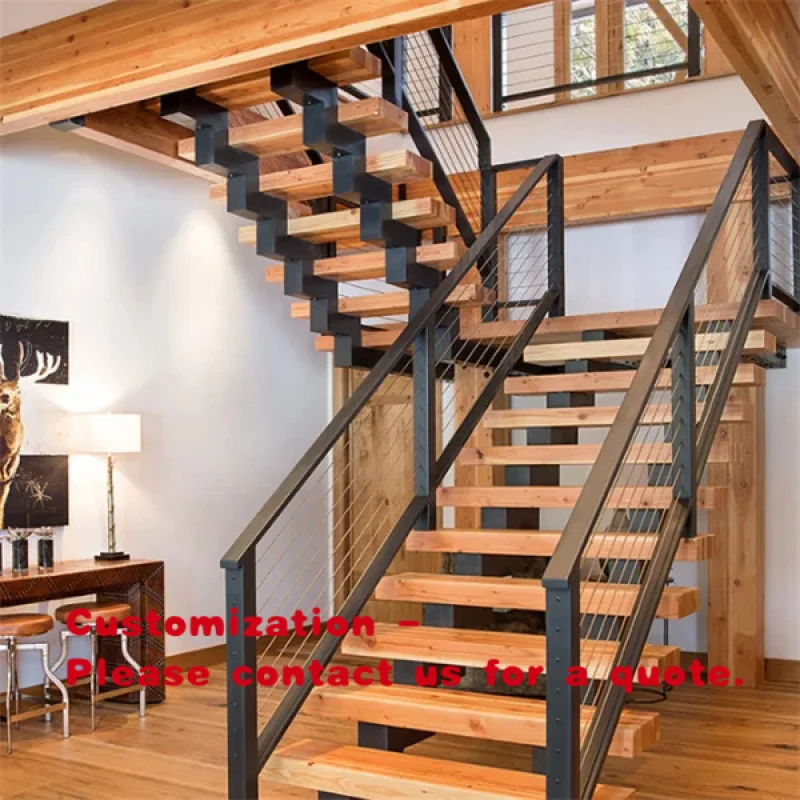


Understanding Building Regulations for Staircases
Familiarizing myself with the building regulations is crucial for ensuring compliance and safety in any vertical structure. Local authorities usually provide guidelines that govern the dimensions and specifications required for effective ascent and descent.
Key Dimensions and Specifications
| Aspect | Requirement |
|---|---|
| Rise of Steps | Maximum height of 220mm |
| Tread Depth | Minimum depth of 220mm |
| Width | Minimum width of 1000mm for narrow access |
| Headroom | Minimum clearance of 2m above |
Following these parameters helps me achieve a structure that meets professional standards while allowing safe passage. Other critical elements such as landings must also adhere to regulations, which often stipulate a minimum size equal to the width of the access route.
Building Control and Permissions
Engaging with the local building control officer early in the process offers me guidance and insights on specific permissions and necessary inspections. In some cases, I may need to submit detailed plans, ensuring that they meet local regulations before commencing construction.
Ignoring these regulations can lead to complications, including the need for costly alterations or even removal of non-compliant elements. Always check with relevant authorities to avoid such issues and guarantee that the design is both functional and adherent to building codes.
Choosing the Right Staircase Design for Your Loft
Selecting an appropriate design requires careful consideration of space, aesthetics, and functionality. A few designs stand out as particularly suitable for upper spaces.
- Spiral Stairs: Ideal for compact areas. Their unique shape can enhance visual appeal while occupying minimal floor space.
- Open Tread: Promotes light flow and makes the area feel larger. These are great for modern interiors.
- Alternative Angled Designs: Provide a stylish solution by allowing for custom angles, which can maximize height and usability.
Materials also play a large role in the design process. Wood offers warmth and can integrate well with various styles, while metal can convey a contemporary look.
Take into account the following:
- Width and Depth: Ensure enough space for comfortable movement.
- Landing Space: Plan for adequate room at the top and bottom for safety.
- Railings: Choose designs that provide safety yet complement the overall aesthetic.
Involve an architect or designer to refine your ideas, ensuring a cohesive look that matches the rest of your property. The right combination of design and materials contributes significantly to the overall feel of the area, enhancing both beauty and utility.
Measuring Space Requirements for Stair Installation
To determine the necessary dimensions for installing a new staircase, I begin by measuring the vertical height from the floor of the lower level to the floor of the upper area. This distance is critical as it dictates the total number of steps needed. Each step typically rises around 7 to 8 inches, so dividing the total height by this figure gives a preliminary count of the steps required.
Next, I assess the width of the opening where the stairway will be placed. Most designs necessitate a minimum width of 36 inches for safety and comfort. If the space is narrower, I may need to consider alternate designs, such as spiral or space-saving models, which can accommodate tighter areas.
Depth is another significant measurement. I measure the total run, which is the horizontal distance from the starting point to the ending point of the staircase. Each tread usually extends about 10 to 11 inches, so this measurement helps in calculating the footprint of the entire structure. Proper planning ensures adequate space for foot traffic and movement.
I also take into account the clearance height above the staircase. There should be a minimum of 6 feet 8 inches of headroom over the center of each step to avoid any obstructions. If there are existing beams or other impediments, adjustments in design may be necessary.
Lastly, I evaluate the surrounding area for any potential obstructions or hazards that might impact usability, such as door swings or furniture placement. This thorough approach guarantees that the installation will be both functional and safe.
Selecting Materials for Stairs in a Loft Conversion
For durability and aesthetics, opt for hardwood, such as oak or maple. These options resist wear and offer a timeless look. If budget constraints exist, engineered wood or laminate can mimic the appearance of solid wood while remaining cost-effective.
Consider the risks of slips and falls; choosing non-slip materials is crucial. Carpet or textured finishes on treads can enhance safety without compromising style. Metal options like steel or aluminum provide a modern edge, particularly suitable for contemporary designs.
Glass panels are ideal for those wanting an airy feel in smaller spaces. They pair well with wooden or metal frameworks but require careful consideration regarding maintenance and safety standards.
Concerning environmental impact, sourcing recycled materials or sustainably harvested wood aligns with eco-friendly choices. This reflects a commitment to both quality and responsibility.
Finally, ensure compatibility of chosen materials with the overall style and function of the area. Cohesion in design enhances the visual appeal and utility of the entire space.
Ensuring Structural Support for Loft Stairs
A robust frame beneath the ascent is paramount. I recommend assessing the floor joists to confirm their ability to bear additional load. If they are undersized or damaged, reinforcement with additional joists or blocking may be necessary.
Key Steps for Structural Evaluation
- Inspect current joist dimensions and spacing: Typically, a 6×2 inch timber joist spaced at 400mm centers is adequate.
- Calculate the weight load: The stairs and any accompanying furniture must be factored into the weight distribution calculations.
- Consult with a structural engineer for verification on load capacity and potential reinforcement strategies.
Reinforcement Options
- Adding LVL or glulam beams for superior support.
- Creating triangular bracing between joists for improved stability.
- Installing a beam under the joists at the point where the stairs land, if necessary.
Regular inspections should be conducted to assure the integrity of the structural framework, especially after completion. Addressing these factors will lead to a safer and more secure ascent to the upper space.
Planning the Location of Stairs in Your Loft
Prioritize placing access points where they will be both functional and convenient. Consider using existing openings, such as hatches, to minimize structural changes and maximize space efficiency.
Select a location that allows for a natural flow between levels. Avoid spots that disrupt the layout of rooms below or lead to awkward transitions. Think about positioning the entry point near regularly used areas for seamless movement.
Analyze the ceiling height to ensure there’s enough clearance for both ascent and descent. I found that measuring the available headroom is crucial, especially at the midpoint of the climb, where I encountered the most obstruction.
Draft a layout plan incorporating nearby furniture and potential obstructions, allowing for clear circulation paths around the installation. I recommend marking the proposed area on the floor to visualize the flow more effectively before making any commitments.
Evaluate the structural integrity of surrounding walls and floors in your design. Consulting a structural engineer can provide insights on load-bearing aspects and ensure that the entire framework supports the new accessway robustly.
If possible, position near a natural light source to enhance the space’s atmosphere. I adjusted my location slightly to take advantage of a window, significantly brightening the stairwell area.
Hiring Professionals vs. DIY Stair Installation
Choosing between hiring a contractor and handling the installation personally can greatly impact the outcome. If precision and compliance with regulations are paramount, enlisting experienced tradespeople ensures adherence to safety standards and regulations.
Many individuals favor the DIY approach to save costs or enjoy the satisfaction of personal craftsmanship. However, it demands substantial knowledge of construction principles, tools, and materials. Mistakes can lead to safety hazards, requiring costly corrections.
For ambitious projects or complex designs, seeking professional assistance often pays off in the long run. Here are some factors to consider:
| Criteria | Hiring Professionals | DIY Installation |
|---|---|---|
| Expertise | Access to specialized knowledge and experience in building codes. | Requires extensive research and potentially limited experience. |
| Time | Typically faster due to contractors’ efficiency and manpower. | Can take longer depending on personal schedules and skill level. |
| Cost | Higher upfront cost but fewer errors and subsequent expenses. | Lower initial investment; potential for unexpected costs from mistakes. |
| Tools and Equipment | Professionals come equipped with necessary tools and resources. | Must acquire or rent specialized tools, adding to costs and logistics. |
| Quality Assurance | Guaranteed quality of workmanship, often backed by warranties. | Quality depends on individual skill and attention to detail. |
Assess your skill level, budget, and timeline carefully. If uncertainty exists regarding structural integrity or regulations, prioritize hiring experts. On the other hand, for those with sufficient expertise and confidence, the DIY route can be rewarding but comes with inherent risks. Plan diligently to make the best choice for your project’s needs.
Finishing Touches: Balustrades and Stair Safety Features
Incorporating balustrades is crucial for enhancing safety in multi-level homes. Ensuring that the height of the railing complies with safety standards is non-negotiable. Most regulations specify a minimum height of 900mm for residential areas. Choose materials that match the overall aesthetic while providing durability; options include wood, glass, or metal.
Non-slip treads are vital for preventing accidents. Adding textured surfaces to each step can significantly reduce the risk of slipping, especially in high-traffic areas. If the design permits, opt for contrasting colors for the steps and risers to improve visibility.
Handrails and Their Importance
Handrails are another critical element for safe navigation between levels. They should be easy to grasp and installed at a height of 900-1000mm from the pitch line of the stair. It’s advisable to extend the handrail beyond the last step to provide support, aiding in safer transitions.
Consider integrating lighting features along the stairway for enhanced visibility at night. This can be achieved through built-in LED lights or strategically placed wall sconces, making travel safer and more comfortable after dark.