
 Caleb Turner

To achieve an appealing vintage vibe, I often begin by applying a base coat of chalky white shade to my item. This specific type of coating provides a perfect surface for subsequent aging techniques.
After the initial layer dries completely, I use a fine-grit sandpaper to gently abrade certain areas. Focus on corners and edges, as these spots naturally wear over time. This process reveals the wood beneath and creates that sought-after contrast that enhances character.
For an added layer of authenticity, I sometimes use a mixture of wax and metallic paint. Applying this with a cloth allows me to enhance the appearance of oxidation in high-relief areas. The combination of colors adds depth, making the piece visually interesting and unique.
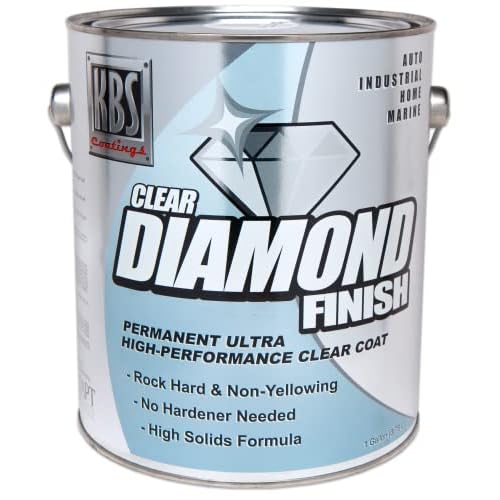
Finally, finishing with a protective clear coat ensures durability while preserving the matte look. This approach results in a beautifully aged aesthetic that tells a story of its own.
Selecting the Right Furniture for Distressing
Choosing suitable pieces is crucial. Focus on items made of solid wood or quality composite materials. These substrates respond better to techniques without chipping or losing integrity.


Look for designs that exhibit lines, curves, and texture. Open-pore finishes, such as oak or pine, are excellent because they enhance the charm during the finishing process.
Consider items with pre-existing wear or imperfections. Dings and scratches offer a head start on achieving that aged appearance, reducing required effort.
Avoid overly modern styles. Classic and vintage-inspired silhouettes enhance the aesthetic outcome, making it easier to incorporate character into your alterations.
Evaluate dimensions. Smaller pieces, like side tables or accent chairs, allow for maneuverability and experimentation. Larger items may present challenges during the treatment process.
Finally, think about the existing decor. Selecting a piece that harmonizes with your environment can solidify the desired ambiance while remaining cohesive with other elements.
Preparing the Surface for Painting
Begin with thorough cleaning. Use a mixture of warm water and mild soap to eliminate dust, grease, or residues. Rinse with clean water and let it dry completely.
Next, inspect for imperfections. Sand any rough spots or scratches with fine-grit sandpaper. This step is vital as it ensures an even application and improves adhesion.
After sanding, wipe down the surface with a damp cloth to remove any dust created during sanding. Allow it to dry again.
For surfaces that may have a glossy finish, consider using a primer specifically designed for such materials. This enhances adhesion of the subsequent layers and provides a better final outcome.
Apply a coat of primer uniformly and allow it to dry as per the manufacturer’s instructions. If necessary, lightly sand the primer for a smoother texture.
Choose a paint type that suits your project, whether chalk paint for a matte finish or acrylic for a glossy appearance. Prep accordingly based on the paint’s requirements.
Lastly, ensure your workspace is well-ventilated, and protect surrounding areas with drop cloths. This preparation phase lays the groundwork for achieving the desired antiqued aesthetic.
Choosing the Ideal White Paint for Your Project
Select a high-quality acrylic latex formula for an enduring finish. This type offers excellent adhesion and durability, essential for achieving authentic character over time. Look for a paint with a satin or eggshell sheen; both finishes can provide a subtle luster while allowing for easier touch-ups later.
Color Variations
Consider selecting a creamy off-white or a brighter shade depending on your desired aesthetic. Off-white hues lend a vintage feel, while brighter tones can evoke a modern vibe. Test samples on a discreet area of the piece to see how the color interacts with your lighting.
Specialty Products
Explore chalk-style formulas designed specifically for rustic finishes. These paints often require minimal prep and can be layered to build texture, enhancing the weathered appearance. Be aware that some may require a sealing coat for added protection against stains and scratches.
Applying the Base Coat Evenly
Use a high-quality brush or foam roller for an even application of the primer. I prefer a synthetic brush for water-based formulas, ensuring a smooth finish without brush strokes. Pour a small amount of primer into a tray, dip the brush, and remove excess paint. Apply in long, even strokes following the grain of the wood to avoid uneven spots.
For larger surfaces, I switch to a foam roller, as it covers more area quickly. Roll it in a ‘W’ pattern initially, then fill in the spaces without lifting the roller to maintain consistency. Allow sufficient drying time according to the manufacturer’s recommendations before moving on to subsequent coats.
If the surface is especially porous, consider applying a thin second coat for better adhesion and coverage. Lightly sand between coats with fine-grit sandpaper to ensure optimal inter-coating adhesion and a flawless appearance. Use a tack cloth to remove any dust particles before proceeding to the next step.
Patience is key; rushing this phase may lead to unsatisfactory results during the distressing process. I typically allow a full day for each coat to dry completely, ensuring that the base is durable and ready for the aging techniques I will employ later.
Creating Distressed Effects with Sandpaper
To achieve a rugged appearance, I use various grits of sandpaper for different effects. Starting with a medium grit, such as 120, I focus on areas that would naturally wear over time: edges, corners, and surfaces that receive frequent contact. A light touch is key; I gently sand these spots to create soft, worn edges while avoiding excessive removal of the base layer.
Techniques for Sanding
It’s important to keep my movements consistent. I often use a circular motion and follow the grain of the wood where possible to preserve the underlying texture. If I want to create a more aggressive distressed look, I switch to a coarser grit, like 80, in specific spots, but I always finish with a finer grit for smoothness. Finalizing with 220 grit ensures the surface feels pleasant to the touch.
| Grit Size | Purpose |
|---|---|
| 80 | Aggressive distressing in targeted areas |
| 120 | General distressing and wear |
| 220 | Finishing and smoothing edges |
After sanding, I wipe down the surface with a damp cloth to remove any dust particles. This step is crucial before applying any finishing touches, allowing the next layers to adhere properly. Experimentation is part of the process; I often try different techniques to discover unique effects that suit my style and preferences.
Using Wax and Stain for Authenticity
To achieve a genuine vintage appearance, applying wax and stain is crucial. I recommend opting for a clear furniture wax after distressing. This provides a protective layer while enhancing the depth of the color. Make sure to work in small sections. Apply a thin layer with a clean cloth, using circular motions to avoid streaks. Let it sit for about 10-15 minutes and then buff it with a soft lint-free cloth for a subtle sheen.
Next, consider using a glaze or stain to accentuate the details of your piece. A brown or gray stain can highlight crevices and add to the aged effect. Use a brush or a cloth to apply it sparingly. Wipe excess off immediately to avoid overpowering the lighter base color. This step creates wonderful contrasts that draw attention to the distressed areas.
Combining Techniques
For an even richer effect, layer the wax over the stained surfaces. This combination not only protects your work but also deepens the color and adds complexity. Remember to let each layer dry thoroughly before applying the next. The interplay between wax and stain creates a multidimensional finish that feels authentic and well-loved.
Maintenance Tips
To maintain the authenticity and longevity of your piece, periodically reapply wax as needed. This keeps the wood nourished and the finish looking fresh. Avoid harsh chemicals during cleaning to preserve the handcrafted look. Instead, a damp cloth will suffice.
Incorporating Optional Techniques like Crackle Finish
To achieve a charming, aged appearance, I recommend using a crackle finish as an additional layer to your project. This technique creates the illusion of natural wear and adds character to the surfaces.
Materials Needed
Gather crackle medium, topcoat paint, a brush, and a spray bottle with water. Ensure the paint used for the topcoat is of high quality to enhance the final effect.
Application Process
First, apply the crackle medium over the base coat after it has thoroughly dried. Follow the manufacturer’s instructions for application; typically, you’ll brush on an even layer. As it dries, the medium will start to crack. Once it’s fully cured, apply the topcoat paint. The thickness of the topcoat will influence the size of the cracks, so experiment to achieve your desired look. A lighter topcoat may create finer cracks, while a thicker application results in larger fissures. Allow this layer to dry completely to reveal the charming, vintage effect.
Sealing the Furniture for Longevity
For optimal durability, I recommend a multi-step sealing process after achieving the desired aesthetics. Begin with a clear finishing product suitable for your surface type. A polyurethane topcoat, whether water- or oil-based, offers robust protection against scratches and spills. Apply at least two coats, allowing adequate drying time between applications to ensure a strong bond.
If the piece will see heavy use, consider a matte or satin finish, which can help mask minor imperfections while still providing a protective layer. When applying the finish, use a high-quality synthetic brush or foam applicator to avoid brush marks.
For an extra layer of defense against moisture and stains, using a wax can enhance both protection and appearance. A soft cloth applied with circular motions makes for an efficient wax application. This approach not only imparts a soft glow but also facilitates easy touch-ups in the future.
After sealing, let the piece cure fully–typically a week–for maximum effectiveness. During this time, avoid placing heavy items or exposing the surface to excessive humidity. This ensures the longevity of the beautifully aged character you’ve created.
Final Touches to Enhance the Distressed Look
To achieve an authentic weathered appearance, consider using a fine-grit sandpaper after the initial distressing process. Lightly abrade areas where natural wear and tear would occur, typically around edges and corners. This method adds depth and realism to the finish.
Adding Character with Accessories
- Incorporate vintage hardware. Replacing modern knobs and hinges with aged metal or antique-style options enhances the aged aesthetic.
- Add a subtle glaze. A diluted glaze in a darker shade can be applied in crevices and carved details to create shadows, amplifying the distressed feel.
- Use stencils. Delicately stenciling on designs or lettering with a darker hue can introduce a unique, personalized touch.
Maintenance for Longevity
Regularly dust and clean using a soft cloth to preserve the finish over time. Avoid using harsh chemicals; instead, opt for mild soap and water to maintain the integrity of the surface.
These enhancements will further articulate the vintage charm, ensuring your project stands out with a captivating and genuine appeal.


