Caleb Turner

Position your sources strategically to enhance texture and form. Use diffused flash or softboxes to wrap around the piece, minimizing harsh shadows and bright spots. Setting up your lighting at an angle can reveal contours, transforming ordinary objects into stunning visual narratives.
Experiment with different color temperatures to evoke specific moods. Warm tones can create a cozy atmosphere, while cooler shades offer a modern feel. Adjust your settings according to the atmosphere you want to convey, and don’t hesitate to tweak the white balance in your post-processing for optimal results.
Utilize natural light whenever possible. Placing your subject near windows during golden hour enriches the scene with soft, flattering illumination. If the sunlight is too direct, consider using sheer curtains to diffuse the light without sacrificing brightness.
Lastly, consider the environment and backdrop. Props can complement the visual story, while clutter can distract from the main subject. A clean, organized space ensures that the attention remains on the piece you are capturing, achieving a polished look that resonates with viewers.


Optimizing Illumination for Interior Shots
Place your subject near a window to utilize natural illumination during the day. Avoid direct sunlight which can lead to harsh shadows. Instead, aim for softer, diffused lighting by shooting during overcast conditions or using sheer curtains to soften the rays.
Artificial Options
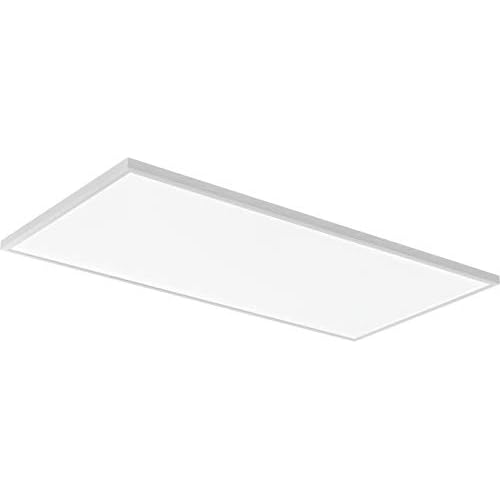
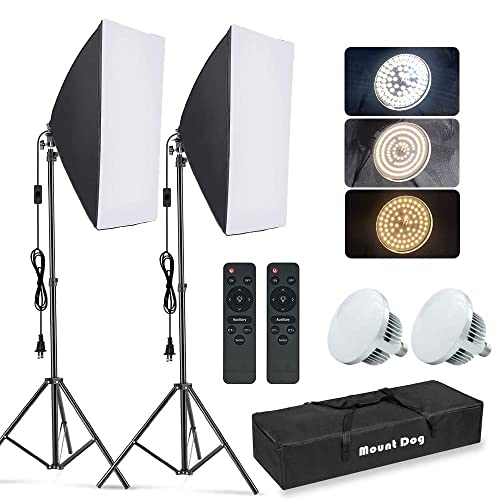
Use several softboxes or LED panels to generate a well-distributed glow. Position these at a 45-degree angle from the subject to achieve a flattering effect, eliminating unappealing shadows.
| Type of Light | Effect on Image | Placement Tips |
|---|---|---|
| Softbox | Softens edges, reduces shadows | Position at 45°; adjust height for balance |
| LED Panel | Even brightness, minimal heat | Place close for softness; away for broader coverage |
| Reflector | Enhances highlights | Opposite main light; angle towards subject |
White Balance Considerations
Adjust settings based on your light source to maintain color accuracy. If mixing natural and artificial sources, custom white balance helps to eliminate color casts. Always check the preview and make adjustments to ensure true representation of textures and colors.
Choosing the Right Lighting Type for Furniture Photography
Opt for continuous or strobe sources based on desired mood. For soft and natural effects, continuous lights allow real-time adjustments.
Utilize LED panels for even illumination and lower heat output. Softboxes attached to these lights help diffuse harsh shadows, ensuring an appealing appearance.
Consider reflectors to direct and soften light, enhancing highlights on textures. These can be placed strategically to fill in shadows or emphasize particular features.
For dramatic effects, experiment with backlighting or sidelighting. This technique creates depth and an engaging ambiance, especially for darker pieces.
Fluorescent tubes offer a unique ambiance, providing a cool tone that may complement modern designs. However, be cautious of color balance; a white balance adjustment may be necessary.
- Continuous options are great for flexibility.
- Strobe lights work well for freezing motion and high-speed captures.
- LEDs are versatile, energy-efficient, and generate minimal heat.
- Reflectors improve light distribution and enhance visual appeal.
- Exploring backlighting can add a creative twist to standard shots.
Pay attention to the color temperature of the sources. Warmer tones evoke coziness, while cooler tones can suggest modernity. The choice significantly impacts the overall aesthetic.
Finally, consider using gels on sources to modify color. This adds a creative layer and allows personalization of each shot.
Natural Light vs. Artificial Light: Pros and Cons
Relying on daylight offers a soft, diffused quality, lending a natural look to the images. Early morning or late afternoon provides the best conditions, minimizing harsh shadows and creating a pleasing glow. However, it’s important to consider that weather changes and time of day can impact consistency, making scheduling tricky.
Artificial illumination offers control and versatility, allowing adjustments in intensity and color temperature. It’s suitable for any time and weather conditions, ensuring steady results throughout the shoot. Nonetheless, some artificial sources can introduce unwelcome color casts, requiring post-processing to correct.
| Lighting Type | Pros | Cons |
|---|---|---|
| Natural Light |
|
|
| Artificial Light |
|
|
Choosing the proper type depends on the desired outcome, resources, and conditions at hand. By understanding the advantages and drawbacks of each, I can make more informed decisions for optimal results.
Best Light Sources for Highlighting Furniture Features
Artificial lighting sources, such as softboxes and LED panels, are ideal for showcasing details. They provide consistent illumination without harsh shadows.
Types of Light Sources
- Softboxes: Offer diffuse light that minimizes harsh reflections and enhances textures.
- LED Panels: Versatile and adjustable; they allow for fine-tuning of brightness and color temperature.
- Ring Lights: Emit uniform light that flatters curves and surfaces, especially useful for smaller pieces.
Natural Lighting Techniques
- Window Light: Position items near large windows to utilize diffused sunlight, enhancing natural colors.
- Reflectors: Use white boards or mirrors to bounce light, minimizing shadows and adding depth.
Combining different sources can create an engaging scene. Experimenting with placements and angles provides unique results and emphasizes the specific attributes of each piece.
Setting Up Your Lighting Position for Optimal Results
Position your light source at a 45-degree angle to the subject. This placement creates a pleasing shadow that adds depth and dimension to the image.
Experiment with varying heights; using a tall stand or a low table can drastically alter the appearance. A higher angle typically softens features, while a lower angle emphasizes details.
- Test distances: Start close to capture softness, then gradually move further away to observe the changes in shadow and highlight.
- Use reflectors to redirect light toward the darker areas, enhancing balance and eliminating excessive shadows without overpowering the scene.
- Consider the backdrop; ensure it complements the arrangement without competing for attention.
Adjust the intensity by dimming or adding diffusion to soften harsh spots. Experiment with different setups during various times of day to find what best showcases the item. Pay attention to the angle of the source relative to both the subject and your camera; a slight adjustment can completely transform the final photograph.
- First, locate the most flattering angle for your object. Use the 45-degree rule as a starting point.
- Next, adjust your setup, noting how each change affects the overall look.
- Finally, capture multiple shots to select the best option during editing.
Varying the light’s color temperature can also impact the mood; warmer tones lend a cozy feel, while cooler tones instill a fresh essence.
Using Reflectors to Enhance Furniture Lighting
I recommend incorporating reflectors to manipulate and bounce light effectively onto your setup. Placing these tools strategically can fill shadows and create a balanced illumination on the pieces. Start by using white or silver reflectors; they provide a clean boost to brightness without altering the color temperature.
Position the reflector opposite your primary light source to redirect the illumination. Adjust the angle of the reflector to control how much light is being bounced, ensuring it highlights the contours and textures of the items. Experiment with materials, such as foam boards or specialized photography reflectors, to find the perfect setup for your scene.
For a softer effect, consider using diffusion materials in conjunction with reflectors. This combination can create a more flattering appearance, enhancing the overall ambiance without harsh glares. Always check your results through the camera to fine-tune the placement and angle for optimum visual appeal.
In addition, using colored reflectors can add creative flair and warmth to the atmosphere. Subtle hues can draw attention to specific features, making your images more captivating. Play around with different colored surfaces, like gold, for a warm glow, or blue for a cooler vibe.
Finally, be mindful of the surroundings. Ensure that the reflectors do not introduce unwanted backgrounds or distractions in the frame. A clean, direct reflection helps maintain focus on the pieces being captured. Regularly assess your results, making adjustments as needed to achieve the best visual outcome.
Controlling Shadows and Highlights in Furniture Photography
To manage shadows and highlights effectively, I prioritize using a combination of diffused and direct sources. Positioning lamps or flashes at angles can create depth without overwhelming brightness. For instance, placing a light slightly above and diagonally in front of the piece allows the contours to be revealed while minimizing harsh shadows.
Utilizing Accessories
Employing softboxes or umbrellas is invaluable. These tools diffuse the intensity, softening shadows and producing a more balanced appearance. Additionally, I often use flags or gobos to block light selectively, thus controlling unwanted highlights and creating more defined shapes.
Camera Settings and Observations
Adjusting the camera’s exposure can help fine-tune shadow and highlight dynamics. Lowering the exposure can preserve details in brighter areas, while increasing it can help in darker zones. I closely examine the histogram during shooting; it guides me in balancing the image without losing critical detail in either the highlight or shadow regions.
Color Temperature and Its Impact on Furniture Imagery
Set your white balance to 5500K for natural daylight simulation. This temperature enhances wood grain and fabric textures, creating realistic representations. Adjusting color temperature influences mood and perception; warmer tones evoke coziness, while cooler tones convey modernity.
Utilize gels on artificial sources to achieve desired temperatures. A CTB gel can adjust to cooler whites, while CTO gels warm up the scene, perfect for highlighting rich colors and details. Consider the psychology behind colors; earthy tones can ground space, while bright, cool options can uplift it.
Always trial with different settings. Reviewing test shots in various temperatures helps identify the best match for the scene’s atmosphere. Using a gray card can assist in achieving accurate white balance in post-processing, ensuring true-to-life portrayal.
Additionally, consider mixed sources–natural and artificial–to balance ambiance and functionality. This technique can create depth, distinguishing materials and finishes effectively. Environmental factors like time of day and weather also play significant roles; cloudy skies can soften light, impacting the outcome positively.
Experimentation is key. Test various setups and angles under different conditions to find the ideal color balance, which enhances fabric textures and overall aesthetics. Ultimately, understanding color temperature will elevate the visual appeal of your subjects in imagery.
Lighting Techniques for Different Furniture Materials
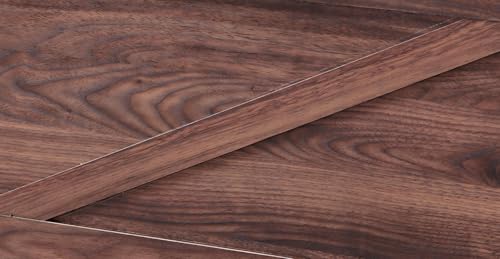
For wooden items, soft diffused sources yield a warm glow that accentuates grain patterns. Position the source at a 45-degree angle to reveal texture without harsh shadows. Use reflectors to bounce light back into darker areas, enhancing the overall appearance.
Metal surfaces require a different approach. Employ a cooler color temperature to balance reflections and avoid unwanted glare. Direct the beams to create highlights that showcase the sleekness, while ensuring not to overexpose the reflective surfaces. Adjust the angle to control the intensity of reflections for a polished look.
Soft goods, such as upholstered pieces, benefit from even and subtle illumination. Use large softboxes or scrims to distribute light across the entirety of the surface. This technique reduces harsh shadows and maintains color fidelity, allowing for accurate depiction of textures and patterns.
For glass elements, balance is critical. Utilize a combination of backlighting and front lighting to showcase transparency and depth. This strategy enhances details and creates interest without allowing the glass to become a distraction. Keep the sources at opposing angles to decrease reflections.
Lastly, for mixed-material designs, combine techniques tailored for each material. It’s key to analyze how each component interacts with different illuminations. Mixing soft and hard light sources will help harmonize finishes and maintain visual cohesion.
Testing and Adjusting Lighting Before the Shoot
I always begin by setting up a test area to evaluate various light sources. It’s essential to experiment with different intensities and angles to see how they affect the overall aesthetic. Using a gray card, I calibrate the exposure settings on my camera to ensure accurate color representation. This step helps in determining the optimal positioning of the light source.
Trial Runs and Adjustments
Before the main session, I conduct trial runs to observe how shadows react with the surfaces of the items being captured. I reposition sources based on these trials, often noting how certain arrangements enhance or diminish texture details. It’s vital to take test shots throughout the adjustment process, enabling me to analyze results and make real-time changes. In some cases, adding diffusion materials can soften harsh illumination without compromising clarity.
Fine-Tuning the Setup
I find that incremental adjustments can lead to significant enhancements. After evaluating the test shots, I tweak angles, heights, and distances as needed. Making these small modifications allows me to control the interplay between highlights and shadows more effectively. This attention to detail ensures that the final images maintain the desired aesthetic and clarity.