
 Caleb Turner
The first step in addressing oil marks is to act quickly. Blot the area gently with a clean, dry cloth to absorb excess liquid without pushing it deeper into the material.
Next, sprinkle a generous amount of baking soda or cornstarch over the affected area. Both powders are absorbent and can draw out the residue from the fabric or leather. Allow it to sit for at least 15 to 30 minutes before brushing it off gently.
If the mark persists, create a mild solution using warm water and dish soap. Dampen a cloth in the mixture and gently rub the area, ensuring not to saturate the surface. Wipe away any excess moisture with a clean, dry towel afterward.
For tougher spots, consider using a specialized fabric cleaner or a mixture of vinegar and water. Apply it with care, then wipe clean with a damp cloth. Always test any solution on a hidden area first to prevent damage.


In some cases, seeking professional cleaning services might be necessary, especially for delicate materials. Regular maintenance can also help prevent future issues with unwanted marks.
Techniques for Tackling Oils on Surfaces
I found that acting quickly can make a significant difference in dealing with unwanted marks. Blot the area gently with a dry, clean cloth to absorb excess liquid without spreading it further.
Applying a Cleaning Solution
To effectively clean the surface, create a mixture of warm water with a few drops of dish soap. Dip a soft cloth into this solution, wring it out, and wipe the affected area. Be careful not to soak the material, as excess moisture could cause damage.
Rinsing and Drying
After using the soap solution, it’s essential to rinse the area with a cloth dampened in plain water to remove any soapy residue. Follow this by drying the surface thoroughly with a clean, dry towel to prevent any unwanted moisture from sitting on the surface.
If the blemish persists, I recommend trying a mild solvent like rubbing alcohol or vinegar on a cotton ball, applying it gently and testing in an inconspicuous area first. This approach has proven successful for me in eliminating stubborn marks.
Identifying the Type of Furniture Material
To tackle any spot on your seating or tables efficiently, first, understand the material composition. Each type responds differently to cleaning techniques and agents.
Common Materials and Their Characteristics
- Wood: Usually treated with a finish that can be either matte or glossy. Test any cleaning solution on an inconspicuous area as untreated wood may absorb liquids easily.
- Leather: This can be genuine or synthetic. Genuine leather requires careful treatment, whereas synthetic options can often withstand stronger products. Look out for cracks or peeling that might indicate it needs special care.
- Fabric: Diverse in types such as cotton, polyester, and blends. Always check the manufacturer’s tags for cleaning recommendations to avoid damage.
- Vinyl: Resistant and easy to maintain, but certain cleaners can break down the finish. Use only mild diluted soaps.
Material-Specific Advice
For wooden surfaces, consider using a mixture of vinegar and water sparingly. Leather might respond well to a soft cloth dampened with alcohol-free wipes, while fabric could require specific upholstery cleaners. Always perform a spot test regardless of the material to prevent any unwanted reactions.
Gathering Necessary Cleaning Supplies
Prepare a few key items before attending to any issue on your upholstery or wooden pieces. I find that having the right tools on hand makes the cleaning process much smoother and more efficient.
Essential Items
Here’s a list of crucial supplies I recommend for tackling the problem:
| Item | Purpose |
|---|---|
| Soft Cloths | To gently blot and absorb the substance without damaging the surface. |
| Paper Towels | Useful for initial absorption and can be discarded after use. |
| Dish Soap | A mild option for breaking down residues without harsh chemicals. |
| White Vinegar | Effective for neutralizing odors and cutting through oily residues. |
| Baking Soda | Great for absorbing lingering odors and providing gentle scrubbing power. |
| Warm Water | For diluting cleaning solutions and rinsing surfaces afterwards. |
| Petroleum Jelly or Olive Oil | To test on inconspicuous areas before using any cleaners; helps assess compatibility. |
Optional Tools
If the task requires a bit more force, consider these additional tools:
- Soft-bristle brush for textured surfaces.
- Spray bottle for even application of solutions.
- Sponge for excess liquid absorption and scrubbing.
Having these supplies prepared will ensure the process goes as smoothly as possible. Each item plays a role in effectively managing the situation while safeguarding your belongings.
Testing Cleaning Solutions on an Inconspicuous Area
Before applying any cleaner directly on a visible surface, it’s crucial to test it on a hidden section. Choose an area such as the back of a leg or a spot under a cushion. Apply a small amount of the cleaning agent using a clean cloth. Leave it for a few minutes to see if any discoloration or damage occurs.
After the waiting period, inspect the test area for any adverse reactions. Look for fading, texture changes, or any adverse reactions to the material. If the test area remains unchanged, proceed carefully with treating the visible spots.
In cases of strong cleaners, consider diluting with water to reduce potential harm. Always follow the manufacturer’s instructions on the label for specific usage recommendations.
If any negative effects appear, discontinue use of that particular solution. Seeking alternatives specifically designed for your material may be necessary for effective cleaning without risking damage.
Applying a Suitable Cleaning Solution for Wood
I recommend using a gentle cleaning solution made specifically for wooden surfaces. A mixture of equal parts white vinegar and water can be effective. This natural option helps break down residues without damaging the wood finish. If preferred, commercially available wood cleaners can also be used; just ensure they are suitable for your specific type of wood.
For enhancing cleaning power, adding a few drops of mild dish soap to the vinegar and water blend can help eliminate stubborn grime. Always dissolve the soap thoroughly before applying it with a soft cloth.
A microfiber cloth works best for application, as it is non-abrasive and minimizes the risk of scratches. It’s important to dampen the cloth with the solution rather than soaking it, as excess moisture can warp or damage the wood. Wipe gently in the direction of the grain to avoid scratches and allow the solution to lift impurities.
If the first pass doesn’t yield desired results, a second application may be necessary. Rinse the cloth with clean water afterward to remove any cleaning agents, ensuring no residue remains on the surface. Finally, buff the area with a dry, soft cloth to restore shine and prevent water spots.
Using Dish Soap for Upholstered Surfaces
I typically opt for mild dish soap as an initial solution for cleaning upholstered items. This approach effectively targets unwanted residues without damaging the fabric. Mix a few drops of dish soap with warm water in a bowl. Avoid using excessive soap to prevent a soapy mess.
Application Process
After preparing the solution, I use a clean, soft cloth or sponge to dab the mixture onto the affected area. It’s crucial to work gently, starting from the outer edges of the mark and moving inward. This technique helps prevent spreading the residue further. I avoid rubbing vigorously, as this can damage the fibers.
Final Steps
After applying the soapy solution, I always blot the area with a separate damp cloth to remove any soap residue. This is important, as leftover soap can attract dirt in the future. Finally, I allow the fabric to air dry thoroughly, ensuring no dampness remains, which could lead to mildew.
Removing Marks from Leather Furniture
To address a mark on leather upholstery, the first step involves using a dry cloth to absorb any surface residue. I recommend gently blotting the area instead of rubbing, as this can prevent spreading and further embedding the substance into the material.
Next, mix a solution of distilled water and mild soap, such as castile soap or a specially formulated leather cleaner. Dampen a clean cloth with this mixture, ensuring it is not overly saturated. Carefully dab the affected area, working in small circles. Avoid soaking the leather, as excess moisture can harm its structure.
If the mark persists, I suggest testing a small amount of white vinegar or rubbing alcohol on an inconspicuous area. Apply it with a cotton ball and observe for any adverse reactions. If the leather shows no discoloration or damage, gently treat the visible mark with the same dabbing technique.
After treatment, use a separate dry cloth to absorb any remaining moisture. Once the area is dry, consider applying a leather conditioner to restore suppleness and prevent future cracking or dryness.
For persistent issues, consulting with a professional cleaner experienced in leather care may yield the best results. They possess specialized products and techniques to treat delicate materials effectively without causing harm.
Dealing with Stubborn Stains on Fabric
For persistent marks on textiles, my approach typically involves a few careful steps.
-
Blot the area with a clean, dry cloth to absorb excess moisture. Avoid rubbing, as it may spread the issue.
-
Create a cleaning mixture using equal parts water and white vinegar. Apply it to the fabric using a spray bottle, ensuring not to soak it.
-
Gently dab with a soft cloth or sponge. Work from the outside towards the center to prevent spreading.
-
Rinse with cold water by blotting the area again with a damp cloth to remove cleaning solution residue.
-
For particularly resilient issues, a mixture of warm water and mild dish soap can be effective.
-
Test any cleaning solution on a discreet area first to ensure colorfastness. If there are no adverse reactions, proceed to treat the visible mark.
-
After the cleaning process, let the fabric air dry. Avoid using heat sources, as they might set any remaining marks.
If the issue persists, consider seeking professional cleaning services that specialize in upholstery. They often have access to advanced products that can address complex challenges.
Drying and Final Touches after Cleaning
To ensure all moisture is eliminated, I place a clean, dry cloth over the treated area. I press lightly to absorb any remaining liquid without damaging the material. For wooden surfaces, I allow natural air circulation to aid drying, avoiding direct sunlight which can cause warping.
For upholstered pieces, I recommend using a fan to accelerate the drying process. It’s crucial to wait until the area is completely dry to prevent mold growth. I often check back periodically, adjusting the cloth as needed.
After ensuring dryness, I assess the finish. If necessary, applying a small amount of polish or conditioner can revive the material’s texture and sheen. For leather, a specialized conditioner works wonders, restoring moisture and protecting against future issues.
For fabrics, I gently brush the area to lift any fibers that might have flattened during the cleaning process. This not only enhances appearance but also maintains texture. If I notice uneven coloration, a fabric-safe dye might be used to refresh the look.
Finally, I inspect the entire piece for any overlooked areas, repeating the cleaning process if required. This meticulous approach guarantees that the surfaces look pristine and are well cared for.
Preventing Future Lube Stains on Furniture
To avert unsightly marks on surfaces, consider utilizing protective covers tailored to your specific pieces. Slipcovers for couches or throws for chairs act as a barrier against accidental spills.
Opt for a silicone-based sealant on wooden surfaces that are frequently exposed. This creates a resilient shield that can withstand accidents, making clean-up easier if something unforeseen occurs.
Regular maintenance is key; dust and clean surfaces with suitable products designed for the material in question. This practice not only enhances appearance but also helps in spotting potential issues before they escalate.
Keep all lubricating substances in a designated area away from delicate items. Use storage solutions that minimize the chance of contact with any furniture.
Educate everyone in your household about safe practices involving such products. This awareness can significantly reduce the likelihood of mishaps.
Lastly, routinely assess your items for wear and tear. Prompt attention to any signs of damage can prevent further complications down the line, ensuring your belongings remain in top-notch condition.
FAQ:
What is the best method to remove lube stains from fabric furniture?
To address lube stains on fabric furniture, first blot the area with a clean cloth to absorb excess lubricant. Then, sprinkle baking soda on the stain and let it sit for about 15 minutes. This will help absorb the stain. After that, gently brush off the baking soda and apply a mixture of warm water and a few drops of dish soap with a soft cloth. Blot the area again until the stain lifts. Rinse with a damp cloth and let it air dry.
Can I use vinegar to remove lube stains from leather furniture?
Yes, vinegar can be used on leather furniture, but it should be done cautiously. Mix equal parts of distilled white vinegar and water. Dampen a soft cloth with this solution and gently dab the lube stain. Avoid saturating the leather, as too much moisture can cause damage. Once cleaned, use a dry cloth to wipe any excess moisture and let the leather air dry. Following this, apply a leather conditioner to restore its shine.
Are there commercial products effective for removing lube stains from furniture?
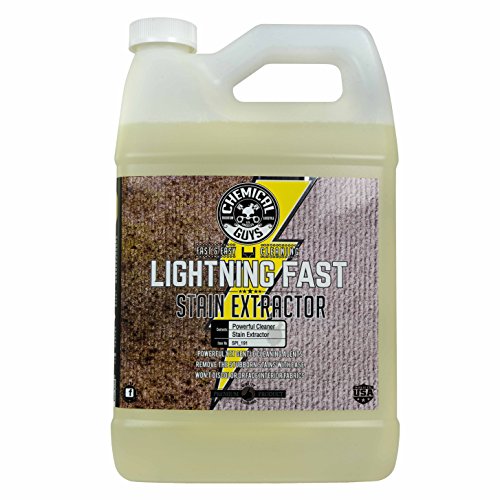
Yes, there are several commercial products designed to tackle grease and oil stains. Look for stain removers specifically formulated for the type of material of your furniture, such as upholstery cleaners for fabric or leather cleaners. Always follow the instructions on the label and test the product on a small, inconspicuous area first to ensure it does not cause discoloration or damage to your furniture.
What precautions should I take before attempting to remove lube stains?
Before attempting to remove lube stains, it is important to identify the type of fabric or material of your furniture. Always test any cleaning solution on a hidden area first to check for adverse reactions. Gather your cleaning supplies, including soft cloths, detergents, and any other substances you plan to use. Ensure proper ventilation in the area where you are cleaning, especially when using commercial products, to avoid inhaling any fumes.
How can I prevent future lube stains on furniture?
To prevent lube stains on furniture, consider using protective covers or throws on areas that are more susceptible to spills. If you’re using products that contain lubricant, take care not to apply too much and handle them over a surface that is easy to clean. Regularly clean your furniture to maintain its condition. Additionally, be mindful of where you place containers that may leak or spill, creating fewer opportunities for stains to occur.
What is the best method to remove lube stains from my leather sofa?
To remove lube stains from a leather sofa, first, gently blot the stain with a clean, dry cloth to absorb any excess lubricant. Avoid rubbing, as this can push the lube deeper into the leather. Next, create a mixture of lukewarm water and a few drops of mild dish soap. Dampen another clean cloth with this solution and gently wipe the stained area. Afterward, use a clean damp cloth to remove any soap residue. Finally, dry the area with a towel and apply a leather conditioner to restore moisture and suppleness to the leather. If the stain persists, considering consulting a professional cleaner who specializes in leather care.


