Caleb Turner

I recommend using a 70% isopropyl solution to address stubborn stains on your plush upholstery. This concentration effectively breaks down oils and grime, ensuring the fabric retains its appearance without damage.
To start, always test the solution in an inconspicuous area. This step is crucial to ensure there’s no adverse reaction that could harm the softness or color of your seating. Apply a small amount of the liquid and wait a few minutes to observe any changes.
For spot treatment, pour a small amount of the solution onto a clean microfiber cloth. Gently dab the stained area, avoiding excessive rubbing which can cause wear. After treatment, use another dry cloth to blot the area, helping to absorb excess moisture and restore texture.
If your upholstery requires a deeper refresh, a gentle scrub with a soft brush after applying the solution can help lift embedded dirt. Allow it to air dry, and then fluff the fabric with a soft brush for the best results.

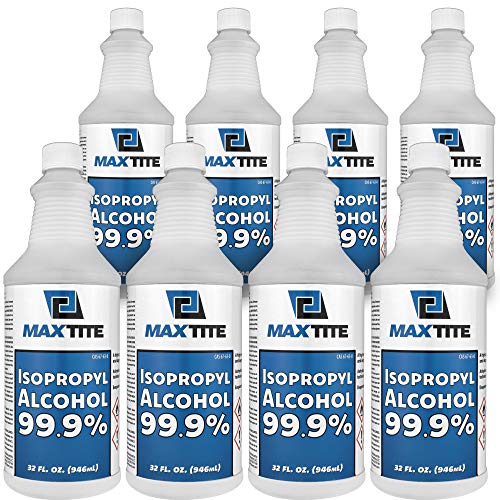

Cleaning Upholstery with Isopropyl Solution
I recommend using isopropyl solution to tackle stains and refresh the texture of your upholstery. First, take a clean spray bottle and fill it with the solvent. Ensure the mixture is at least 70% isopropyl for optimal results. Lightly spritz the affected area from a distance of about six inches to avoid saturating the fabric.
Stain Treatment Technique
<pFor localized marks, dampen a microfiber cloth with the solution. Gently blot the stain instead of rubbing it, as this prevents further embedding into the fibers. Work from the outer edges toward the center. If the stain persists, allow the area to dry and repeat this step.
Refresh Appearance
<p.After addressing spots, use a clean, dry cloth to lightly scrub the upholstery, restoring its soft finish. This method also helps maintain the color and texture. If necessary, repeat the entire process for stubborn areas, ensuring adequate drying time between applications.
Understanding Microfiber and Its Cleaning Needs
Choosing the right cleaning products for this synthetic textile is crucial due to its delicate nature and specific fibers. The material consists of very fine strands that can trap dirt and dust effectively, but improper care can lead to a dull appearance or damage.
Composition and Behavior
The soft texture comes from individual filaments woven tightly together, creating a surface that repels water and resists stains. Unlike traditional fabrics, it doesn’t absorb liquids as easily, making it essential to address spills immediately to minimize potential staining.
Optimal Maintenance Practices
Regular dusting using a microfiber cloth or a vacuum with appropriate attachments keeps surfaces looking fresh. Occasional deep cleaning ensures buildup doesn’t settle into the fibers. Always test any solution in an inconspicuous area, as the colorfastness of this material may vary, necessitating caution with new agents or methods.
Gathering Necessary Cleaning Supplies
First, obtain isopropyl solution, ideally a concentration of 70% for optimal results. This level effectively targets dirt and grime without damaging materials.
Next, select a microfiber cloth. Ensure it’s free of any prior treatments or fabric softeners to avoid unwanted residues during the process.
A soft brush can be beneficial for loosening debris embedded in fibers. Choose one with non-abrasive bristles to prevent scratching surfaces.
Additional Items
Consider having a spray bottle handy for easy application of the solution. This promotes even distribution and minimizes excess moisture on the surface.
Lastly, keep a few old towels or rags to absorb any spills or excess product, maintaining a tidy environment as you proceed.
Preparing the Surface for Cleaning
Ensure the area is free of loose debris and dust. I use a soft brush or a lint roller to remove any particles that could cause scratches during the process. Pay attention to seams and hidden corners where dirt may accumulate.
Next, assess any stains or marks. If I notice particularly stubborn spots, I lightly dampen a soft cloth and gently dab these areas to lift the stain before proceeding. This helps in reducing the effort needed during the main cleaning phase.
Lastly, ensure the environment is well-ventilated. I open windows or turn on a fan to facilitate airflow, which assists in the drying process and reduces any lingering odors from the cleaning agents used.
Creating a Rubbing Alcohol Solution
For optimal results, I create a mixture of 1 part isopropyl alcohol to 1 part distilled water. This combination maintains effectiveness while reducing the concentration of alcohol, making it safer for surfaces.
Ingredients Needed
| Ingredient | Measurement |
|---|---|
| Isopropyl alcohol (70% or higher) | 1 cup |
| Distilled water | 1 cup |
Mixing Instructions
In a clean spray bottle, I combine the measured alcohol and distilled water. Securing the lid tightly, I shake gently to blend the two liquids without creating excessive bubbles. Labeling the bottle helps ensure I know what’s inside and allows for easy identification in the future.
Applying Rubbing Alcohol to Microfiber
For optimal results, I use a spray bottle to apply the solution evenly. This ensures that the fabric absorbs just the right amount without becoming overly saturated.
I start by holding the bottle approximately 6 to 12 inches away from the surface. This distance helps to mist the area rather than soak it, which is critical to maintain the integrity of the fibers.
As I spray, I focus on one small section at a time. This allows me to monitor the effectiveness and see how the material responds. If there are stubborn spots, I apply a bit more pressure directly onto the stain using a clean cloth after the solution has been applied.
Next, I gently rub the treated area with a soft, lint-free cloth. The motion should be circular, encouraging the removal of dirt and grime without damaging the fibers.
To help restore texture, I use a soft brush or my fingers to fluff the area after drying. This step prevents the fabric from looking flat or matted.
Patience is key. I give ample time for the surface to air dry completely before using or covering. This method ensures that the material maintains its look and feel while effectively reducing marks and stains.
After I finish, I often step back and assess the work. Examining the surface before full use reminds me to consistently check the long-term health of my upholstery.
Removing Stains from Microfiber Upholstery
I recommend acting quickly once a mark appears on the surface to enhance the likelihood of complete removal. Here’s a clear process I follow for tackling different types of stains effectively.
Types of Stains and Solutions
- Food and Beverage Spills: Blot the area gently with a cloth to absorb excess liquid. Use a mixture of mild detergent and water, applying lightly with a clean cloth. Rinse with plain water to eliminate soap residue.
- Ink Marks: Dab the stain with rubbing alcohol using a cotton ball. It’s essential to test on an inconspicuous area first. Blot gently until the ink begins to lift.
- Grease Stains: Sprinkle baking soda over the affected area to absorb the oil. Let it sit for 15-30 minutes before brushing it away. If any residue remains, a cloth dampened with soapy water can help.
- Pet Urine: Absorb as much liquid as possible, then use a mixture of white vinegar and water. This remedy neutralizes odors and aids in stain removal.
General Tips for Stain Removal
- Always test any cleaning solution on a hidden spot to check for color fastness.
- Avoid harsh scrubbing, which can damage the fibers. Instead, use a gentle blotting motion.
- After treating a stain, it’s advisable to brush the fibers gently to restore their original texture.
By applying these specific techniques, I’ve consistently achieved successful outcomes in removing difficult marks.
Drying Techniques for Cleaned Microfiber
Immediately after treatment, I recommend using a clean, dry cloth to blot any excess moisture. This technique assists in preventing water spots while absorbing residual liquid.
For quicker drying, I prefer placing the item in a well-ventilated area. Opening windows or utilizing a fan effectively speeds up the process and enhances air circulation, which helps reduce drying time significantly.
Another helpful method is the use of a hairdryer on a cool setting. Maintaining a distance of at least 12 inches from the surface ensures that the heat doesn’t damage the fibers, while still facilitating evaporation.
If I encounter stubborn dampness, I lightly brush the fibers with a soft-bristled brush once they are mostly dry. This action restores texture and prevents stiffness.
Lastly, I recommend allowing the upholstery to air dry completely before any usage to avoid moisture retention, which could lead to mold or mildew growth. Patience here pays off, ensuring the fabric remains fresh and comfortable.
Maintaining Microfiber Furniture Post-Cleaning
To prolong the life and appearance of your upholstery, I recommend regularly brushing the fabric with a soft-bristled brush. This removes dust and debris that can accumulate over time.
Applying a specialized protector after the initial cleaning can safeguard against future stains. These products form a barrier on the surface, preventing spills from penetrating the fibers.
Perform routine spot checks and promptly address any new stains. Quick action minimizes the chances of permanent marks setting in.
Avoid exposing the material to direct sunlight for extended periods, as UV rays can cause fading. Use curtains or blinds to control sunlight exposure.
Lastly, schedule periodic deep cleaning every six months to a year. This encompasses thorough washing and potentially professional services to maintain optimal condition.