
 Caleb Turner

Utilize a simple solution of mild soap and warm water to tackle stubborn stains. Dampen a cloth with the mixture and gently scrub the affected area. Rinse with a clean, damp cloth to remove any soap residue. This method not only rejuvenates the appearance but also preserves the material’s integrity.
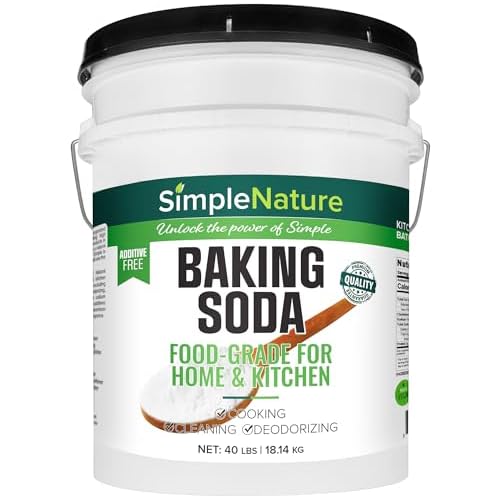
For persistent marks, try a mixture of baking soda and water, forming a paste. Apply it to the stain and let it sit for ten minutes before wiping it away with a damp cloth. The abrasiveness of baking soda effectively lifts stains without damaging the surface.
Maintain the longevity of your seating by applying a specialized conditioner for synthetic surfaces. This acts as a barrier against dirt and grime, while also restoring a pleasant sheen. Regular application helps in keeping the material supple and prevents cracking over time.

To prevent dust accumulation, employ a soft-bristle brush or a microfiber cloth for routine dusting. This simple practice protects the surface while keeping your pieces looking their best, ensuring they remain a cherished part of your space for years to come.
Assessing the Condition of Your Vinyl Seating
Begin by examining for signs of wear, such as cracks, discoloration, or fading. Touch the surface; if it feels sticky or tacky, it indicates deterioration. Look closely for any peeling or bubbling, which can signify moisture damage or age-related breakdown.
Check for Structural Integrity
Gently press on seams and edges to confirm they are intact. Loose seams may require immediate attention to prevent further damage. If the frame is unstable, consider reinforcing it to uphold usability.

Determine Cleaning Needs
Note areas with noticeable stains or soil buildup. This will help in selecting appropriate cleaning agents and techniques. If there are persistent odors, this may indicate deep-set stains or materials beneath the surface that need addressing.
Gathering the Right Cleaning Supplies
Begin with a mild dish soap. This gentle cleanser is versatile and won’t harm surfaces. Combine it with warm water to create a soapy solution.
Next, acquire a microfiber cloth. This type of fabric is non-abrasive, ensuring no scratches while effectively lifting dirt and grime.
Additional Tools
Keep a soft-bristle brush on hand. It’s useful for reaching crevices and corners where dust accumulates. A sponge can also be beneficial for applying solutions without causing damage.
For stubborn stains, consider having a small container of white vinegar. This natural acid works wonders on tough spots without risking discoloration.
Protective Gear
Don gloves to protect your hands from prolonged exposure to cleaning agents. If you are sensitive to odors, a mask may be wise while working in less ventilated areas.
Testing Cleaning Solutions on a Small Area
Before applying a new product to the entire surface, I always test it on an inconspicuous spot. This ensures compatibility and prevents potential damage. Follow these steps to conduct a patch test:
- Choose a hidden area, such as the back or underside of the piece.
- Apply a small amount of the solution using a clean cloth or cotton ball.
- Gently rub the area for a few seconds, examining the response of the material.
- Wait 10-15 minutes to observe any adverse reactions, such as discoloration or warping.
- If no damage occurs, proceed with confidence to clean the visible areas.
Should any negative reaction occur, I recommend rinsing the area with water immediately. This will help mitigate potential harm. Always opt for solutions specifically formulated for synthetic textiles. This approach ensures I maintain the integrity and appearance of my items.
Removing Dust and Debris from the Surface
I first use a soft microfiber cloth to gently wipe the surfaces, ensuring that I am picking up both dust and loose particles without scratching. This type of cloth is particularly effective as it traps debris, preventing it from just redistributing across the area.
Using a Vacuum Cleaner
If the piece is larger or has intricate patterns, I utilize the upholstery attachment on my vacuum cleaner. This allows me to draw out debris from crevices and textured areas that a cloth might miss. I ensure to keep the vacuum on a low setting to avoid any potential damage.
Spotting Hard-to-Reach Areas
For tight corners or seams, a soft-bristled brush or an old toothbrush comes in handy. I lightly go over these areas to dislodge any stubborn dust or dirt. Always remember to be gentle to avoid causing wear on the surface.
Regular maintenance of cleaning the surfaces keeps the materials looking fresh and also extends their lifespan significantly. After removing visible dust and debris, I prepare for the next stage by checking for any stains or marks that might require specific solutions.
Cleaning stains with homemade solutions
For tough marks, I find a mixture of vinegar and water to be highly effective. Combine equal parts of white vinegar and warm water in a spray bottle, apply to the stain, and gently blot with a microfiber cloth. This solution works well for various types of discolorations.
Baking soda can also tackle stubborn spots. Make a paste by mixing baking soda with a small amount of water. Apply it directly to the stain, let it sit for 10-15 minutes, then wipe off with a damp cloth. It’s particularly useful for grease or oil remnants.
For ink or pen marks, rubbing alcohol is my go-to choice. I dab a cotton ball in rubbing alcohol and apply it to the stain. After a few moments, I wipe it away gently. It’s important to avoid scrubbing, as this can damage the surface.
| Stain Type | Homemade Solution | Application Method |
|---|---|---|
| General stains | Vinegar and water | Spray, blot with cloth |
| Grease/oil | Baking soda paste | Apply, wait, wipe |
| Ink/pen marks | Rubbing alcohol | Apply with cotton ball, wipe |
For sticky residues, a mixture of dish soap and warm water can help. I add a few drops of dish soap to warm water, soak a cloth, and gently rub the area. Rinse with a separate damp cloth afterward.
Always ensure to test these mixtures on a small, inconspicuous area first to check for any adverse reactions. Following this approach, I maintain the integrity and appearance of my surfaces while effectively removing stains.
Dealing with tough grime and mildew
To tackle stubborn dirt and mildew, I recommend using a mixture of white vinegar and water in equal parts. This solution effectively breaks down grime without damaging the surface. Apply it to a microfiber cloth and wipe the affected area, allowing it to sit for a few minutes for better penetration.
If mildew persists, I switch to a combination of baking soda and water to create a paste. Gently rub the paste onto the mildew, then rinse with warm water and dry thoroughly. This method not only removes the unwanted growth but also deodorizes the surface.
In more challenging cases, a diluted bleach solution (one part bleach to ten parts water) can be used. However, I ensure proper ventilation and wear gloves while applying it. After a brief application, I rinse well and dry the item to prevent chlorine damage.
Regular maintenance includes checking for moisture buildup, as it can lead to future growth. Staying proactive about cleaning keeps my vinyl surfaces looking fresh and extends their lifespan.
Conditioning and protecting the vinyl after cleaning
Applying a conditioner specifically designed for synthetic surfaces is a vital step after washing. This helps to restore moisture and flexibility, reducing the risk of cracking. Look for products that are silicone-based or specifically labeled for use on similar materials. Apply a small amount to a soft cloth, then evenly distribute it across the surface in circular motions, ensuring no area is missed.
After conditioning, it’s wise to introduce a protective layer. A spray-on protectant can provide an additional defense against stains and fading. Select a product that offers UV protection to combat sun damage and prolong the material’s lifespan. Spray a light coat over the surface, following the manufacturer’s instructions for best results.
Regular maintenance enhances durability. Occasionally wipe the surface with a damp cloth to remove dust and debris, and reapply conditioner every few months to maintain its luster. Store items away from direct sunlight and heat sources, as these can lead to accelerated wear.
Lastly, consider using a microfiber cloth when interacting with the surface. This material is gentle enough to avoid scratches while effectively removing contaminants. Being mindful of how you use and care for the material will help it remain in excellent shape for years.
Maintaining Your Vinyl Furniture for the Long Term
Use a soft microfiber cloth daily to wipe away dust. This prevents buildup, keeping surfaces tidy and extending lifespan.
Apply a specialized conditioner every 6-12 months designed for synthetic surfaces. This helps retain flexibility and prevents cracking.
Protect against direct sunlight. Excessive UV exposure can cause fading. Utilize window treatments or rearrange items to minimize light contact.
Store items away from heat sources, as high temperatures can warp materials. Ensure a stable room temperature to maintain integrity.
For spills or stains, address them immediately to prevent them from setting. Blot gently rather than scrubbing, preserving the surface texture.
Consider using coasters or placemats to protect surfaces from scratches or damage caused by sharp objects or hot dishes.
Inspect for any signs of wear or damage periodically. Catching issues early can save time and money in repairs.
Consider rotating usage if applicable. This prevents uneven wear and keeps various areas in good condition longer.
By following these guidelines, longevity of these surfaces can be significantly improved, ensuring they remain attractive and functional for years to come.


