
 Caleb Turner
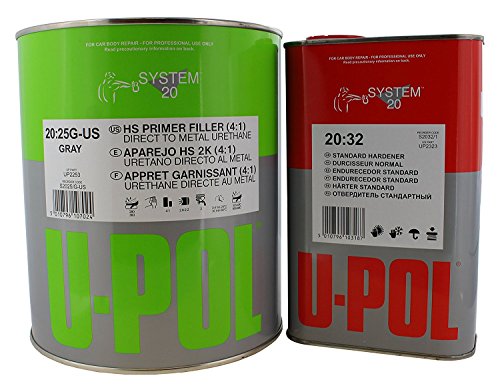
Before diving into this project, gather your materials. Quality primer, appropriate finishing paint, brushes, and sandpaper are key. Opt for a water-based primer designed for slick surfaces to ensure the best adhesion.
Once you have your supplies, begin by preparing the surfaces. A light sanding creates a texture that helps the primer stick, addressing the smooth finish most of these items come with. Wipe down with a damp cloth to remove any dust after sanding.
Apply the primer evenly and allow ample drying time as per the manufacturer’s instructions. Following this, a couple of coats of your chosen color will give a stunning transformation. Always allow each layer to dry completely before applying the next for a seamless finish.
Finally, seal your work with a clear topcoat for durability. This extra step adds protection against everyday wear and keeps your pieces looking refined. Enjoy the enhanced aesthetic of your redesigned storage solutions!


Techniques for Refreshing IKEA Malm Surfaces
Using a primer specifically designed for laminate surfaces is essential. This creates a strong adhesion base, preventing peeling. I recommend selecting a water-based product, as it dries quickly and is less toxic.
Before applying any coating, ensure the surface is free from dust and grease. I usually wipe everything down with a mixture of warm water and mild detergent, followed by a thorough dry with a microfiber cloth.
Choosing the Right Coating
Selecting high-quality acrylic or chalk finishes provides durability and a pleasant texture. My preference leans towards chalk paint for its matte finish and ease of use. It requires minimal prep and adheres well to non-porous surfaces.
Application Method
Using a foam roller allows for smooth and even coverage, especially on larger areas. For edges and intricate details, a synthetic brush works perfectly. I apply in thin, even layers, waiting for each to dry completely before adding the next coat to avoid drips and unevenness.
Finishing Touches
Once I’ve achieved the desired opacity, a topcoat enhances durability. A clear matte sealant protects against scratches and stains while maintaining that refined look. I focus on high-traffic areas to ensure everything remains pristine.
Taking time for this process results in a custom, refreshed piece that integrates seamlessly into my decor. Patience and attention to detail transform everyday items into unique, stylish additions.
Choosing the Right Paint for IKEA Malm
Select a high-quality acrylic or latex-based coating, as these offer excellent adhesion and durability on laminate surfaces. Avoid oil-based products, which can lead to peeling and are harder to clean.
Finish Types
Opt for a satin or semi-gloss finish to achieve a smooth look while ensuring easy maintenance and resistance to scuffs. Matte finishes may show fingerprints and wear more quickly.
Color Selection
Consider using samples to test colors in the intended environment, as lighting significantly affects how shades appear. Light colors can enhance a small space, while deeper tones add richness and drama.
Preparing the Surface for Painting
Begin by cleaning the entire area to remove dust and grime. I use a microfiber cloth soaked in a gentle cleaning solution to ensure a smooth base for the application.
Next, inspect for any scratches or dents. For minor imperfections, a fine-grit sandpaper works well to smooth the surface. If deeper damage exists, I apply a filler suitable for the material, letting it cure completely before proceeding.
Once the repairs are done, I lightly sand the entire surface again. This step promotes adhesion by creating a slightly rough texture. After sanding, wipe away the dust with a damp cloth to avoid contamination.
I always recommend using a primer designed for the specific surface type I am working with. Applying a coat of primer enhances durability and ensures the final finish looks uniform. Wait for the primer to dry thoroughly before moving on.
Applying Primer: Why and How
The use of primer is a crucial step before applying any finish to your piece. It enhances adhesion and prevents peeling or chipping, ensuring longevity and a smoother surface. Here’s how I approached this step.
Benefits of Primer
- Improved Adhesion: A suitable primer helps create a strong bond between the surface and the subsequent layers.
- Hides Imperfections: It fills minor flaws, making imperfections less visible in the final look.
- Seals the Surface: It protects materials from stains and moisture, improving overall durability.
Applying the Primer
- Choose the Right Primer: Opt for a water-based, high-quality primer formulated for the material of your piece.
- Clean the Surface: Ensure the area is free of dust and grease for optimal adhesion.
- Use a Brush or Roller: Select a method that suits the design; a foam roller can provide a smooth finish, while a brush is great for detailed areas.
- Apply Evenly: A thin, uniform layer prevents drips and uneven texture. Allow it to dry as per the manufacturer’s instructions.
- Inspect the Surface: After drying, check for any rough spots. Lightly sand with fine-grit paper if necessary.
- Clean Up: Wash brushes or rollers immediately to prolong their life.
Following this process set a solid foundation for the final coat, significantly enhancing the final appearance and durability of the applied finish.
Selecting the Best Painting Technique
To achieve a flawless finish, I opt for spray painting or using a quality foam roller. Spray painting provides an even coat and reaches intricate corners effectively, while a foam roller minimizes brush marks and works well on flat surfaces.
Tools and Techniques
For the spray method, I use a well-ventilated area and employ a mask to avoid inhaling fumes. Holding the spray can about 6–12 inches away ensures an even distribution. When using the roller, I roll in one direction to enhance consistency.
| Technique | Advantages | Considerations |
|---|---|---|
| Spray Painting | Even coverage, reaches tight spaces | Requires proper ventilation, overspray can occur |
| Foam Roller | Minimizes brush strokes, great for flat areas | May require more paint for a uniform coat |
Final Touches
After applying the chosen method, I inspect the surface for any imperfections. If necessary, a light sanding between coats enhances adhesion and smoothness. This attention to detail guarantees a professional outcome that lasts.
Finishing Touches: Sealing and Protection
To ensure longevity and durability of your customized surfaces, applying a sealer is critical. Consider using a clear polyurethane coating or a water-based topcoat for optimal results.
- Choose the right product: Select a polyurethane that suits your desired finish, whether gloss, satin, or matte. Water-based options dry quickly and are low in odor.
- Application method: Use a high-quality synthetic brush or a foam applicator to achieve a smooth finish. Avoid using rollers as they may introduce bubbles.
- Two or more coats: For maximum protection, apply at least two coats of sealer, allowing sufficient drying time between applications. Follow the manufacturer’s instructions regarding drying times.
- Light sanding: Between coats, lightly sand the surface with fine-grit sandpaper to enhance adhesion of subsequent layers and create a uniform texture.
Allow the final coat ample curing time before heavy use to prevent scratches and damage. Store items carefully to avoid unnecessary wear on your newly treated surfaces.
Regular maintenance includes cleaning with a damp cloth and avoiding abrasive cleaners to preserve the finish.
Maintenance Tips for Painted Malm Furniture
To keep your transformed items looking fresh, regularly clean surfaces with a damp cloth and mild soap. Avoid abrasive cleaners that might scratch the finish.
Once a month, inspect for any signs of wear or damage, focusing on edges and corners where chips may occur. Touch up those areas promptly to prevent further deterioration.
For surfaces exposed to frequent use, consider applying a furniture polish containing silicone, which can provide an additional layer of protection. Ensure it’s compatible with the new finish you applied.
If your pieces are used in areas with high humidity, a dehumidifier can help prevent moisture-related issues, like paint peeling or bubbling.
To safeguard against scratches, use coasters and pads under decorative items or electronics. This simple measure can greatly prolong the lifespan of your refinished pieces.
In case of heavy staining, I recommend performing spot cleaning with a soft cloth and a mixture of water and vinegar. Test this solution on a small, inconspicuous area first to ensure it won’t cause any discoloration.
Finally, to maintain color vibrancy, keep your furnishings out of direct sunlight for prolonged periods. Use window treatments to filter light effectively.


