
 Caleb Turner
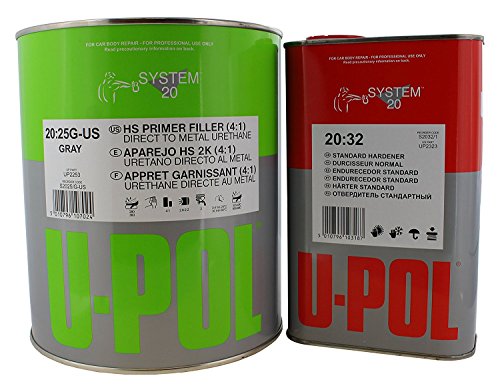
I recommend gathering a few key supplies before starting the transformation of any synthetic timber piece. Ensure you have high-quality sandpaper, a reliable primer, and the right paint or stain that fits the style you desire. These materials are crucial for achieving a polished and professional appearance.
Begin by thoroughly cleaning the surface to remove dust and grime. This step will significantly enhance adhesion and ensure a smooth finish. After cleaning, gently sand the surface to remove any gloss and create a texture for better paint adherence. Use fine-grit sandpaper for this process to avoid damaging the underlying material.
Applying a suitable primer is next on the agenda. This step is significant as it helps to seal the surface and creates a foundation for the paint or stain that will follow. Choose a primer designed for synthetic materials to ensure compatibility and longevity of the finish.
Allow the primer to dry completely before moving on to the color application. Selecting the right hue can dramatically change the aesthetics of your piece. Whether opting for a bold shade or a classic tone, multiple thin layers tend to yield the best results. Allow adequate drying time between each coat to avoid peeling or bubbling.


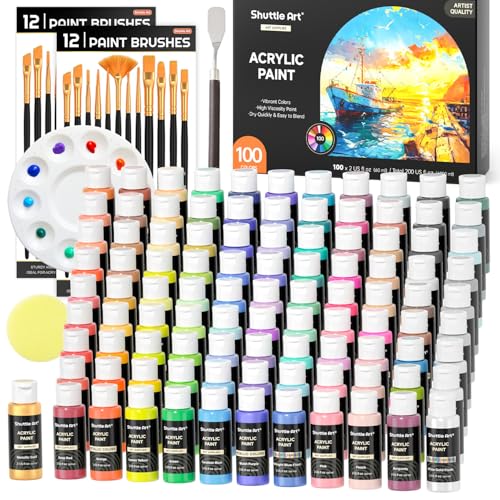

For added durability, consider sealing the finish with a topcoat. This final step can protect against scratches and wear, extending the life of your revitalized item. Following these tailored steps will breathe new life into any synthetic timber piece you choose to update.
Refurbishing Replicated Timber Surfaces
I recommend starting with a thorough cleaning of the surface using a mixture of mild soap and warm water. This will remove any dirt and grime accumulated over time, giving you a clean slate to work with.
Required Materials
- Soft cloths or sponges
- Fine-grit sandpaper (220-grit)
- Primer suitable for synthetic surfaces
- Quality paint or stain
- Clear sealer or topcoat
Process Steps
- After cleaning, allow the surface to dry completely before proceeding.
- Lightly sand the surface using fine-grit sandpaper to create a better adhesion for the primer. Be gentle to avoid damaging the finish.
- Apply a coat of primer specifically designed for synthetic materials. This step ensures that any subsequent paint or stain adheres properly.
- Once the primer has dried according to the manufacturer’s instructions, apply your chosen color or finish. Use a high-quality brush or roller for an even application.
- After the paint or stain has dried, finish with a clear sealer to protect the surface and give it a polished look.
Patience is key during the drying process between each step. Ensure proper ventilation when working with paints and sealers for a safe experience.
Choosing the Right Products for Faux Wood
Begin with a high-quality primer specifically designed for laminate surfaces. This will ensure proper adhesion and a smooth application of subsequent layers. I recommend looking for products like Zinsser B-I-N or KILZ Adhesion, which are great for preparing the surface before painting.
Paint Selection
Choose a durable, water-based paint that is ideal for non-porous materials. Brands such as Behr Premium or Benjamin Moore offer excellent options. Make sure the finish is satin or semi-gloss for added protection and a more aesthetic appearance.
Finishing Touches
For sealing, opt for a clear polycrylic or polyurethane that is compatible with your chosen paint. Products like Minwax Polycrylic or Varathane provide a strong finish while maintaining clarity and color. Apply multiple thin coats for optimal durability and appearance.
Preparing the Surface Before Refinishing
Cleaning is crucial. I use a mixture of warm water and a mild detergent to wipe down surfaces thoroughly, removing dirt and grease that can interfere with adhesion. A microfiber cloth works best for this task. Rinse with clean water and allow ample time for drying.
Next, I inspect for imperfections like scratches or dents. For any damage, I apply wood filler to repair the surface, ensuring it’s smooth and even once dried. I sand down filled areas with fine-grit sandpaper to create a seamless finish.
After sanding, dust can accumulate, so I vacuum the area and wipe surfaces with a tack cloth to capture any remaining particles. This step is vital, as dust can affect the final appearance when applying new finishes.
If the previous coating is glossy, I lightly scuff the surface with medium-grit sandpaper to promote better adhesion of the new layer. It’s important not to sand too aggressively; I aim just to dull the shine without compromising the underlying material.
Finally, I ensure the workspace is well-ventilated. Proper airflow reduces the potential buildup of fumes from any coatings applied, making for a safer environment during this process.
Techniques for Sanding Faux Wood Safely
To effectively sand surfaces resembling lumber without damaging them, I recommend using a light touch with fine-grit sandpaper (220 grit or higher). Begin by testing a small, inconspicuous area to assess the reaction of the material. This initial step prevents any irreversible damage.
Choosing the Right Tools
Opt for sanding blocks or a palm sander to ensure even pressure. Manual sanding allows for greater control, especially on intricate details. Keep the sanding pad flat against the surface to avoid creating low spots or uneven textures.
Safety Precautions
Always wear a dust mask and safety goggles to protect against dust inhalation and debris. Ensure adequate ventilation in the workspace. If using power tools, maintain a steady hand and avoid pressing too hard to reduce the risk of overheating and damaging the finish.
| Tool | Use | Recommendation |
|---|---|---|
| Sanding Block | Manual control | Use for detailed areas |
| Palm Sander | Even finish | Light pressure only |
| Fine-grit Sandpaper | Finishing touch | 220 grit or higher |
After sanding, it’s crucial to clean the surface thoroughly to remove all dust particles before proceeding with any treatments. A vacuum or a damp cloth works well to achieve a clean slate for the next steps in your project.
Selecting Paints and Stains Suitable for Faux Wood
For transforming synthetic surfaces, selecting the right paints and stains is crucial. I recommend using acrylic paints for their flexibility and fast drying times, ensuring they adhere well to the substrate.
Types of Paints
- Acrylic Paint: Water-based, low odor, and provides a durable finish. Ideal for indoor pieces.
- Chalk Paint: Creates a matte, vintage appearance. Use a sealer to enhance durability.
- Oil-Based Paint: Offers a glossy finish and excellent adhesion. Requires more drying time and solvents for clean-up.
Staining Options
- Water-Based Stains: These dry quickly and are easy to clean up. They can provide a variety of finishes.
- Gel Stains: Perfect for even application on synthetic surfaces. Less tendency to run, offering better control.
- Oil-Based Stains: Create a deep, rich color. However, they take longer to dry and require solvents for clean-up.
Always test a small area before applying the selected product to ensure compatibility with the surface and desired effect. Pay attention to the finish type as some products may highlight imperfections in the surface.
When matching color, consider both the undertone of the material and the existing environment where the piece will be placed. A good mix of paints and stains can breathe new life into synthetic surfaces.
Applying Primer and Base Coats Correctly
I apply a high-quality primer designed for non-porous surfaces to ensure good adhesion. I choose a water-based formula for easy cleanup and less odor. With a smooth brush or roller, I apply an even coat, making sure to cover all nooks and crannies. I avoid overloading the brush to prevent drips and runs.
I let the primer dry completely according to the manufacturer’s guidelines, typically around 1-2 hours. Once dry, I lightly sand the surface with fine-grit sandpaper to improve the bonding between layers. After sanding, I clean the surface with a damp cloth to remove any dust before moving on to the base coat.
For the base coat, I select an acrylic or latex paint known for durability. Using the same brush or roller, I apply a thin layer, ensuring all areas are uniformly covered. I recommend multiple thin coats rather than one thick coat to avoid bubbling or peeling. I typically let each coat dry for about 4 hours before applying the next, allowing sufficient curing time.
If I plan to use a stain over the paint, I wait until the paint is fully cured, usually 72 hours, to prevent any reactions. This ensures a smooth application and helps achieve the desired final look.
Finishing Touches: Sealants and Topcoats Options
For a durable finish, I prefer using polyurethane sealants. It provides excellent protection against scratches and wear, perfect for surfaces that will see regular use. Water-based polyurethane is my go-to because it dries quickly and allows for easy clean-up. If you want a glossy finish, consider an oil-based version, but be mindful of longer drying times and stronger odors.
Choosing the Right Topcoat
When selecting a topcoat, I recommend considering the final appearance desired. Satin finishes offer a soft sheen that’s less likely to show imperfections, while a semi-gloss finish enhances color depth and durability. Additionally, matte finishes provide a modern look, though they might require more frequent touch-ups due to their tendency to show wear.
Application Techniques for Sealants
Using a high-quality synthetic brush ensures smooth application, while foam applicators can help achieve a flawless finish. For best results, I lightly sand between coats to promote adhesion and improve the overall finish. Be sure to follow the manufacturer’s instructions regarding drying times and application methods to prevent issues with bubbling or streaking.
Maintaining Your Newly Finished Faux Wood Furniture
Regular cleaning is vital. I use a soft microfiber cloth slightly dampened with water to wipe down surfaces. For tougher stains, a mild soap solution can be applied, but I ensure it’s rinsed well to avoid residue.
Preventing Damage
I always place coasters under beverages and use pads under decorative items to prevent scratches. For hot items, a trivet or mat is essential to avoid heat marks.
Periodic Touch-Ups
Inspecting the finish regularly helps me identify any areas needing attention. If I spot dull spots or abrasions, a quick reapplication of a compatible sealant refreshes the appearance. I schedule these inspections every few months to keep my pieces looking their best.
FAQ:
What materials do I need for refinishing faux wood furniture?
To refinish faux wood furniture, you’ll typically need the following materials: a soft cloth or sponge for cleaning, a gentle wood cleaner or a solution of mild soap and water, fine-grit sandpaper for smoothing the surface, primer suitable for faux wood, paint or stain designed for plastic or laminate surfaces, and a clear coat for protection. Depending on the desired finish, you might also want brushes or rollers for application and painter’s tape to protect areas that shouldn’t be painted.
How can I tell if my faux wood furniture needs refinishing?
Signs that your faux wood furniture may need refinishing include visible scratches, chips, or peeling in the finish. You might also notice a faded appearance or discoloration that detracts from its original look. If the surface feels rough or sticky, or if it’s difficult to clean due to built-up grime, these are signals that refinishing could enhance its aesthetic and functionality. A thorough inspection of the furniture can help determine if a revitalizing coat is necessary.
Can I use regular wood stain on faux wood surfaces?
No, regular wood stain is not recommended for faux wood surfaces. Faux wood commonly consists of materials like laminate or plastic, which do not absorb stains in the same way natural wood does. Instead, look for paints or stains specifically formulated for use on laminate or synthetic surfaces. These products are designed to adhere properly and provide a lasting finish that mimics the look of stained wood without peeling or chipping.
What steps are involved in the refinishing process for faux wood furniture?
The refinishing process for faux wood furniture involves several key steps. First, clean the surface thoroughly with a soft cloth and a mild cleaner to remove any dirt and grime. Next, lightly sand the surface with fine-grit sandpaper to smooth imperfections. After sanding, wipe away any dust and apply a bonding primer specifically made for faux wood. Once the primer dries, you can apply your chosen paint or stain in thin, even coats. After achieving the desired color or finish, seal the project with a protective clear coat to ensure durability. This process can reinvigorate the appearance of your furniture.
How long does it take to refinish faux wood furniture?
The total time to refinish faux wood furniture can vary based on the size of the piece and the specific steps involved. Generally, the cleaning and sanding can take a couple of hours, while applying primer, paint, and clear coat may require additional time for drying between coats, which can range from 30 minutes to several hours depending on the products used. Overall, you should expect the entire refinishing process to take anywhere from a few hours to a full day if you account for multiple drying times and necessary coats. Planning ahead will ensure a smoother experience.
What materials do I need to refinish faux wood furniture?
To refinish faux wood furniture, you will need several materials to ensure a smooth process. First, gather paint stripper or a good quality all-purpose cleaner for prep. You’ll also require sandpaper or a sanding sponge to smooth out the surface. A primer suited for plastic or laminate surfaces is necessary, and then choose a suitable paint or wood finish according to your desired look. Don’t forget to have clean rags on hand for wiping down surfaces, and use a sealant, like polyurethane, to protect your work once completed. Additionally, safety gear such as gloves and a mask is recommended to protect yourself from fumes and dust.


