
 Caleb Turner

Before you begin, ensure the surface is clean and dry. Thoroughly sand any existing finish to promote adhesion and remove imperfections. A smooth base will yield better results, so dedicate time to this crucial step.
Choose a high-quality alkyd product suitable for your desired finish, considering factors like sheen level and drying time. If working in a poorly ventilated area, opt for low-odor formulas to maintain comfort and safety during the process.
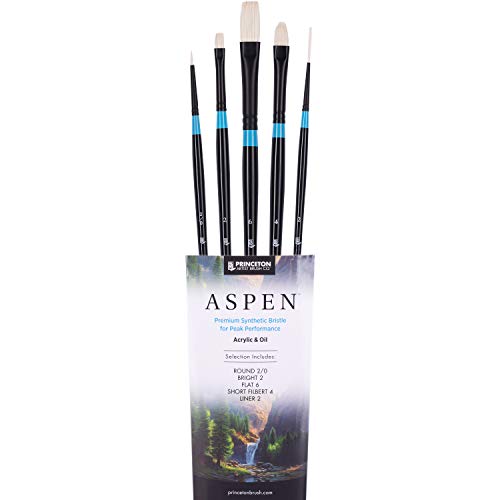
Utilize a brush or roller designed for oil-based mediums, as they help achieve a more even application. Apply a thin coat using long, even strokes, and avoid over-brushing, which can lead to an uneven surface. Let the first layer dry completely as per the manufacturer’s guidelines before applying additional coats.


To enhance durability, consider incorporating a protective topcoat once the color is set. This adds longevity and improves resistance to scratches and stains. Regular maintenance will keep the finish looking new, ensuring your items stand out for years to come.
Techniques for Achieving a Flawless Finish
Employing a high-quality brush is imperative for smooth application. I prefer a natural bristle variety for larger surfaces, as it effectively holds the medium and provides even distribution. For intricate areas, a smaller synthetic brush allows for precision without leaving streaks.
Thorough surface preparation cannot be overstated. I sand my piece to create a slightly rough texture, ensuring the layer adheres well. After sanding, I clean the surface meticulously to eliminate any dust or debris that could compromise the finish.
Applying in thin, even layers is my go-to approach. This technique minimizes the risk of drips and allows for optimal drying time. I wait for each coat to cure completely before moving to the next–this is crucial for longevity and durability. One coat can often suffices, but two or three may be necessary for complete coverage, depending on the color and existing finish.
Utilize a high-quality thinner if adjustments are needed for viscosity. I usually add a small amount to enhance flow without compromising the integrity of the product.
When it comes to drying and curing, I find a controlled environment vastly improves results. A temperature of around 70°F and moderate humidity levels help speed up the process while preventing issues like tackiness or dust contamination.
Once fully cured, applying a clear protective seal can add an extra layer of durability. I tend to choose a matte or satin finish, depending on the desired look, to ensure longevity and ease of cleaning.
Choosing the Right Oil Based Paint for Your Project
Select a high-quality formula to ensure durability and a smooth finish. Look for products specifically designed for surfaces similar to your items, whether it’s cabinetry or decorative pieces.
Examine the color palette available. Different brands often offer distinctive shades and sheens. Consider samples to see how they look under various lighting conditions to avoid disappointment.
Evaluate drying times. Some formulations dry faster than others, which can impact your timeline. Ensure adequate ventilation during the drying phase to facilitate an optimal cure.
Assess the environmental impact. Some mixtures include more volatile organic compounds (VOCs). If indoor air quality is a concern, opt for low-VOC versions to minimize health risks.
Pay attention to the manufacturer’s recommendations for application tools. Some compositions work better with specific brushes or rollers, enabling easier application and minimizing brush strokes.
Check out the gloss level options. Higher gloss levels may enhance durability but can also reveal imperfections more easily. Choose a sheen that balances aesthetics and functionality according to your specific needs.
Don’t forget to factor in the project scope. For larger undertakings, purchasing in bulk might save costs while ensuring color uniformity. Make sure to store any excess properly for future touch-ups.
Preparing Your Furniture for Painting: Cleaning and Sanding
Thoroughly clean the surface before applying color. Use a degreaser or a mixture of warm water and mild soap. A sponge or cloth can effectively remove dirt and grime. Make sure to dry the surface completely to prevent moisture from interfering with adhesion.
Sanding is a critical step to ensure smooth application. Follow these steps:
- Choose the right grit sandpaper; start with 120-grit to remove old finishes and then progress to 220-grit for a smoother surface.
- Sand along the grain to avoid scratching the surface. Pay special attention to corners and edges where buildup might occur.
- Use a sanding block or electric sander for larger areas to maintain even pressure.
- After sanding, remove all dust using a tack cloth or vacuum cleaner to prepare for the next stage.
Ensure the environment is suitable. Working in a well-ventilated area is crucial to avoid inhaling fumes and to facilitate drying. Protect surrounding surfaces to prevent accidental splashes.
Taking the time to clean and sand properly will enhance adhesion and lead to a professional-looking finish.
Applying Primer for Oil Based Coating: When and Why
Using a primer is vital for achieving a lasting finish. A well-chosen product enhances adhesion and creates a uniform surface, minimizing complications later on.
- Adhesion Boost: Primer helps the subsequent layers adhere better, reducing the chance of peeling or chipping.
- Surface Uniformity: It can bridge small imperfections, resulting in a smoother final appearance.
- Stain Blocking: Some surfaces may have stains or knots that bleed through the final layer. A primer can prevent this issue.
- Color Enhancement: White or light-toned primers work well to ensure true color reflection of the topcoat, preventing discoloration.
- Material Compatibility: Different surfaces, like wood, metal, or laminate, benefit from specific primers designed for them. Choosing the correct type ensures optimal results.
Applying a primer is crucial if the original finish is glossy or if the surface has been painted previously. Sanding may not always be sufficient to prepare the surface, hence the need for a primer to facilitate better bonding.
Opt for an oil-based primer when the intention is to use similar finishes – it provides excellent durability and is particularly effective on wood and metals. When selecting a primer, check for labels that indicate compatibility with oil-based solutions to avoid issues down the road.
In summary, I find a primer not just an additional step, but a necessary action ensuring my work withstands time and usage.
Techniques for Applying Oil Based Paint Evenly
For a smooth, even finish, I recommend utilizing a high-quality synthetic brush or a foam applicator. A synthetic brush ensures minimal brush strokes, while foam applicators help in achieving a smooth layer without bubbles.
Layering and Drying Time
Applying thin layers is crucial. I always let each coat dry fully before adding another. This prevents the finish from sagging or running, leading to a more polished appearance. Depending on humidity and temperature, drying may vary; typically, I wait 24 hours between coats.
Consistent Technique
Consistent application is key. I use long, even strokes, maintaining a wet edge to avoid lap marks. This technique helps blend the paint seamlessly. Additionally, I often work in sections, completing one area before moving to the next.
Drying and Curing Time for Oil Based Paint: What to Expect
I recommend monitoring the initial drying time, which typically spans 6 to 8 hours. However, this can vary based on humidity and temperature levels in your workspace.
After application, it’s essential to let the surface dry thoroughly before adding a second coat. Waiting 24 hours between coats enhances adherence and results in a smooth finish.
Curing is a separate process and takes significantly longer. Expect full hardness to develop over 2 to 4 weeks. During this time, the surface reaches maximum durability and resilience against wear and tear.
Avoid heavy use or placing objects on the surface until it has fully cured. This will prevent indentations or scratches that could compromise the final look.
Utilizing fans or dehumidifiers can accelerate drying and curing in humid conditions, ensuring optimal results. Always prioritize ventilation to facilitate odor dispersal and drying efficiency.
Perform a touch test after the initial drying period: if it feels tacky, additional time is needed. Patience is key to achieving the desired effect.
Maintaining Your Painted Furniture: Tips for Longevity
Regular cleaning should be your first line of defense. A soft, damp cloth is ideal for removing dust and grime. Avoid harsh chemicals, as they can damage the surface finish and lead to premature wear.
Repairing Minor Damage
Scratches and scuffs can happen. For minor blemishes, I recommend using a furniture touch-up marker or wax crayon in a matching color. Gently apply it to the affected area, then buff it out with a soft cloth to blend.
Preventing Wear
Using coasters, placemats, or tablecloths can protect against heat and moisture. Additionally, placing felt pads under objects can greatly reduce the risk of scratches. Keep items off surfaces for long periods to avoid uneven wear over time.
| Maintenance Task | Frequency |
|---|---|
| Dusting | Weekly |
| Deep Cleaning | Monthly |
| Checking for Damage | Quarterly |
| Reapplication of Wax or Finish | Annually |
Lastly, avoid direct sunlight exposure to prevent fading. Consider repositioning your items or using curtains to block harsh rays. Following these steps will help keep your surfaces looking great for years to come.


