 Caleb Turner

To revitalize outdated pieces, select a high-quality primer designed for your material–wood, metal, or fabric. Apply the primer evenly to ensure proper adhesion and an even finish. Allow it to dry completely before moving on to the main color application.
Choosing the right hue is crucial. Sample paints directly on your items and observe them under different lighting conditions to select a tone that complements your existing decor. For durability, opt for a finish that enhances longevity, such as satin or semi-gloss, especially for items frequently used.
Technique matters. Use a foam roller for larger surfaces to achieve smooth application, while a brush can help you maneuver into intricate details. Multiple thin coats outperform one thick layer, enabling a consistent look without drips or uneven spots. Sand lightly between coats to further improve adhesion and texture.


Lastly, proper curing time is essential. Allow your restyled items adequate time to dry thoroughly before use to ensure the finish hardens appropriately. This care will maintain your newly refreshed pieces for years to come.
Techniques for Transforming Household Pieces
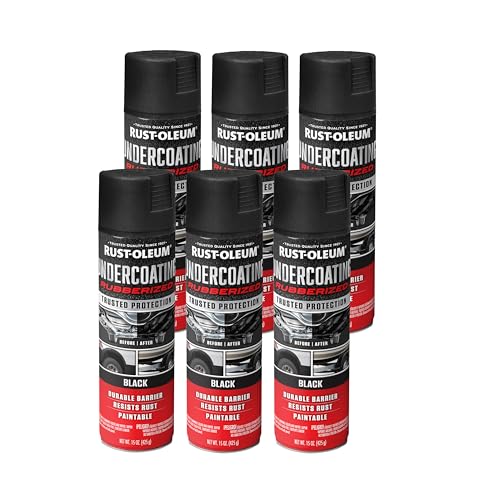
Opt for a high-quality primer before applying color. This ensures better adhesion and a uniform finish. I prefer using a spray primer for even coverage, especially on intricate surfaces.

Select your color wisely based on the mood you want to create. Neutral tones work well for a serene vibe, while bold hues can add personality and warmth.
Follow these steps for application:
- Sand the surfaces to create a smooth texture, using fine-grit sandpaper.
- Wipe down with a damp cloth to remove dust and debris.
- Apply the primer in thin, even coats, allowing drying time between layers.
- After drying, proceed to your chosen color, applying multiple thin layers for depth.
- Consider a topcoat for added durability and protection against scratches or stains.
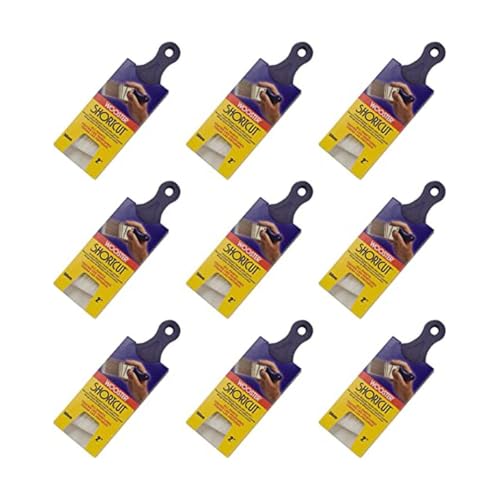
For brushes, use synthetic bristles for water-based products and natural bristles for oil-based paints. Invest in quality rollers if covering larger areas; they reduce streaks and improve finish.
Remember to ventilate the area well. I often place a fan nearby to ensure proper airflow while I work. It’s crucial to be patient and allow adequate drying time between each step; this ultimately leads to a professional-looking outcome.
Choosing the Right Paint for Furniture
Opt for acrylic or latex formulas when covering surfaces in a living area. They provide durability and ease of cleaning, making them ideal for high-traffic spaces. If you prefer a more traditional approach, alkyd-based options are robust and offer a smooth finish, though they typically have a longer drying time.
Finish Types
Consider the sheen level; satin and semi-gloss finishes are popular choices due to their balance between aesthetics and functionality. Matte finishes can be elegant but are less forgiving regarding wear and maintenance. High-gloss is striking but shows imperfections easily, so prep work becomes crucial.
Color Selection
Choose hues that enhance your space without overwhelming it. Neutral tones provide versatility, while bold colors can serve as focal points. Always test samples on the actual furniture in different lighting to ensure the shade aligns with your vision.
Preparing the Furniture for Painting
Cleansing the surfaces is my first step. I utilize warm soapy water to remove dust and grease, ensuring a smooth application later. For stubborn stains, a mixture of vinegar and water works wonders.
Next, I inspect for any imperfections like scratches or old finishes. Sanding those areas with medium-grit sandpaper helps create an even texture, ensuring better adhesion of the new coating.
After sanding, I wipe everything down with a damp cloth to eliminate any debris and dust particles created during the process.
Repairing Damages
Any dents or chips require filling. I apply wood filler using a putty knife, allowing it to dry thoroughly before sanding it down to a flush finish. This step guarantees a flawless surface for the new hue.
Removing Hardware and Preparing the Area
I detach any handles, knobs, or hinges to prevent accidental paint spots. Covering the surrounding area with drop cloths protects floors and nearby items from splatters. Using masking tape around edges completes my preparation routine.
Thorough preparations lead to a stunning transformation, providing the best results possible for my project.
Gathering Necessary Painting Supplies
A high-quality color finish begins with the right collection of tools. I ensure I have the following items ready: a good brush, ideally made of synthetic bristles, for smooth applications in corners and on intricate details. A foam roller is useful for covering larger, flat areas quickly. I opt for a sanding block or fine-grit sandpaper to smooth surfaces and prepare for adhesion.
I keep a primer on hand, especially for surfaces that require extra bonding power. This step enhances the final outcome significantly. Choosing a drop cloth or old newspapers protects the surrounding area from possible spills. A well-ventilated space is crucial, so I also prepare a face mask for safety.
I use painter’s tape to prevent marks on areas I do not want to color while ensuring sharp lines. A small disposable tray makes it easy to access and manage my paint. Finally, I have a clean, damp cloth ready to wipe surfaces before I start, providing a clean slate for my project.
Selecting the Best Location for Painting
I prefer to choose a well-ventilated area for my projects, ideally near a window, which allows for fresh air circulation while reducing fumes. A flat surface, such as a drop cloth or sturdy table, prevents accidental spills and provides stability for technique precision.
Indoor spaces should be free from dust and clutter. I clear out the surrounding area and cover floors and furniture with protective sheets. In cases where external factors might hinder my work, like weather, I make sure to have a backup indoor setting equipped for good lighting.
If possible, I avoid high humidity spots, as moisture can affect the drying process significantly. A controlled climate with moderate temperatures is preferable to ensure even coatings. I also keep an eye on my surroundings, ensuring pets and children are well away to prevent interruptions.
Public places, like patios or balconies, can be great alternatives, provided they are sheltered from strong winds. I find that these locations help maintain focus, reducing distractions. Before finalizing a spot, I always consider accessibility; it’s vital to easily reach all sides of the item without strain.
Applying Primer to Furniture Surfaces
Begin with a high-quality primer to ensure good adhesion and increased durability of the topcoat. I recommend using an oil-based or water-based primer specifically designed for the material of your items, such as wood or MDF.
Before application, clean the surfaces thoroughly with a damp cloth to remove dust and grease. Allow to dry completely. Next, stir the primer well to achieve a smooth consistency.
Using a synthetic brush or foam roller, apply a thin and even layer of primer. It’s crucial to follow the grain of the wood if applicable. Avoid excessive buildup, as this can lead to drips and an uneven finish.
After the first coat dries according to the product instructions, lightly sand the surface with fine-grit sandpaper. This step will create a better bond for the subsequent layers and eliminate any imperfections.
Wipe down the surface again to remove sanding dust before applying a second coat of primer. Depending on the color and type of topcoat chosen, you may need a third layer for perfect coverage.
| Primer Type | Best For |
|---|---|
| Oil-based Primer | Wood surfaces and high-traffic areas |
| Water-based Primer | Lightweight items and indoor applications |
| Shellac-based Primer | Stains and odors |
Once satisfied with the primer application, allow it to cure fully before proceeding with your chosen top layer. This preparation is vital for achieving a professional look and longevity for your refreshed pieces.
Choosing the Right Painting Technique
For best results, I prefer using a brush for detailed work, especially on intricate surfaces. This method allows for precision and better coverage in corners and nooks. A foam roller works wonders for larger, flat areas, providing a smooth finish without brush strokes. The choice between these tools largely depends on the piece’s structure and texture.
Spray Application
If I’m aiming for a flawless, even coat, spray application is my go-to option. It reduces the chances of drips and can cover complex shapes more easily. However, I ensure to use a mask and work in a well-ventilated space to avoid inhalation of fumes. A spray can also produce a more professional sheen, making it ideal for glossy finishes.
Layering Techniques
When I want depth or a distressed effect, layering different techniques is beneficial. I might apply a base coat with a roller and follow up with a brush for details. For a rustic look, I occasionally sand between coats to create texture. Experimenting with these methods helps achieve the desired aesthetic that complements my style.
Finishing Touches: Sealants and Topcoats
Select a sealant based on the specific material treated. For wood surfaces, a polyurethane topcoat provides excellent durability and moisture resistance. I typically go for a water-based version, which dries quickly and has a lower odor compared to oil-based alternatives. For vintage or distressed pieces, a matte or satin finish can enhance the character without appearing overly glossy.
Before applying, ensure the previous layers are thoroughly dry. Lightly sand between coats with fine-grit sandpaper to promote adhesion. I often use a high-density foam roller for a smooth application, which minimizes brush strokes and creates an even coat.
For metal surfaces, consider a clear enamel or acrylic sealant. These help prevent rusting while providing a protective barrier against scratches. Always check the compatibility of the sealant with your base layer to avoid unexpected reactions.
If more durability is required, especially for high-traffic items like tables, an additional layer of sealant is advisable after the first has cured completely. Be mindful of recommendations on the drying time and recoat intervals specified by the manufacturer to achieve optimal results.
Finally, allow the finished item to cure fully in a well-ventilated area. This can take several days, depending on the products used. Proper curing is key for ensuring longevity and maintaining the aesthetic appeal of the piece.
Cleaning Up After Your Painting Project
Once I’ve finished applying the final coat, I prioritize tidying up my workspace. Here’s a structured approach that I follow for an effective cleanup.
Disposing of Materials
- Safely dispose of used brushes, rollers, and any rags that contain paint. If they are water-based, they can be washed out after drying. For oil-based products, follow local regulations for disposal.
- Store leftover liquid in sealed containers with proper labels for future touch-ups or repurposing.
Cleaning Tools and Surfaces
- Clean brushes and rollers thoroughly using the correct solvent; for water-based options, water works. For oil-based, use mineral spirits or paint thinner.
- Wipe down surfaces that might have paint splatters using a damp cloth. Be cautious with any remaining wet paint to avoid spreading.
- Dispose of any drop cloths or protective coverings responsibly, or wash them according to the type of material.
Finally, I ensure that the area is well-ventilated for a few hours, allowing any lingering fumes to dissipate before reintroducing items to the space. Tidiness results in a more pleasant environment.
Maintaining Painted Furniture Over Time
To keep your newly coated items looking fresh, I recommend regular dusting and cleaning using a soft, damp cloth. Avoid harsh chemicals that could damage the surface. Instead, a mild soap solution is effective for light cleaning.
Protecting Surfaces
Using coasters and placemats can safeguard against scratches and water rings. For items that are exposed to direct sunlight, consider installing UV-filtering window treatments to prevent fading.
Touch-ups and Repairs
For minor scuffs and chips, having a small amount of the original color on hand allows for quick touch-ups. A fine brush works best for precision. If damage occurs, lightly sand the area and apply a matching color to maintain a seamless look.
Inspect your pieces periodically for signs of wear. Addressing issues early can prevent larger repairs and extend the life of your decor.
If a complete refresh is needed after several years, lightly sanding the surface and applying a fresh coat can rejuvenate the appearance without starting from scratch.
FAQ:
What materials do I need to paint my living room furniture?
To paint your living room furniture, you will need a few key materials. Begin with high-quality paint suitable for furniture, such as latex or chalk paint. Next, gather necessary tools: brushes, rollers, or spray paint for application. A sandpaper or sanding block will help prepare the surface, and a primer is often beneficial, especially for raw wood or dark finishes. Don’t forget a drop cloth to protect your floor and some painter’s tape for clean edges.
How can I prepare my furniture for painting?
Proper preparation is critical for a successful paint job. First, remove any hardware, such as knobs or handles. Next, clean the furniture thoroughly to eliminate dirt and grease. If the surface is glossy, lightly sand it to create a better texture for the paint to adhere. You may also want to repair any dents or scratches using wood filler and let it dry fully before sanding again for a smooth finish. Finally, wipe down the furniture with a damp cloth to remove any dust before you start painting.
What type of paint is best for furniture?
The best type of paint for furniture often depends on the look you desire and the material of the furniture. For a classic and durable finish, latex or acrylic paint is commonly used due to its durability and ease of cleaning. Chalk paint is another popular choice for a matte, vintage look and generally requires no primer, simplifying the process. Oil-based paints are very durable as well but have a longer drying time and more odor, requiring better ventilation during application.
How do I achieve a smooth finish when painting furniture?
To achieve a smooth finish when painting furniture, start with proper surface preparation by sanding to remove any imperfections. Apply a high-quality primer if necessary, which helps the paint adhere better and minimizes any texture. Use a quality brush or roller to apply thin layers of paint rather than one thick coat. Sand lightly between coats once they have dried to create a smooth surface before applying the next layer. Lastly, a final clear coat can be added for added protection and to achieve an even smoother finish.
How long does it take for painted furniture to dry and cure?
The drying time for painted furniture can vary based on the type of paint used. Typically, latex or acrylic paint can dry to the touch within one to two hours, allowing for a second coat to be applied. However, curing, which is when the paint fully hardens and reaches its maximum durability, can take up to a few weeks. To ensure the best results, it is advisable to leave the furniture undisturbed for at least 24 hours after painting before using it, and waiting a week is ideal for full curing.
What materials do I need to paint living room furniture?
To successfully paint living room furniture, you’ll need a few key materials. First, gather sandpaper or a sanding block for prepping the surface and removing any existing finish. You’ll also need primer, especially if you’re working with a surface that has an existing gloss or if you are painting a lighter color over a darker one. Choose a high-quality paint suitable for furniture—either latex or alkyd paint works well. Don’t forget to have paintbrushes or rollers, a drop cloth to protect your floors, and painter’s tape for clean edges. Finally, a sealer or topcoat will help protect your newly painted furniture and enhance its durability.
How do I prepare my living room furniture for painting?
Preparing your living room furniture for painting is crucial for achieving a smooth and lasting finish. Begin by cleaning the furniture thoroughly to remove any dust, grease, or grime. Next, lightly sand the surface using sandpaper, which helps the paint adhere better. After sanding, wipe off any dust with a damp cloth. If your furniture has an existing finish, consider applying a primer as this increases the paint’s adhesion and provides a uniform base for color application. Make sure to let everything dry completely before applying the paint. Lastly, if you’re working with intricate details, use painter’s tape to mask off areas you want to protect from paint.