 Caleb Turner

Before tackling the preservation of your items, I always recommend gathering all necessary supplies first. Choose a high-quality, puncture-resistant plastic film that is suitable for the job; typically, a thickness of at least 60-80 gauge is ideal for safeguarding your valuables.
Next, one must ensure that the items are clean and dry. Dust and moisture can lead to mold or damage over time. Consider disassembling larger pieces or removing detachable elements to make wrapping easier. Pay close attention to corners and edges, as they often require additional protection.
For optimal results, begin wrapping at the base of the item and work your way up. This technique helps provide support and stability. Layer the film around the object, overlapping each pass by at least 50% to ensure complete coverage. If you’re protecting multiple pieces, it’s advisable to wrap them individually to prevent them from sticking to each other, which could cause scratches or dents.
As a final step, I suggest securing the end of the film with tape to prevent it from unraveling. Label each wrapped item clearly to assist you during unpacking in the future. Following these steps will ensure your possessions remain safe and sound.
Selecting the Right Stretch Film for Your Items
Opt for a high-quality film that offers sufficient thickness, typically ranging from 60 to 80 gauge. Thicker material enhances puncture resistance, especially important for sharp edges or intricate shapes.

Key Factors to Consider
- Clarity: A transparent option allows for easy visibility of the wrapped items, aiding in inventory management.
- Elasticity: Choose a product with good elasticity to ensure a snug fit around various shapes without tearing.
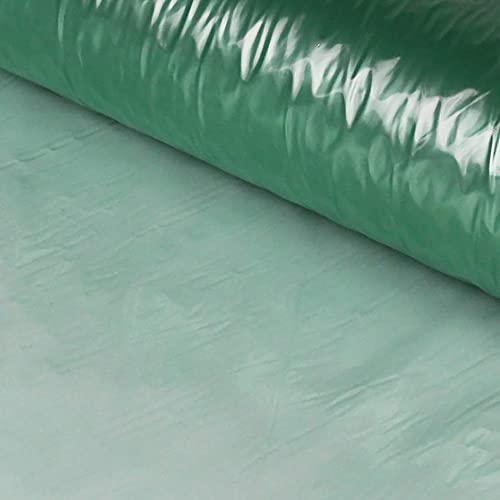
- Color: Black or opaque films provide additional UV protection, useful for items exposed to sunlight.
Specific Needs
If you’re working with heavier items, consider reinforced options for added strength and support. For delicate surfaces, a softer film reduces the risk of scratching. Always test a small area before wrapping everything to ensure compatibility.
Preparing Items for Protective Covering
Remove all loose items, such as cushions and detachable parts, to ensure a smooth layer of protection. This prevents damage and allows for a tighter fit around the main structures.
Clean surfaces thoroughly to eliminate dust and dirt. Use a mild cleaner or damp cloth; any residue may stick to the protective layer, making removal difficult later. Allow the surfaces to dry completely before proceeding.
Inspect for any sharp edges or protrusions. Cover these areas with foam padding or cardboard to avoid puncturing the protective material and to safeguard surrounding items during transport.
Disassemble larger pieces if feasible. Removing legs or sections minimizes bulk and enhances the overall protection of each component by reducing movement during handling.
Consider the weight distribution. For heavier items, ensure they are balanced and stable before encasing them. This attention will facilitate easier transportation and stacking.
Step-by-Step Guide to Wrapping Furniture
Begin the process by gathering all necessary materials, such as the polyethylene sheet, scissors, and protective gear if needed. Ensure the workspace is clear and free from obstacles that may impede the task.
1. Position the Item
Place the object on a flat surface to ensure stability. Ensure it’s free of dirt or dust, as any debris can create marks or damage during the covering process.
2. Secure Loose Parts
If the item has detachable components or loose pieces, remove them. I often use tape to secure smaller parts together, preventing them from getting lost during transportation.
3. Begin at the Base
Start encasing the lower section by wrapping the material around the base. Overlap each rotation slightly, ensuring that it clings firmly to the surface, providing it with protection from scratches and dust.
4. Move Upward
Continue spiraling upward, maintaining consistent tension. This prevents the covering from sagging and creates a snug fit around the contours of the item. Cover all sides, paying special attention to corners.
5. Finish with an Overlap
Once you reach the top, make several rotations around the upper section, ensuring sufficient coverage. I always finish by securing the end of the material with tape or twisting it to prevent unraveling.
| Step | Action |
|---|---|
| 1 | Gather materials |
| 2 | Position the item |
| 3 | Secure loose parts |
| 4 | Start at the base |
| 5 | Move upward |
| 6 | Finish with overlap |
For larger items, I recommend having a second person help stabilize. Once completed, inspect the coverage to ensure all areas are securely protected and ready for safe transportation.
Securing the Wrap for Maximum Protection
To ensure optimal safety during transportation or storage, I focus on the tightness of the applied material. I start by applying pressure and ensuring that the film adheres directly to the surface of the item. By overlapping each layer by about 50%, I create a secure barrier that prevents movement and reduces the risk of damage.
Tension Control
I maintain a consistent tension throughout the process. Too loose, and it may slip; too tight, and it can tear. I adjust my grip on the roll to control the tension, making sure it’s snug without distorting the object underneath.
Sealing Edges
After wrapping, I pay special attention to the edges and corners. I use additional pieces of the film to reinforce these areas, particularly for items with sharp edges or protrusions. This extra layer helps shield against punctures and increases the integrity of the protection.
For added stability, I may use tape on particularly vulnerable sections or at the final point of the wrapping. Carefully placing this tape ensures it secures the end of the film while avoiding any sticky residue on the surface of the item.
Once the protective covering is complete, I conduct a quick inspection. I shake the wrapped item gently. If there’s movement, I know I need to add more tension or layers in specific areas. This thorough approach guarantees that the goods are safeguarded effectively during the move.
Tips for Moving and Storing Wrapped Furniture
Choose a moving truck that provides ample space and is equipped with moving blankets for additional protection. Ensure that the vehicle has a smooth surface to prevent any scuffing or damage while transporting your items.
Loading Techniques
Position larger pieces against the walls of the truck, stacking smaller items on top. Secure each item using straps to prevent shifting during transit. Place heavier objects on the bottom and lighter ones on top to maintain stability and avoid crushing delicate items.
Storage Best Practices
Store items in a climate-controlled environment to prevent moisture damage or warping. Avoid placing wrapped items on concrete floors; use pallets or other raised surfaces to enhance airflow. Label each bundle clearly to make retrieval easier and prevent stacking inappropriately.
Removing Stretch Wrap without Damaging Furniture
Begin by selecting a cutting tool that won’t harm the underlying surface, such as a plastic knife or a pair of scissors. Avoid using sharp blades that can easily scratch or gouge the material.
Gently lift one corner of the film, using your fingers or the edge of your tool to get underneath. Peeling away slowly prevents unintentional tearing and protects finishes.
If the film is particularly tight, apply light tension to the material while cutting to alleviate pressure. Always work in a controlled manner to reduce the risk of accidents.
As you remove the covering, keep an eye out for any adhesive or residue that may remain. In such cases, mild soap and water can help clean any sticky areas without causing damage.
Once the protective layer is completely removed, check for any scratches or marks. If found, a quality furniture polish can help restore the appearance without risking further harm.