Caleb Turner

Begin with a dry, soft cloth to gently wipe away dust and debris. This fundamental step removes surface dirt, preparing the way for deeper maintenance.
Use a mixture of equal parts vinegar and olive oil to tackle stubborn stains. Apply a small amount of the blend to a microfiber cloth and rub it in circular motions. This natural solution not only cleans but also nourishes the surface, restoring its sheen.
For embedded grime, a mild soap diluted in warm water can work wonders. Lightly dampen a cloth with the solution and wring it out thoroughly. Avoid saturation, as excessive moisture can damage the adhesive layers beneath. Wipe the surface and follow up with a dry cloth to eliminate any residual dampness.

If scratches or discolorations are present, consider a wood filler that matches the hue of the surface. Carefully apply it with a putty knife, let it dry, and then sand it lightly to blend with the surrounding area. Finish off with a polish to enhance the appearance.
Regular upkeep involves periodic dusting and conditioning to maintain the luster and prolong the life of the material. A dedicated approach ensures your vintage piece remains a cherished part of your home.

Steps for Restoring Antique Laminated Surfaces
Begin with a soft, lint-free cloth to gently wipe off any loose dust or dirt from the surface. This avoids scratching during the subsequent steps.
Solution Preparation
Mix equal parts of distilled water and white vinegar in a spray bottle. Vinegar effectively breaks down grime without causing harm to the laminated surface.
Application Technique
Spray the solution lightly onto a clean cloth instead of directly on the surface. Wipe the furniture in the direction of the grain to prevent streaks or damage.
| Tip | Detail |
|---|---|
| Spot Test | Always do a small test in an inconspicuous area to ensure no adverse reaction occurs. |
| Drying | After wiping, use a separate dry cloth to buff the surface and remove any excess moisture. |
| Conditioning | Follow up with a polish designed for laminated surfaces to add shine and protect against future wear. |
For stubborn stains, mix baking soda with water to form a paste. Apply it gently with a soft cloth and rinse with a damp cloth afterward.
Assessing the Condition of Veneer
Inspect each piece of wood closely to determine its state. Look for obvious signs of damage such as peeling, cracks, or discoloration. Touch the surface to feel for rough patches, which can indicate wear or water damage.
Consider these steps:
- Check for delamination where the top layer separates from the core.
- Look for uneven surfaces; this could signify underlying problems.
- Examine joints and edges for gaps. A secure connection indicates good condition.
Additionally, assess the finish. If it appears dull or sticky, it might need refinishing. A more polished surface suggests less wear.
Pay attention to the smell of any stored item. A musty odor may signal mildew, which requires immediate action to prevent further damage.
Taking thorough notes during your assessment will assist you in deciding what steps to take next. Use a light to check for deeper issues that may not be visible to the naked eye.
Choosing the Right Cleaning Products
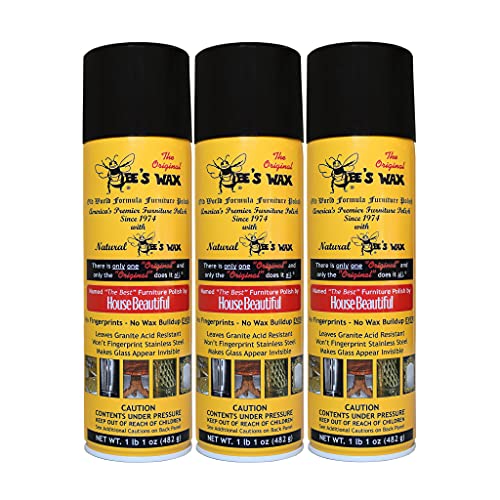
I recommend using pH-balanced solutions specifically designed for wood surfaces, as these products are gentle and won’t cause damage. Look for natural ingredients that can effectively remove grime without harsh chemicals. Products containing beeswax or carnauba wax can enhance shine and protect the finish.
Avoiding Harsh Chemicals
Steer clear of ammonia-based cleaners, as they can strip finishes and create dull spots. Bleach and strong solvents should also be avoided, as they can lead to discoloration and deterioration of the material. Instead, opt for mild dish soap diluted in water for routine maintenance, ensuring no residue is left behind.
Testing Products
Before applying any product, conduct a patch test on an inconspicuous area. This helps ensure compatibility with the surface without risking visible damage. If no adverse reactions occur after 24 hours, proceed with the cleaning process using the tested solution.
Preparing the Furniture for Cleaning
Remove all items from the surface to avoid accidents and ensure a thorough approach. Check for any loose parts, like knobs or hinges, and tighten them if necessary. This step prevents further damage during the maintenance process.
Next, dust the piece using a soft, dry cloth. Start from the top and work your way down, allowing any settled debris to fall away. This initial dusting is key to avoiding scratches when applying cleaning agents.
Inspect for any signs of damage or wear, such as chips or scratches. Document these areas with pictures or notes, as it assists in determining necessary repairs post-cleaning.
Lastly, perform a patch test on a small, inconspicuous area before applying any cleaning substance. This ensures that the product won’t adversely affect the wood or finish. Always allow the test area to dry completely to evaluate any potential reactions.
Techniques for Surface Dust Removal
I recommend using a soft, lint-free microfiber cloth for the initial dust removal. This material attracts dust effectively without scratching the delicate surface. Gently wipe in straight lines rather than circular motions to avoid leaving any marks.
For stubborn dust accumulation in crevices, a small, soft-bristled brush or a clean paintbrush works wonders. This method allows you to reach intricate details without damaging the finish.
An alternative is to slightly dampen the microfiber cloth with water or a gentle solution of vinegar and olive oil. Ensure the cloth is not soaking wet; excess moisture can penetrate and damage the layers beneath.
For larger pieces, I often utilize a handheld vacuum with a brush attachment. It’s adept at lifting particles from flat surfaces and intricate designs without the risk of scratches.
After initial dusting, I recommend running a dry microfiber cloth one more time to catch any remaining particles. This way, surfaces are left clean and ready for deeper treatments.
Deep Cleaning Stains and Marks
For stubborn stains, I rely on a mixture of equal parts vinegar and olive oil. I apply this blend with a soft cloth, working gently in the direction of the grain. It lifts grime while conditioning the surface. For ink or heavy water stains, I use a paste of baking soda and water. After applying the paste to the stained area and letting it sit for 10 minutes, I wipe it away with a damp cloth, ensuring no moisture remains.
Oily Residues
To tackle grease or oily residues, I utilize a few drops of dish soap in warm water. Using a soft cloth dampened with soapy water, I gently scrub the area, then finish with a clean damp cloth to remove any soap. Following this, drying with a microfiber cloth prevents moisture absorption.
Scratches and Scuffs
For minor scratches, I find that a walnut can work wonders. Rubbing the meat of the nut over the scratch fills in imperfections. To enhance the finish, I buff the area with a clean cloth afterward. For deeper scratches, I apply a touch of matching wood stain or marker, followed by a light varnish to protect the area.
Restoring Shine to Dull Surfaces
For a radiant finish, I often employ a homemade furniture polish. Mix equal parts of olive oil and white vinegar, applying it with a soft cloth. This combination nourishes the wood while adding a natural luster.
Steps to Achieve Shine
- Dust the surface thoroughly to remove any debris.
- Moisten a cloth with the oil-vinegar mixture; do not soak it.
- Rub gently in circular motions, allowing the solution to penetrate the wood.
- Buff the surface with a clean, dry cloth to enhance the shine.
Additional Tips for a Gleaming Appearance
- Test the solution on an inconspicuous area first to ensure compatibility.
- Avoid excessive moisture to prevent warping or damage to the surface.
- Consider repeating this process every few months for ongoing maintenance.
For stubborn dullness, products designed specifically for polishing wood can be effective. Choose one with natural ingredients to avoid harsh chemicals.
Protecting Veneer After Cleaning
I recommend applying a clear furniture polish or a specialized wood conditioner to safeguard the surface after maintenance. Choose a product that is suitable for polished surfaces to enhance protection.
Consider using a soft, lint-free cloth to apply the polish evenly, ensuring it penetrates the grain without leaving excessive residue. Remember to work in small sections to maintain control over the application process.
After treatment, allow the polish to set for the time suggested on the product label. This step is crucial for forming a protective barrier against potential moisture and dirt. Be cautious not to over-saturate the surface, which could lead to build-up.
For long-lasting protection, consider regular maintenance routines every few months. This practice helps maintain the integrity of the surface and reduces the need for deeper interventions in the future.
Another layer of defense can be achieved by strategically placing coasters, mats, or felt pads under objects to avoid scratches or heat damage. Protecting surfaces in this way preserves their aesthetic appeal for years to come.