
 Caleb Turner

Preparation is key. Before applying any coating, clean the surface thoroughly with soapy water to remove dust and grease. A sandpaper with a medium grit helps to create a rough texture, enhancing adhesion. After sanding, wipe the area again with a damp cloth to eliminate any dust particles.
Choosing the right product is critical. Use a specially formulated primer designed for non-porous surfaces. This step significantly boosts the longevity of your finish. Allow the primer to dry completely according to the manufacturer’s recommendations.
For the topcoat, opt for high-quality acrylic latex or spray paints that are compatible with synthetics. Multiple thin coats yield better results than one thick layer. Always follow the instructions on drying times between layers to prevent any peeling or bubbling later.
Preparing Your Pieces for a Fresh Look
Begin with a thorough cleaning using a mixture of soap and water. This step removes dirt, grease, and any residues. Rinse with clean water and let it dry completely.
Next, use fine-grit sandpaper to lightly scuff the surface. This creates a texture for the new layer to grip, enhancing adherence. Be careful not to sand too aggressively, as you want to maintain the integrity of the item.


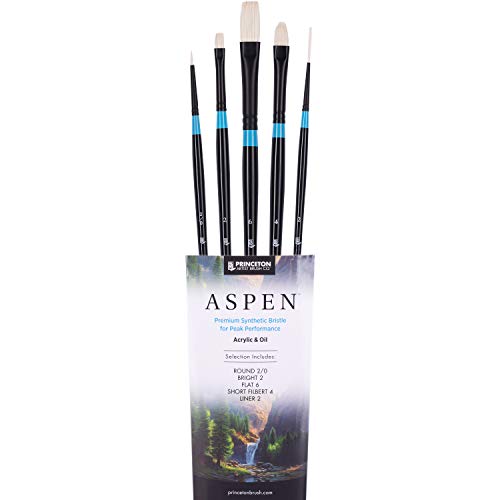
Selecting the Right Products
Choose a primer specifically designed for non-porous materials. This is crucial for ensuring longevity. Apply a thin, even coat and let it dry according to the manufacturer’s instructions.
When selecting a color, opt for high-quality spray paint or a suitable alternative that is formulated for non-absorbent surfaces. These options typically offer better coverage and durability.
Application Process
- Hold the spray can about 12 inches away from the item.
- Apply light, even strokes, overlapping slightly with each pass to avoid drips.
- Allow each coat to dry before applying another, usually two to three coats will suffice.
Once finished, let your pieces cure in a well-ventilated area for several days. This ensures the new finish has fully set and maximizes its durability.
Choosing the Right Paint for Plastic Surfaces
I recommend selecting a spray or acrylic formula specifically designed for synthetic materials. These types adhere better and provide a durable finish. Look for options labeled as “for plastics” on the packaging; this indicates compatibility with synthetic surfaces.
Also, consider paint that includes a primer mixed in, as it enhances adhesion and reduces the need for multiple coats. Brands like Krylon and Rust-Oleum often feature suitable options in their product lines.
Color selection is essential as well. Light colors can help in reflecting light and maintaining a fresh appearance, while darker hues may show scratches and wear more prominently. Always pick shades that complement your existing decor for a cohesive look.
Verify that the chosen paint is also weather-resistant if the item is outdoors. This ensures longevity against elements and prevents fading. Lastly, review user feedback to gauge performance; it helps in making an informed decision.
Preparing the Plastic Furniture for Painting
Thoroughly clean the surface using warm soapy water and a sponge. Rinse it well to remove any residue. This step eliminates grease, dirt, and dust that might affect adhesion.
After cleaning, dry the surface completely with a lint-free cloth to prevent moisture from interfering with the coating process.
Next, lightly sand the surface with fine-grit sandpaper (around 220 grit). This will create small grooves, allowing the new layer to grip better. Focus on areas that may have a glossy finish, as this will be critical for proper adhesion.
Be sure to dust off the furniture after sanding. Use a vacuum or a tack cloth to eliminate particles that could cause imperfections.
Apply a primer specifically designed for non-porous surfaces. This preparation offers better bonding for the final coat. Use a spray primer or a brush, ensuring even coverage without pooling.
- Choose a well-ventilated area to work in.
- Allow the primer to dry completely, according to the manufacturer’s instructions.
- Inspect the surface for any imperfections and sand lightly if needed.
Once the primer is dry and smooth, the item is ready for the final layer that will transform its appearance. Following these steps will ensure a long-lasting and visually appealing finish.
Applying Primer on Plastic: Why and How
I recommend using a primer specifically designed for non-porous surfaces before applying any color finish. This step enhances adhesion and ensures a more durable coat. Selecting the right type of primer can prevent peeling and chipping down the line.
Steps to Apply Primer
1. Clean the surface thoroughly with soap and water to remove dust and grease.
2. Allow it to dry completely. Any moisture will hinder the adhesion process.
3. Use a soft sanding sponge to lightly scuff the surface; this will promote better primer adherence.
4. Choose a high-quality product, considering options like spray primers for an even coat or brush-on versions for detailed areas.
5. Apply the primer in thin, even layers. Multiple light coats are preferable to one thick application, as this reduces the risk of drips.
6. Allow each coat to dry completely before adding another, following the manufacturer’s instructions.
Common Mistakes to Avoid
Avoid skipping the cleaning and sanding steps; they are critical for optimal adhesion. Refrain from applying the primer in humid conditions, as this can lead to longer drying times and poor results. Lastly, don’t rush the process; proper drying time is key for a flawless finish.
Selecting Proper Tools for a Smooth Finish
I recommend using a foam roller for large, flat areas. It provides an even coat without leaving texture marks. For detailed sections or edges, a high-quality synthetic brush is best. Choose one with a fine tip; it allows for precision and control.
An alternative is a spray can, particularly for intricate designs. It ensures an even application and reduces brush strokes, but requires a well-ventilated area and appropriate protective gear.
A sanding block will come in handy for surface preparation. Lightly scuff the surface before applying primer or color to enhance adhesion. Opt for a fine-grit sandpaper; it reduces the risk of damaging the material.
Lastly, invest in a drop cloth and painter’s tape. The cloth protects surrounding areas, while tape ensures crisp, clean lines. Quality tools can significantly influence the final look, so select wisely for the best results.
Techniques for Even Application of Coating
To ensure a smooth and uniform layer on synthetic surfaces, I rely on specific methods that enhance adherence and finish quality. Using a spray method often yields exceptional results by allowing for an even distribution without brush marks. I maintain a consistent distance from the object, usually around 10-12 inches, applying several light coats rather than one heavy layer.
Brush and Roller Techniques
When opting for brushes or rollers, I choose high-quality synthetic bristles or foam for optimal outcomes. The key is to work in small sections, applying gentle pressure. Always blend overlapping areas while the material is still wet to eliminate streaking.
Timing and Environment
Working in a controlled environment is crucial. I paint in temperatures between 60°F and 80°F with low humidity. This promotes better adhesion and reduces the risk of imperfections.
| Technique | Benefits |
|---|---|
| Spray Application | Even coverage, no brush marks |
| Brush Technique | Precision in detailing |
| Roller Application | Quick coverage for large areas |
| Proper Timing | Improves adhesion and finish quality |
By integrating these practices, the outcome significantly enhances, ensuring that the surface looks renewed and professionally finished.
Ensuring Proper Drying Time Between Coats
For optimal results, I always allow at least 24 hours between each layer of finish. This duration gives sufficient time for the initial coating to fully cure, preventing issues like streaking or peeling in subsequent applications.
Temperature and humidity play significant roles in drying time. In warmer conditions, drying may complete faster, but I prefer to adhere to the full 24-hour rule regardless. If humidity is high, extending the waiting period to 48 hours can be beneficial.
If possible, I check the surface touch test. Gently press a finger against an inconspicuous area; if it feels tacky, more time is necessary. I also use a fan or dehumidifier in the workspace to promote air circulation, aiding the drying process.
Additionally, I keep in mind the specific recommendations on the paint can. Different formulations have varying drying times, and adhering to these guidelines is crucial for achieving a flawless surface.
Patience pays off. Rushing between layers compromises the integrity of the finish, leading to an unsatisfactory outcome. I ensure that each coat is given ample opportunity to set properly before applying the next one.
Maintaining Painted Plastic Furniture for Longevity
Regular cleaning is the first step. I use a mixture of mild soap and water to gently wipe surfaces, avoiding harsh chemicals that can damage the finish. A soft cloth or sponge works best to preserve the coating.
Inspecting surfaces periodically is crucial. I look for any signs of wear or scratches. If I find imperfections, I carefully sand the area with fine-grit sandpaper and touch it up with matching hues.
Using protective coverings enhances durability. I cover items when not in use, especially to shield against sun exposure and environmental factors. This simple precaution can extend the life of the finish significantly.
Maintaining the right humidity levels in the storage area is valuable. I ensure the environment is not overly humid, as excessive moisture can lead to peeling or bubbling of the coating.
Lastly, moving items with care prevents chipping or cracking. I lift rather than drag, ensuring that edges remain intact and finishes stay unblemished. These steps help me keep my refreshed items looking their best for years to come.


