
 Caleb Turner

Choosing a high-quality dye is crucial. I recommend picking one that penetrates deeply and provides even coverage, ensuring longevity and a seamless finish. Always test the shade on a small, inconspicuous area before the main application to see how it interacts with the grain.
Preparation is key. Sand the surface thoroughly to remove old finishes and imperfections, using progressively finer grits for a smooth result. A clean surface allows the mixture to settle evenly, minimizing blotches during application. Wiping down with a damp cloth after sanding helps remove any dust particles.
Applying the mixture requires a methodical approach. I prefer using a brush for detailed areas and a rag for larger surfaces. Working in sections ensures I maintain control and avoid streaks. To achieve a rich hue, I recommend layering applications, allowing each coat to dry completely before adding the next.
Finally, sealing the finish enhances durability and brings out the desired tone. Choose a sealant that complements your chosen hue and apply it evenly. This step not only protects the surface but also enhances the visual depth of the transformation.

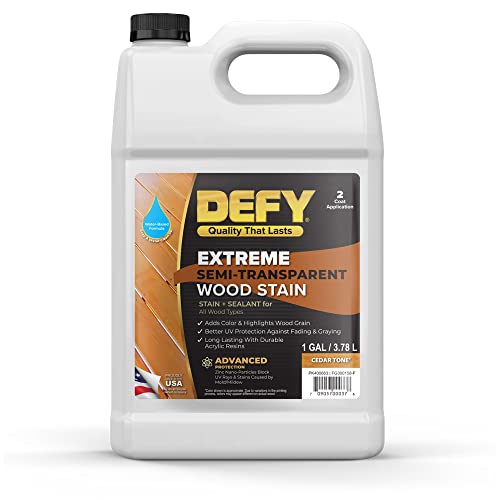

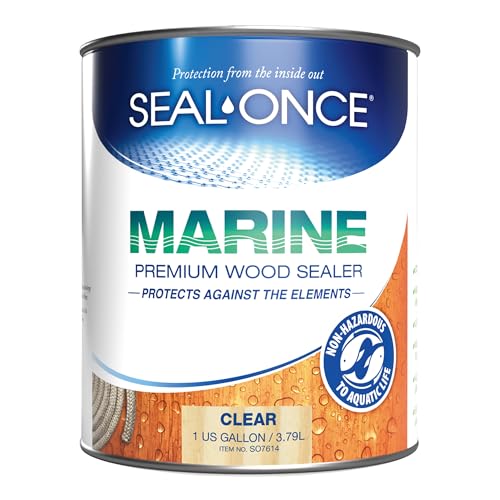
Change the Hue of Your Furniture
Prepare the surface by cleaning it thoroughly with a mixture of warm water and mild detergent. Allow it to dry completely. If necessary, lightly sand the piece to ensure better absorption of the new shade. Use a fine-grit sandpaper to avoid deep scratches, and wipe off any dust with a damp cloth.

Test the New Shade
Before applying the new tint, conduct a test on a hidden area. This step helps to see how the new finish interacts with the existing one. Apply a small amount, let it dry, and evaluate the result. Adjust as needed by blending or selecting an alternative option.
Application Process
Using a brush or cloth, apply the new product evenly. Work in sections for better control and avoid lap marks. Allow it to penetrate for the recommended time, then wipe off any excess. Multiple layers may be necessary to achieve the desired intensity; follow the manufacturer’s instructions regarding drying times between coats. Finish off with a clear protective topcoat to enhance durability.
Choosing the Right Wood Stain for Your Project
Opt for an oil-based product if durability is a priority. These formulations penetrate deeply, providing a resilient surface ideal for high-traffic pieces.
If you prefer quicker drying times, select a water-based alternative. These options are user-friendly, with easy cleanup and minimal odor.
Consider the hue range available. Samples on small boards help visualize results under different lighting. Test on the actual item whenever possible, as variations in grain and texture influence appearance.
Evaluate transparency levels. Transparent varieties enhance natural grain, while semi-solid and solid alternatives offer more coverage, hiding imperfections and providing a uniform look.
Safety is paramount. Use products with low volatile organic compounds (VOCs) for better air quality and compliance with regulations.
Read manufacturers’ instructions for best practices. Each blend may have specific application techniques to achieve optimal results.
Don’t overlook the finish. A topcoat or sealer can significantly alter the final aesthetic while safeguarding against wear and tear.
Take note of drying and curing times, as these will dictate your project timeline. Ensure adequate ventilation regardless of your choice, especially during application.
By focusing on these guidelines, you can enhance your craftsmanship and achieve a look that complements your space beautifully.
Preparing Furniture for Staining: Cleaning and Sanding
Thoroughly clean the surface to ensure proper adhesion. Use a mixture of warm water and mild dish soap, or a dedicated wood cleaner. Apply it with a soft cloth, and make sure to remove any dust, grease, or previous finishes.
Steps for Effective Cleaning
1. Dust the surface with a microfiber cloth to eliminate loose particles.
2. Dampen a cloth with the cleaning solution and wipe down the entire area.
3. Rinse with a wet cloth to remove any residue from the cleaner.
4. Allow the piece to dry completely before proceeding to sanding.
Sanding Techniques
Choose the appropriate grit sandpaper for your project. Start with a coarser grit (80-120) to remove any old finish and imperfections, then progress to a finer grit (220) for a smooth surface.
Sand in the direction of the grain to avoid scratches that could remain visible after applying the new finish. Keep the sanding even and avoid staying in one spot for too long.
| Grit Size | Purpose |
|---|---|
| 80-120 | Remove old finish and smooth out rough areas |
| 220 | Create a smooth surface for finishing |
After sanding, vacuum the dust and wipe the surface again with a damp cloth. Ensure everything is clean and dry before applying the new finish for the best result.
Test Stain on Scrap Wood Before Application
Before applying any finish to your project, I always recommend testing it on a piece of scrap that matches the type of material being worked on. This simple step allows me to gauge how the final hue will appear and interact with the grain. Gather leftover pieces from your project, or obtain similar material to ensure an accurate comparison.
Procedure for Testing
I begin by sanding the scrap to the same grit as my main piece. Then, I apply the product in the same manner I intend to use on the actual item, ensuring that I replicate the technique–be it with a brush, cloth, or spray. One coat often reveals the base tone, while multiple layers help me visualize the depth and richness of the finish.
Evaluating Results
After allowing the sample to dry thoroughly, I evaluate the outcome in different lighting conditions–both natural and artificial. This allows me to see how light interacts with the applied layer, ensuring the shade meets my expectations before committing to the entire piece.
Applying Wood Stain: Techniques and Tools
Choosing the right tools and methods is crucial for achieving a consistent and appealing finish. Here are some effective techniques and implements I recommend:
- Brush Application: Use a high-quality synthetic bristle brush for even application, especially on flat surfaces. Dip the brush into the formula and work in the direction of the grain, applying in thin coats to prevent drips.
- Cloth Method: Soft lint-free cloths are excellent for absorbing the liquid and spreading it evenly. Dampen the cloth slightly and wipe on, ensuring even distribution across the surface.
- Spray Application: For larger projects, consider using a spray gun. Maintain a consistent distance from the surface to avoid pooling and ensure an even layer. Practice on scrap pieces first to get a feel for the technique.
- Foam Applicators: These are useful for intricate areas and detailed work. They provide smooth coverage and reduce streaking, making them ideal for more complex patterns.
Prep your implements thoroughly before use:
- Ensure brushes and cloths are clean and free from contaminants that could mar the finish.
- Use a test piece to evaluate how each method works with your chosen formula and personal technique.
Monitor drying times carefully. I find that applying the next coat too soon can lead to uneven finishes. Check the manufacturer’s instructions regarding re-coat times to ensure optimal results.
Finally, always wear protective gear, especially in well-ventilated areas, while handling these products. Ensuring personal safety allows for a more enjoyable and less stressful experience.
Achieving Desired Color: Multiple Coats and Mixing Stains
To reach the precise hue you envision, applying several layers often proves beneficial. Each layer deepens the tone, allowing you to gradually build up the impact while maintaining control over the final appearance. Start with a lighter base coat to establish the foundation, then incrementally add darker shades or contrasting tints. This technique enables more customization than applying a single dark layer.
Applying Multiple Coats
Consider the following steps for layering:
- Allow each layer to dry completely before adding another, typically 4-6 hours, depending on conditions.
- Sand lightly between coats with fine-grit paper to enhance adhesion and smoothness.
- Assess every layer to decide if additional tinting is needed before moving on.
Mixing Stains for Unique Hues
Merging various pigments expands your options significantly:
- Test small amounts in a container to evaluate the blend before application on your surface.
- Record the ratios used for future reference in case you wish to replicate the shade.
- Consider using a clear medium to lighten a mixture without losing the essence of the original tones.
Experimenting with combinations not only broadens your possibilities but can also create a distinctive finish tailored to your preferences. Careful application and thoughtful layering will lead to striking results that transform your pieces dramatically.
Dealing with Uneven Stain Application
If I notice blotchiness or inconsistency in the finish, I act quickly to rectify it. One effective method is to use a clean, lint-free cloth dampened with the same product that I originally used. Gently rub over the uneven areas to blend them in without removing too much pigment.
Spot Fixing Techniques
For localized problems, I find that applying additional product to the specific area works well. I ensure that the application matches the surrounding area in terms of thickness and hue. It’s crucial to feather the edges of the repair to prevent harsh lines.
Blending Techniques
When a broader area is affected, I may opt for a different approach, such as lightly sanding the uneven spots with fine-grit sandpaper after the finish has fully dried. This helps to create a uniform surface. Following sanding, I apply another thin coat for uniformity, allowing each layer to dry as recommended by the manufacturer.
| Issue | Solution |
|---|---|
| Blotchy Finish | Dampen cloth and blend with original product |
| Localized Discrepancy | Apply product to specific area, feather edges |
| Broad Area Issues | Lightly sand, apply thin coat |
By responding to issues promptly and using the right techniques, I can achieve an even and lasting finish on my projects.
Sealing and Protecting Stained Wood Furniture
For safeguarding the applied finish on your piece, I recommend using a high-quality topcoat. This will enhance durability while providing a layer of protection against scratches and moisture.
Types of Sealants
- Polyurethane: This is the most common choice. Available in oil-based and water-based formulas, it dries clear and offers excellent resistance to stains and water.
- Varnish: Ideal for high-traffic areas, varnish creates a tough surface. It’s suitable for exterior applications as well.
- Lacquer: Provides a high-gloss finish and dries quickly. However, it’s less resistant to water, so consider this for low-moisture environments.
Application Process
Ensure the stained surface is completely dry before applying the sealant. Follow these steps:
- Use a fine-grit sandpaper (220 grit) to lightly sand the stained area, enhancing adhesion.
- Clean the dust with a damp cloth to ensure a pristine surface.
- Apply the chosen sealant with a high-quality brush or foam applicator, working in thin, even coats.
- Allow each coat to dry completely before lightly sanding and applying the next layer.
I typically choose to apply at least two to three coats for added protection. After the final coat, allow it to cure for several days before placing items on it, ensuring optimal durability and longevity.
Maintaining Stained Furniture: Tips for Longevity
Regularly dust the surface with a soft, dry cloth to prevent dirt buildup that can damage the finish. For deeper cleaning, use a damp cloth with mild soap, followed by a dry wipe to avoid moisture seeping into the grain.
Apply a protective wax or oil every six months to a year. This adds a layer of defense against scratches and UV damage. Ensure the surface is clean and dry before applying any product.
Avoid placing items directly on the surface without some form of protection. Use coasters, placemats, or felt pads to reduce the risk of dents and heat marks.
Keep the environment stable. Extreme temperature and humidity fluctuations can cause the material to expand and contract, leading to cracks or fading. Maintain a consistent climate in the room where the piece is located.
If you notice any damage, address it promptly. Small scratches can often be repaired with a touch-up marker or a bit of matching stain applied carefully. For deeper gouges, consider sanding the area lightly and reapplying a finish coat.
Rotate decorative items on the surface periodically to prevent uneven fading from sun exposure. This helps maintain a consistent appearance over time.
Common Mistakes to Avoid When Staining Wood
Skipping the cleaning step can lead to poor absorption and an uneven look. Always ensure that the surface is free of dust, grease, and old finish.
Using the wrong grade of sandpaper may affect the final appearance. A finer grit helps in achieving a smooth finish while avoiding visible scratches. Start with a medium grit and finish with a fine one.
Applying a thick layer of pigment can result in an overly dark finish. It’s better to apply multiple thin layers, allowing each to dry before adding another.
Failing to test on scrap pieces often leads to unpleasant surprises. Always experiment on a similar material to gauge the final effect.
Ignoring the ambient conditions might affect drying times and the end result. Staining in humid environments can prolong drying and create issues.
Using the same tool for application and finishing can generate inconsistencies. Different brushes, rags, or applicators will yield varied results. Choose the right tool for the desired effect.
Neglecting to read the instructions on the product can lead to mistakes. Each formula might have specific requirements for application and drying times.
Skipping a protective coat after application exposes the surface to wear and tear. Use a durable sealer to ensure longevity and maintain the appearance.
Rushing through the whole process compromises quality. Patience during each phase–from preparation to application–ensures a professional finish.
FAQ:
What materials do I need to stain my wood furniture a different color?
To successfully stain wood furniture, you will need the following materials: wood stain in your desired color, sandpaper (preferably 120 and 220 grit), a clean cloth or rag for applying the stain, a brush or foam applicator, wood finish or sealer to protect the stained surface, and gloves to protect your hands. Additionally, have a drop cloth or newspaper to cover your workspace and some mineral spirits for cleaning up. Make sure to choose a stain suitable for the type of wood you are working with for the best results.
Is it necessary to sand the furniture before staining, and why?
Sanding is an important step before staining wood furniture because it helps to create a smooth surface for the stain to adhere to. It removes any existing finish, dirt, or imperfections that might affect the final look. Starting with a coarse grit (like 120) helps to remove the old finish, followed by a finer grit (like 220) to achieve a sleek surface. If you skip this step, the stain may not absorb evenly, leading to a blotchy appearance. Proper sanding enhances the overall finish of your project.
How can I avoid blotchiness when staining wood furniture?
To avoid blotchiness during the staining process, consider using a pre-stain wood conditioner. This product helps to even out the absorption of the stain, particularly on softwoods like pine or maple that tend to blotch easily. Apply the conditioner according to the manufacturer’s instructions before staining. Additionally, use a consistent application method—either wipe on or brush on—and work in manageable sections. Testing the stain on a small, inconspicuous area of the furniture can also help gauge how the wood will absorb the color.
How long does the stain take to dry before I can apply a finish?
The drying time for wood stain varies based on the product and environmental conditions but typically ranges from 1 to 6 hours. It’s important to read the label on your specific stain for guidance. Generally, it is best to wait at least 4-6 hours to allow the stain to fully cure before applying a finish. If you can, wait overnight to ensure the stain has thoroughly dried, as this helps prevent smudging or mixing with the finish.
What type of finish should I apply after staining my furniture?
After staining, applying a protective finish is crucial to preserve the color and extend the lifespan of your furniture. Common finish options include polyurethane, varnish, and lacquer. Water-based polyurethane dries clear and is easy to clean, while oil-based polyurethane provides a warm glow and is extremely durable. If you want a fast-drying option, consider a water-based finish. Select a finish based on the level of durability you need and the look you want to achieve. Applying at least two coats of finish, with light sanding in between, will enhance the durability and appearance of your stained furniture.
What materials do I need to stain wood furniture a different color?
To successfully stain wood furniture, you’ll need a few essential materials. Start with a wood stain suitable for your furniture type, which comes in various colors. You will also need sandpaper (preferably 120 and 220 grit) to prepare the surface by removing the existing finish and smoothing it out. A clean cloth or sponge is necessary for applying the stain evenly, and brushes, foam applicators, or rags can work as well. Additionally, having a clear topcoat like polyurethane can protect the stained surface. Don’t forget to have gloves to protect your hands and a drop cloth to safeguard the surrounding area from spills.
What is the process for applying stain to wood furniture?
The process for applying stain to wood furniture involves several key steps. First, make sure to prepare the furniture by removing any existing finish. Sand the surface using the 120-grit sandpaper to strip away old finishes, then follow up with the 220-grit sandpaper for a smoother finish. After sanding, clean the dust from the surface with a vacuum or a damp cloth. Next, apply the wood stain using a clean cloth or brush, following the wood grain to ensure an even application. Allow the stain to sit for a few minutes before wiping off any excess with a clean rag. For best results, apply additional coats as needed, ensuring each coat dries completely before the next one. Finally, seal the stained furniture with a clear topcoat to protect the wood and enhance its appearance.


