
 Caleb Turner

For a striking transformation, concentrate on sanding the surface thoroughly to eliminate imperfections and stains. Choose a medium-grit sandpaper, followed by a finer grit to achieve a smooth finish. This crucial step prepares the surface for varnish or paint, enhancing adhesion and longevity.
After sanding, assess the original color and grain. Selecting a suitable stain or paint that complements the existing aesthetics can breathe new life into your item. Consider water-based options for a more environmentally friendly approach, ensuring minimal odor and quicker drying times.


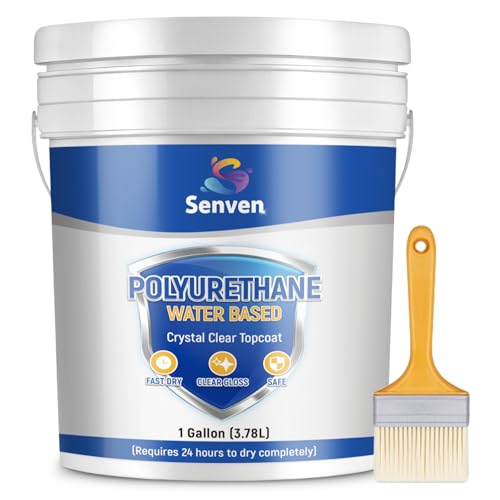
Add a protective finish to elevate durability and shine. A polycrylic or polyurethane coating works wonders, providing a robust barrier against wear and tear. Apply multiple thin layers, allowing adequate drying time between coats to achieve a flawless result.
Don’t overlook hardware adjustments. Replacing outdated knobs or handles with modern designs can significantly update the overall look and functionality. This minor change can make a considerable difference in how the piece feels and operates.
Refurbishing Techniques for Plywood Items
Firstly, selecting a suitable adhesive is paramount. Use waterproof, high-quality wood glue for reassembling any broken parts or fixing peeling edges.
Surface Restoration
For revitalizing surfaces, a thorough cleaning is essential. I opt for a mixture of warm water and mild soap, applying it with a soft cloth. Dry completely to avoid moisture damage.

Next, I sand down the surface using 120-grit sandpaper, moving to 220-grit for a smoother finish. This step removes any old finish and prepares the surface for staining or painting.
Finishing Touches
I prefer natural oil finishes or water-based stains for a fresh look. Applying thin coats allows for greater control and reduces the chance of drips. Always follow the manufacturer’s instructions for drying times between coats.
Finally, add protective seals like polyurethane or wax to guard against wear. This step enhances the longevity of the item, ensuring it withstands daily use while highlighting its natural patterns.
Selecting the Right Materials for Refurbishment
Choosing appropriate supplies is key to achieving a successful transformation of your pieces. High-quality paint or stain will ensure an attractive finish and long-lasting results. I prefer using water-based finishes for their durability and quick drying time. Look for options that are low in VOCs to promote a healthier environment.
Adhesives and Sealants
Strong adhesives are necessary for repairing joints or reinforcing weak areas. I recommend wood glue for its reliability, but also consider polyurethane glue for more challenging areas. Additionally, a good sealant will protect surfaces from moisture and wear. Select a sealant that suits the intended use of the item, whether it will be indoors or exposed to moisture.
Tools and Accessories
Invest in quality tools, including brushes, rollers, and sandpaper. A range of grits from coarse to fine will help achieve a smooth surface. Don’t forget protective gear like masks and gloves when working with chemicals or dust. Proper tools will make the process smoother and contribute to a professional finish.
Preparing the Surface: Cleaning and Sanding Techniques
Thoroughly clean the surfaces before applying any finishes. I use a mixture of warm water and mild dish soap to eliminate dirt and grease. A soft cloth or sponge works well for this purpose. For stubborn stains, a gentle abrasive cleaner can be applied, but I always test it on a small area first to avoid damage.
Once cleaning is done, it’s time to sand. I prefer using fine-grit sandpaper (around 220-grit). This helps to smooth out any imperfections while creating a surface that will bond well with new finishes. Start by lightly sanding the entire area, paying attention to corners and edges where dust tends to accumulate.
Techniques for Effective Sanding
I recommend sanding in the direction of the grain to prevent scratching. Using a sanding block can help maintain even pressure and avoid creating uneven spots. For intricate details or curves, I might switch to sanding sponges or fold the sandpaper for better control.
After sanding, I carefully wipe down the surfaces with a tack cloth or a damp rag to remove all dust particles. This step is crucial for achieving a smooth finish later on. Any remaining dust will interfere with paint or stain adhesion.
Final Touches
Inspect the surface for any rough patches or scratches that may require additional sanding. I take my time at this stage to ensure everything is even and smooth. Preparing the surface adequately sets the foundation for a successful transformation, making the application of new coatings much more effective.
Choosing the Appropriate Paint or Stain for Plywood
To achieve a polished look, I recommend first deciding between paint and stain based on the intended finish and the existing surface quality. Paint provides full coverage and can mask imperfections, while stain enhances the wood’s natural grain.
Here are the key options for each choice:
- Paint:
- Latex Paint: Water-based, quick-drying, and easy to clean up. Ideal for a colorful finish.
- Oil-Based Paint: Offers durability and glossy finishes. Requires mineral spirits for cleanup.
- Chalk Paint: Provides a matte soft texture. Great for a vintage look and requires minimal priming.
- Stains:
- Oil-Based Stain: Deep penetration into the material; enhanced durability. Longer drying time.
- Water-Based Stain: Faster drying and fewer odors. Easier to clean and less toxic.
- Gel Stain: Thicker consistency that works well on vertical surfaces without running.
Consider the finish you desire:
- Matte: Goes well with chalk or flat finishes, which hide imperfections.
- Satin: Offers a slight sheen, providing a balance between durability and aesthetic appeal.
- Gloss: Ideal for high-traffic areas, easy to clean, but highlights imperfections.
Test the chosen product on a small, inconspicuous area first. This ensures compatibility with the existing surface and allows for adjustments in color or application technique before committing to the entire piece.
Ultimately, the selection should reflect personal style while offering sufficient protection to extend the lifespan of the project.
Applying Primer for a Smooth Finish
Before applying the final coat, I always use a high-quality primer specifically designed for wood surfaces. This step ensures better adhesion of paint and creates a more uniform finish. I opt for a water-based primer, which dries quickly and is easy to clean up. I start by stirring the primer thoroughly to achieve an even consistency.
Using a foam roller or a high-density brush, I apply a thin, even coat across the entire surface. I pay special attention to edges and corners, ensuring those areas are well-covered to prevent any uneven texture later on. After the initial application, I let the primer dry according to the manufacturer’s instructions–typically around one to two hours.
For a flawless result, I lightly sand the primed surface with fine-grit sandpaper once it’s fully dry. This process eliminates any raised fibers and provides a smooth foundation for the topcoat. After sanding, I wipe down the surface with a damp cloth to remove any dust particles. I usually let it dry completely before proceeding with the paint or stain application.
This step not only enhances the durability of the finish but also enhances the overall aesthetic appeal. Skipping this part would risk an uneven finish that could ruin the entire project.
Techniques for Painting or Staining Plywood Furniture
For achieving a professional look, I’ve found that applying a high-quality primer is non-negotiable. It enhances the adherence of the paint or stain, ensuring an even finish. I opt for a water-based primer as it dries quickly and is easier to clean up.
Brush vs. Spray
When it’s time to apply the color, I often choose between a brush and a spray can. A brush allows for more control, especially in corners and detailed areas, while spray painting can provide a smoother, unblemished surface. I prefer to spray in a well-ventilated area and use multiple thin coats rather than one thick layer to avoid drips.
Staining Techniques
If I decide to go for a stain, I start with a pre-stain conditioner. This ensures even absorption, particularly with softer woods. After applying the stain with a clean cloth, I wipe excess off after a few minutes to achieve the desired shade. I finish with a clear topcoat, which adds durability and enhances the color. A satin finish is my go-to for that subtle sheen.
Sealing the Surface: Best Options for Protection
For optimal safeguarding, I choose a polyurethane sealant. This provides a durable barrier against moisture and scratches. Water-based versions dry clear and emit fewer fumes, making them suitable for indoor use. For external use, an oil-based polyurethane offers superior protection against UV rays.
An alternative I like is varnish, which enhances the wood grain while adding a glossy finish. It’s easy to apply and offers resistance to heat and water. However, it requires more maintenance over time compared to polyurethane.
Shellac is worth considering for its quick drying time and natural composition. It’s ideal for small projects and can be re-applied without sanding between coats. Yet, it provides less water resistance, which I’m mindful of when choosing the right finish.
An eco-friendly option is a hardwax oil. It penetrates deeply into the surface, providing a natural feel and excellent protection. This option requires periodic reapplication but offers a beautiful, matte finish.
Regardless of the product selected, thorough application is key. I always follow with fine-grit sanding between coats for a smooth final surface. Finishing touches of polishing can enhance visual appeal and reinforce durability.
Enhancing Durability: Tips for Maintenance After Refurbishment
Regular cleaning is crucial. Use a soft, damp cloth to wipe surfaces, avoiding harsh chemicals that can damage finishes.
Reapply protective coatings every six to twelve months, depending on usage. A clear polyurethane sealant can extend the life of the surface and prevent scratches.
Monitor humidity levels in your environment, as excess moisture can warp materials. Use dehumidifiers in damp areas and avoid placing items directly against walls.
Adjust the placement of your restored item. Keep it away from direct sunlight, heating vents, and air conditioning ducts to minimize temperature fluctuations.
Store items on coasters to prevent moisture damage from drinks. Soft pads can be added under decorative items to guard against scratching.
| Maintenance Task | Frequency | Notes |
|---|---|---|
| Dust surfaces | Weekly | Use a soft cloth |
| Reapply sealant | 6-12 months | Clear polyurethane recommended |
| Humidity check | Monthly | Aim for stable levels |
| Coaster use | Always | Protect surfaces from moisture |
Avoid using abrasive cleaners or scouring pads, as these can mar the finish. Instead, opt for gentle cleaning solutions specifically designed for treated surfaces.
In case of scratches, lightly sand the area with fine-grit sandpaper and touch up with paint or finish for a seamless restoration.
Incorporating New Hardware and Accessories
Updating the hardware on your pieces can significantly enhance their appeal. I recommend selecting knobs, pulls, or handles that contrast with the finish to create a striking look.
Types of Hardware to Consider
- Brass or bronze fixtures can add a vintage touch.
- Glass or ceramic knobs can introduce a whimsical element.
- Minimalistic metal options like stainless steel provide a modern feel.
Before installation, ensure you have the right tools, including a screwdriver and measuring tape. Accurate measurements will ensure a seamless fit and prevent additional drilling.
Mixing Accessories for Personalization
- Adding new legs can elevate the design; consider tapered wooden legs or industrial metal frames.
- Felt pads underneath can protect surfaces and add an aesthetic layer.
- Incorporating decorative accents like stencils or decals can personalize your piece further.
For a cohesive look, ensure that your accessories align with the overall theme of your decor. This attention to detail can transform the piece from ordinary to extraordinary.
Adding Personal Touches: Creative Finishing Ideas
Incorporate stencils to create unique patterns or designs on surfaces. I recommend using adhesive stencils, which make it easy to apply paint without bleeding. Choose a design that resonates with your style, and use spray paint or a foam roller for a smooth finish.
Custom Decals and Stickers
Adding custom decals or stickers can infuse a sense of personality into any piece. Look for high-quality vinyl options that are durable and easy to apply. This method allows for easy updating if styles or preferences change.
Textured Elements
Create texture using techniques like decoupage with fabric or paper. Select lightweight materials for easy adherence. Layering different textures adds depth and visual interest, making a statement piece truly stand out. Further, consider adding fabric strips or decorative trim for an enriched tactile experience.
Experiment with mixed media approaches by combining paint with natural elements, such as stones or seashells, to create a singular focal point. Such innovations truly elevate the aesthetic appeal, resulting in a striking transformation that reflects individuality.
FAQ:
What tools and materials do I need to refurbish plywood furniture?
To refurbish plywood furniture, you’ll need a few essential tools and materials. Start with sandpaper in various grits (from coarse to fine) for smoothing the surface. You’ll also need a paintbrush or roller for applying paint or varnish. A wood stain can be used to enhance the grain of the plywood, and a clear sealant will protect the finish. Other handy items include a screwdriver for any assembly or disassembly, a cleaning cloth for removing dust, and a vacuum to clean the workspace. Having a worktable can also make the process easier and more organized.
How do I prepare plywood furniture for refurbishing?
Preparing plywood furniture involves several steps to ensure the best results. First, clean the furniture thoroughly to remove any dust and grease. If you have any scratches or rough spots, sand them down to create a smooth surface. Next, remove any hardware like knobs or handles if applicable. If you’re planning to paint or stain it, consider applying a primer, especially if the existing finish is glossy. Once this preparation is complete, you can proceed to the actual refurbishing steps.
Can I change the color of my plywood furniture, and how do I do it?
Yes, you can easily change the color of your plywood furniture. If you want a dramatic change, staining is a good option as it enhances the wood grain while altering the color. For a solid color, applying paint is the way to go. After preparing the surface, you can either stain or paint directly onto the plywood. If you’re staining, follow the manufacturer’s instructions on application and drying times. For painting, use a primer first, followed by at least two coats of the paint you’ve chosen, allowing sufficient drying time between each coat.
What are the best finishes for plywood furniture after refurbishing?
After refurbishing plywood furniture, the finish you choose is important for both aesthetics and protection. Polyurethane is a popular choice due to its durability and resistance to moisture. For a more natural look, consider using a water-based finish, which tends to dry clear and has a lower odor. If you prefer a matte finish, look for satin or matte polyurethane options. Whichever finish you select, apply it in thin layers and allow proper drying time between coats to achieve a smooth and lasting result.
Is refurbishing plywood furniture a DIY project or should I hire a professional?
Refurbishing plywood furniture can certainly be a DIY project if you have some basic skills with tools and a good understanding of the process. Many people find it a rewarding activity that allows for personal creativity. However, if the furniture is particularly valuable or if you’re unsure about your abilities, hiring a professional might be the better option. A skilled refinisher can ensure a high-quality outcome, especially if intricate techniques like detailed staining or specialized finishes are involved.
What materials do I need for refurbishing plywood furniture?
To refurbish plywood furniture, you will need several materials and tools. Essential items include sandpaper (various grits), wood filler for repairing any dents or scratches, a high-quality primer, and paint or wood stain based on your desired finish. Additionally, you will need brushes or rollers for application, a clean cloth for dusting, and possibly a sealant for added protection. If you plan on adding hardware, such as new handles or knobs, make sure you have the right tools, like a screwdriver. Having these materials ready beforehand will streamline the refurbishing process and help achieve a polished look.


