
 Caleb Turner

To transform simple wooden slats into stylish home accessories, gather a few essential tools first: a saw for cutting, sandpaper for smoothing edges, and wood screws for assembling. Prioritize safety gear like gloves and goggles to protect yourself during the process.
Select your wood components wisely. Look for clean, undamaged pieces–avoid those with excessive wear or splinters. Whether you’re building a coffee table, bench, or shelf, ensure the selected material has been properly treated to withstand the elements if placed outdoors.
Begin with a design blueprint. Sketch a plan that outlines the dimensions and structure of the item you wish to create. This will streamline the construction phase, allowing for efficient assembly and minimizing wasted materials.
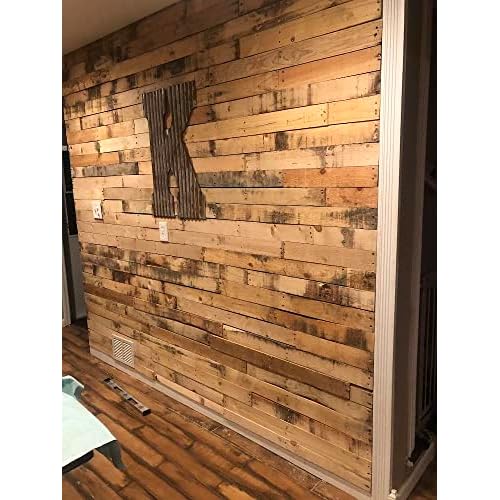


Assembling the components is next. Use wood screws or brackets to secure parts together. Reinforce joints for added stability if the item will bear weight. Always check for squareness with a carpenter’s square to ensure everything aligns perfectly.
Finally, finish your project with attention to detail. Sand all surfaces thoroughly to prevent splinters, then apply paint or sealant for aesthetics and durability. This final touch sets your creation apart, enhancing the overall appearance and protecting the wood.
Choosing the Right Pallets for Your Project
Select high-quality wooden structures that are free from damage, such as deep scratches or broken boards. Look for those stamped with IPPC (International Plant Protection Convention) marks, indicating they have been treated for pests and are safe for reuse.
Prioritize pallets made from hardwood over softwood; the former tends to offer better durability and strength, making them more suitable for various applications. Inspect the wood grain and avoid any that appear warped or have excessive cracks.
Consider the size and weight capacity needed for your project. Standard dimensions generally work well, but tailored solutions may require specific measurements. Always check load ratings to ensure stability and safety.
When obtaining your materials, choose reclaimed options whenever possible. This approach contributes to sustainability and can provide a unique character to your creation. However, ensure these have not been exposed to harmful substances or chemicals.
Evaluate the overall aesthetic you wish to achieve. Different wood finishes, colors, and textures can influence the final appearance significantly, so select pieces that align with your vision.
Lastly, obtain your materials from reputable sources. This ensures the integrity of the wood and reduces the risk of hidden issues that could affect your project’s longevity and safety.
Tools and Materials Needed for Pallet Creation
Gathering the right tools and materials sets the foundation for a successful project. For crafting, ensure you have the following items on hand:
Essential Tools
1. Circular Saw: Ideal for cutting wood quickly and efficiently. A fine-toothed blade minimizes splintering.
2. Drill/Driver: Useful for making holes and driving screws. A set of drill bits is also necessary for versatility.
3. Hammer: For driving nails, especially in construction where speed is vital.
4. Sandpaper or Power Sander: To smooth out rough edges and prepare surfaces for finishing.
5. Measuring Tape: Accurate measurements are key. A tape with both metric and imperial units is advantageous.
6. Square: Ensures corners are true and pieces are aligned correctly.
Materials Required
1. Wood Pallets: Choose ones that are intact and without chemicals. Look for stamps indicating safe treatment.
2. Screws and Nails: Select wood screws that match the density of the wood. For added durability, consider galvanized options.
3. Wood Glue: Strengthens joints and reinforces connections. Opt for a waterproof variety for outdoor pieces.
4. Finish (Stain or Paint): Protects wood from elements. Test samples to ensure you get the desired color and effect.
5. Sealant: Recommended for outdoor items to enhance longevity against moisture and UV rays.
By collecting these specific tools and materials, I’ve found it significantly improves both the process and the results of my projects. Always keep safety gear like gloves and goggles handy as well.
Preparing Pallets for Construction
Remove any damaged or broken slats first to ensure a sturdy base. Check for any exposure to harmful chemicals by looking for stamps or markings; only use those with HT (heat-treated) stamps. Clean the surface with a pressure washer or scrub with a brush to eliminate dirt, dust, and mold.
Inspection Process
Thoroughly inspect each piece for any protruding nails or sharp edges. Use a hammer or a pry bar to remove old nails and reinforce areas that might need extra support. Sanding the surfaces with sandpaper (start with a coarse grit and finish with a finer one) helps prevent splinters and improves the finish.
Tools and Techniques
Gather these tools for effective preparation:
| Tool | Purpose |
|---|---|
| Hammer | Nail removal and adjustments |
| Pry Bar | To pull apart slats if necessary |
| Saw | Cut pallets to required sizes |
| Sander | Smooth surfaces |
| Pressure Washer | Deep cleaning |
After sanding, apply a suitable finish such as wood stain or sealant to enhance durability and appearance. Let it dry completely before proceeding with assembly.
Designing Your Pallet Furniture Piece
Begin with a clear idea of the purpose of your creation. Determine whether it will serve as seating, a table, a bed frame, or storage. Sketch out your design to visualize proportions and dimensions.
Consider the following elements:
- Style: Choose a theme, such as rustic, modern, or industrial, to guide your aesthetic choices.
- Dimensions: Measure the space where the item will be placed. Create a scale drawing to avoid issues with sizes later.
- Functionality: Think about how the piece will be used. If it will be a table, specify the height and surface area needed for comfort.
- Comfort: Ensure that any seating has appropriate height and depth for ergonomic support.
Next, address materials for your design:
- Finish: Decide on treatment such as sanding, staining, or painting that complements your chosen style.
- Accessories: Consider adding cushions or upholstery for enhanced comfort and aesthetics.
- Storage: Incorporate shelves or drawers if additional functionality is required.
Detailed planning will lead to a cohesive and visually appealing end product. Take your time refining the design before moving on to construction.
Assembling Your Pallet Furniture
Begin assembly by gathering all prepared pieces and laying them out according to your design plan. Ensure a clean, flat workspace to facilitate the process.
Joining and Securing Components
Use wood screws or bolts to firmly attach the sections together. Predrilling holes can prevent wood from splitting, especially near edges. Apply wood glue at joints for added stability before tightening screws or bolts.
For larger constructs, consider using brackets or corner braces at critical junctions to enhance durability. When working with multiple levels or surfaces, maintain level alignment using a carpenter’s level throughout the assembly. This ensures a professional appearance and functional stability.
Finishing Touches
After assembling, sand any rough edges to avoid injuries and improve aesthetics. A high-quality outdoor sealant or varnish will protect the surfaces if the piece is intended for outdoor use. Apply at least two coats for optimal durability.
Finally, inspect all connections one last time, tightening screws or bolts as needed. Your completed creation should now be both sturdy and stylish, ready for use in your space.
Finishing Touches: Sanding and Staining
Begin with sanding each piece meticulously. Use a power sander for larger surfaces, transitioning to hand sanding for edges and corners. Start with 80-grit sandpaper to smooth rough areas, followed by 120-grit for a finer finish. Always sand along the grain to avoid scratches.
Tools Needed
- Orbital sander or sanding block
- Sandpaper (80, 120, 220 grit)
- Vacuum or soft brush for dust removal
- Clean cloths
After sanding, clear the dust with a vacuum or a damp cloth. This step is crucial for ensuring even stain application.
Choosing and Applying Stain
Select a stain that complements your color scheme. Test several shades on scrap wood before deciding. Apply with a brush or cloth, following the grain, and ensure even coverage. Let the first coat dry completely before applying a second coat for deeper color.
- Oil-based stains provide durability and rich hues.
- Water-based stains offer quick drying times and easy cleanup.
If desired, finish with a clear sealer to protect the surface. Choose a matte or satin finish to enhance the wood’s natural beauty.
Maintenance Tips for Longevity of Pallet Creations
Regular cleaning with a damp cloth can help preserve the surface with minimal effort. Avoid harsh chemicals that may damage the finish.
Apply a protective sealant every one to two years. This enhances water resistance and guards against UV damage. Choose a sealant that suits your finish–oil-based for a warmer look, water-based for a clear, low-odor option.
Inspect joints and screws periodically. Tighten any loose parts to maintain structural integrity. If you spot any signs of wear, repair them immediately to prevent further damage.
Keep items off the ground if placed outdoors. Raised surfaces prevent moisture absorption from the earth, reducing rot risk. Use coasters or mats indoors to avoid scratches and stains.
Store in a shaded area if outdoors for extended periods. Direct sunlight can lead to fading and warping. Use covers if necessary, and allow airflow to prevent mold.
Avoid excessive weight on any piece, as overloading can lead to stress and eventual failure. Consider recommended weight limits during use.
If painted, regularly check for chips or peeling. Sand and repaint affected areas promptly to maintain aesthetic appeal and protection from the elements.


