
 Caleb Turner
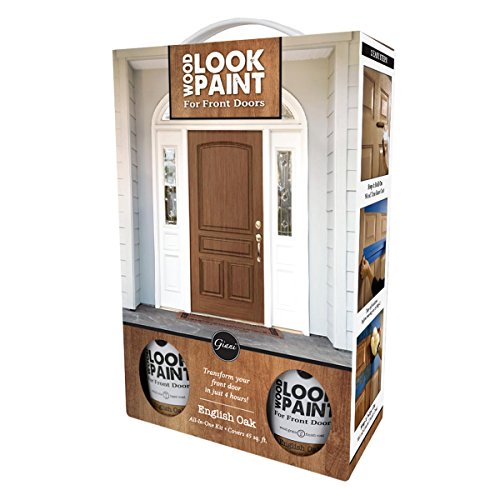
The first step involves selecting a high-quality wood grain adhesive film. This will serve as the foundation for achieving an authentic appearance. Measure the surfaces meticulously and cut the film accordingly, ensuring precise alignment with edges and corners.
Once the film is ready, prepare the underlying surface. Thoroughly clean it with a mild detergent solution to remove any dust or grease that might affect adherence. For an optimal bond, lightly sand the surface to create a texture that promotes adhesion.
After prepping, apply the adhesive film carefully, smoothing out air bubbles with a plastic applicator. This technique ensures a seamless finish that mimics natural wood grains. Following application, allow the film to cure as per the manufacturer’s instructions for the best results.


To enhance the illusion of wood, consider incorporating additional elements such as metallic or matte hardware that complements the new finish, along with suitable decor to blend the piece cohesively into the surrounding space.
Transforming Dark Creations into Natural Charm
Applying a wood grain effect is an immediate approach to achieving a more organic appearance. I use a wood grain paint or wood-patterned adhesive film specifically designed for this purpose. This not only alters the visual appeal but also retains the structure of the original item. After cleaning the surface thoroughly, I apply a base coat of light-colored paint to serve as a background and ensure better adhesion for the wood grain application.
Texturing Techniques
Incorporating a textured finish can significantly enhance the transformation. I utilize a combination of sponges and brushes to create a layered effect, mimicking the natural variations found in timber. Starting with a darker hue for the base and progressively blending in lighter shades allows me to replicate depth. Adding a clear varnish at the end brings out the shine and protects the finish, giving a polished look reminiscent of real wood.
Accessorizing for Authenticity
To further achieve an authentic, natural essence, I recommend pairing these items with accessories made from real timber. I choose knobs or handles crafted from wood to contrast the sleek finish. Incorporating decorative elements like woven baskets or natural fibers into the surrounding space complements the overall aesthetic and creates visual harmony.
Selecting the Right Wood Stain for Black Furniture
Choose a gel stain for optimal control on dark surfaces. Its thick consistency allows for even application without drips, providing a uniform finish that mimics natural timber. Look for colors like walnut or oak, as these emulate common wood tones while providing enough contrast against the base color.
Test your selection on a discreet area first. This helps gauge how the stain interacts with the original finish and ensures you achieve the desired effect. If the result is too bold, consider diluting the stain with a clear finish to create a lighter hue.
Water-based stains are quick-drying and provide a clean application, while oil-based options enhance depth and richness. If a more rustic appearance is your goal, opt for an oil-based stain as it will highlight the grain more effectively.
Lastly, consider using a wood grain tool post-staining. This will help you create an authentic texture, enhancing the illusion of genuine timber. Apply it lightly to avoid overwhelming the already stained surface.
Preparing the Surface for Staining
Begin with a thorough cleaning of the surface. Use a mix of water and mild soap to remove any dirt or grease; this step is vital for proper adhesion of the stain. Rinse well and allow the piece to dry completely.
Next, sand the surface using a medium-grit sandpaper (around 120-grit). This process should focus on creating a smooth texture while ensuring that any previous finish is completely removed. Pay attention to corners and edges, as these areas often retain remnants of paint or varnish.
After the initial sanding, proceed with finer sandpaper (220-grit) for a polished finish. Always sand in the direction of the grain to avoid scratches.
- Use a vacuum or tack cloth to remove all dust particles afterward.
- Inspect the surface for any imperfections that may need further sanding.
For enhanced adhesion, apply a pre-stain wood conditioner. This product helps to prevent blotching and ensures an even absorption of the stain. Follow the manufacturer’s instructions for application, usually requiring a wait time before proceeding with the staining process.
Ensure the workspace is well-ventilated, as fumes from stains and conditioners can be strong. Wearing protective gear such as gloves and a mask is advisable.
Once the surface is adequately prepared and the conditioner has dried, you are ready for the staining phase. This groundwork is key to achieving a realistic appearance of natural timber.
Applying the Wood Grain Effect with Paint Techniques
The wood grain effect can be achieved using techniques like sponging, dragging, or the use of synthetic brushes. First, I prepare the undercoat in a light hue to simulate the base wood color. This serves as a foundation for the subsequent layers.
Sponging Technique
Using a damp sea sponge, I apply a darker shade of paint in a stippling motion. This method creates an organic, textured appearance reminiscent of wood grain. I ensure the sponge is not overly saturated to avoid drips, allowing for better control over the application.
Dragging Technique
For the dragging technique, I apply a glaze over the base layer. With a special wood graining tool or a stiff brush, I pull the glaze in a straight line, mimicking the grain’s flow. To enhance realism, I repeat this process with varying shades of paint, layering until achieving depth.
Spray paint can also be used to establish an even finish for the base layer prior to applying these effects. I prefer working in thin layers for better control and to prevent the effect from becoming too overpowering. Patience is crucial; allowing each layer to dry completely ensures a professional final look.
Combining these methods will yield a unique, customized finish that can transform basic surfaces into pieces that resemble natural timber seamlessly. Regular practice with these techniques will lead to the best results.
Using Wood Veneer to Achieve a Natural Look
Applying wood veneer offers an excellent solution for transforming the appearance of darker surfaces. Choose a thin slice of real wood that matches the desired aesthetic, such as oak, maple, or walnut, to create an authentic look.
Preparation is vital. Clean the surface thoroughly to ensure proper adhesion. I recommend using a high-quality adhesive specifically designed for veneers. Apply it evenly and press the veneer firmly onto the surface, smoothing out any air bubbles.
After the veneer is set, edges may need trimming for a seamless finish. Use a sharp utility knife for precision. Once trimmed, sanding along the edges helps to blend the veneer into the existing material smoothly.
To enhance the wood’s appearance, consider applying a clear sealant. This not only protects the veneer but also adds a depth that mimics natural wood grain. Experimenting with various finishes, such as matte or gloss, can achieve the desired level of sheen.
Incorporate wood stain to emphasize the natural patterns. Applying a stain enhances the visual texture, drawing attention to the grain. Test the stain on a scrap piece first to ensure the desired effect before applying it to your project.
With these steps, I’ve noticed a significant transformation in surfaces, successfully emulating the warmth and character of real wood while maintaining durability and style. This technique also allows for customization to fit various interior design preferences.
Enhancing Texture with Sanding and Distressing
The right techniques can elevate a dark piece into a more textured appearance that mimics natural grain. Begin with medium-grit sandpaper to gently abrade specific areas, focusing on edges and surfaces where wear would naturally occur. This method creates a subtle, worn effect that adds authenticity.
Specific Techniques for Distressing
Consider using a sanding block for control while reducing the risk of overdoing it. Pay attention to corners and high spots where hands typically touch. After sanding, switch to fine-grit paper to smooth the distressed areas. For an aged look, apply a dark wax after sanding; this will seep into the grooves, enhancing the texture.
Layering for Depth
Next, I recommend layering paint techniques. Use a dry brush method with a lighter color over the distressed areas, allowing the darker base to show through. This will create a multi-dimensional finish that echoes natural wood grain patterns. End with a clear sealant to protect the texture while maintaining the new aesthetic.
Sealing the Finish to Mimic Wood Characteristics
For achieving an authentic wood-like appearance, applying a clear sealant is crucial. Select a high-quality polyurethane or water-based topcoat that offers durability and clarity. This not only protects the surface but also enhances the grain effect created earlier.
Before sealing, ensure the faux grain finish is completely dry. I prefer to use a fine-grit sandpaper (220-grit) to lightly sand the surface, giving it a smooth feel without compromising the grain effect.
Application Techniques
Utilize a high-quality brush or foam applicator for the sealant application. Apply the finish in thin, even coats, working with the grain direction to avoid any streaking. Allow each coat to dry thoroughly before lightly sanding again with fine-grit sandpaper. Typically, two to three coats are sufficient for optimal protection and appearance.
Drying and Curing Time
Respect the manufacturer’s instructions regarding drying and curing times. Generally, waiting 24 hours between coats is recommended, while full curing may take up to a week.
| Sealant Type | Durability | Drying Time | Curing Time |
|---|---|---|---|
| Polyurethane | High | 2-4 hours | 3 days |
| Water-based | Moderate | 1-2 hours | 1 week |
| Oil-based | Very High | 4-6 hours | 1 week |
Incorporating these sealing techniques will elevate the finish, achieving a more convincing replicate of natural timber, enhancing both aesthetics and longevity.
Choosing the Right Hardware to Complement the Wood Look
Opt for knobs and pulls in natural materials, such as brass or oil-rubbed bronze. These finishes enhance the warm tones associated with timber. Choose designs that mimic organic shapes like leaves or branches to reinforce the earthy aesthetic.
Types of Hardware
- Knobs: Select round or oval designs that echo the curvature found in nature.
- Pulls: Longer pulls can simulate the feel of handcrafted wooden fixtures.
- Hinges: Use concealed hinges with a matte finish for a sleek, natural profile.
Color Considerations
Opt for finishes that replicate the tones of natural lumber. Neutral and warm metallics can blend harmoniously with stained surfaces. Contrast can be useful too; blackened finishes often enhance the richness of a wooden appearance without overwhelming it.
Scale and Proportion
- Choose larger hardware for substantial pieces to maintain balance.
- Smaller knobs work well on delicate items, enhancing their subtle charm.
Incorporating appropriate hardware influences perception significantly. The right choices can elevate style and reinforce the illusion of natural timber textures, contributing to a cohesive design.
Maintaining and Caring for Wood-Like Furniture Finishes
Regular cleaning is a priority. Use a soft, damp cloth to wipe down surfaces, avoiding harsh chemicals that can strip the finish. For deeper cleaning, a mix of mild soap and water can effectively remove grime without damaging the coating.
Protecting from Scratches and Dings
Consider placing coasters under drinks and using placemats for hot dishes to prevent heat and moisture damage. Felt pads on furniture legs can also minimize scratches when moving items.
Retouching and Restoration
For minor scuffs, a touch-up marker in a matching color can help mask imperfections. If the finish becomes worn or dull, using a specific wood polish can rejuvenate the surface, restoring its luster. Always apply products following manufacturer instructions for optimal results.


