Cleaning the surfaces with a mixture of warm water and mild soap is the crucial first step. This simple solution removes dirt and grime, preparing the material for any refinishing technique to follow.
Next, lightly sanding the surface with fine-grit sandpaper helps to create a smooth finish, ensuring new coatings adhere effectively. Focus on areas with noticeable wear or scratches for best results.
Selecting an appropriate exterior paint or protective coating specifically designed for metal is essential. Opt for products that offer corrosion resistance, enhancing longevity against the elements.


Applying the chosen finish evenly with a spray can or brush provides not only a fresh look but also a protective barrier. Multiple light coats yield better results than one heavy application, reducing drips and ensuring an even finish.
Finally, allowing adequate drying time between coats guarantees durability. Ensuring the environment is dry and free from debris will enhance the overall outcome, resulting in refreshed outdoor seating ready for enjoyment.
Assessing the Condition of Your Aluminum Furniture
Begin with a thorough inspection for visible damage. Look for scratches, dents, or corrosion that may indicate deeper issues. Pay attention to joints and connections, as these areas can weaken over time.
Cleaning Before Assessment
Use a mild detergent and water to clean the surface. Rinse thoroughly and allow it to dry. This step ensures a clear view of any problem areas without debris obscuring the details.
Checking for Corrosion
Examine areas where moisture might gather, such as underneath or in crevices. If corrosion is present, determine its extent. Minor pitting can often be remedied easily, but severe degradation may require more significant intervention.
Inspect paint or finish for peeling or bubbling. This could be an indication that the protective layer is failing, leading to exposure of the underlying material. Surface preparation may be necessary to address these concerns.
Evaluate the structural integrity by applying gentle pressure to various parts. Any wobbling or unusual movement suggests that reinforcement may be needed. Maintaining the strength is crucial for safety and longevity.
Document findings and determine which areas require attention. This checklist approach helps to prioritize repairs and refinishing efforts, ensuring a successful restoration process.
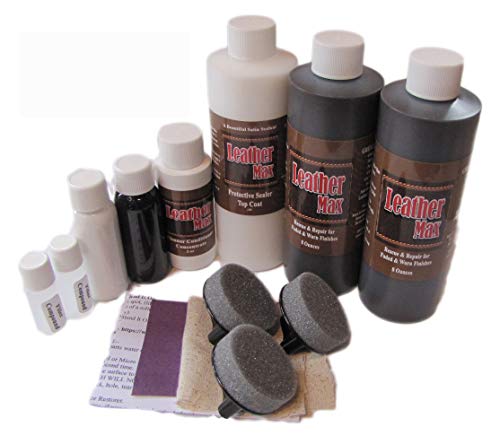
Gathering the Necessary Tools and Materials
For a successful restoration, a few specific items are prerequisites. First, I ensure I have a high-quality cleanser suitable for metal surfaces. A gentle, non-abrasive option works best to avoid damaging the finish.

Grabbing a set of abrasive pads or sandpaper with varying grits is vital. Coarse grits help remove old paint or rust, while finer grits prepare the surface for the final treatment.
A trustworthy primer designed for metal application is crucial. An appropriate primer enhances adhesion for subsequent coatings and helps prevent rust.
Choosing a durable paint or protective coating ensures long-lasting results. Select a formula that specifically states compatibility with metal surfaces and offers weather resistance.
Grab a set of brushes or a spray gun for application, depending on personal preference or the scale of the project. Each method provides distinct finishes, so selecting one that aligns with the desired outcome is important.
Last but not least, have a drop cloth or newspaper nearby to protect surrounding areas from overspray or drips. This step saves time during cleanup and protects other items from potential damage.
Preparing the Surface for Refinishing
Cleaning is the first step in surface preparation. A mixture of mild soap and water effectively removes dirt and grime. Use a soft cloth or sponge to scrub the surfaces thoroughly. Avoid abrasive materials that could scratch the finish.
After cleaning, rinse with clean water and let it dry completely. Any moisture left can interfere with the adhesion of the new coating.
Next, examine for scratches, chips, or peeling paint. Use fine-grit sandpaper (around 220 grit) to smooth out these imperfections. Sanding not only levels the surface but also helps promote better adhesion of the new finish.
In case of extensive damage, consider using a primer specifically designed for metal surfaces. Applying a primer can create a barrier that prevents rust and improves the durability of the finish.
Finally, ensure the working area is free from dust and debris. A clean space will mitigate contamination of the surface during the refinishing process.
Steps to prepare the surface:
- Clean with soap and water.
- Rinse and dry completely.
- Examine for imperfections.
- Sand damaged areas with fine-grit paper.
- Apply primer if necessary.
- Clear the work area of dust and debris.
Selecting the Right Paint or Finish for Aluminum
Choosing the appropriate coating is vital for a durable and appealing makeover. For outdoor metal items, consider using an epoxy or acrylic spray paint, which offers excellent weather resistance.
Types of Coatings
Opt for either a spray-on application or a brush-on formula. Spray paints provide an even coat and are ideal for intricate designs, while brush paints may be preferable for larger surfaces.
Evaluate the finish type: matte, satin, or gloss. Matte finishes can disguise imperfections, while glossy options create a more polished look. A satin finish strikes a balance between the two, providing a subtle sheen.
Color Selection
Color plays a significant role in the overall aesthetic. When selecting hues, consider the existing outdoor elements such as landscaping and architectural styles. Neutral tones typically blend well, while bold colors can serve as eye-catching focal points.
Remember to choose paints labeled as suitable for metal surfaces to ensure proper adhesion and longevity. A primer designed for metal can enhance durability and improve color vibrancy.
Applying Primer and Paint to Aluminum Surfaces
Following surface preparation, a high-quality primer specifically designed for metal is critical. This product aids in adhesion and ensures longevity of the finish. Apply the primer in thin, even coats using a spray can or a brush, ensuring complete coverage. Allow adequate drying time as per the instructions on the primer can, usually around 1-2 hours.
Choosing the Right Paint
Opt for an outdoor paint formulated for direct metal application. Acrylic latex or oil-based paints work effectively. Using a spray gun or brush, layer the paint evenly over the primed surfaces. Apply at least two coats, allowing sufficient drying time between coats, typically 4-6 hours. This ensures a durable and aesthetic result, providing protection against the elements.
Final Touches and Drying
After the final coat, let the painted furniture cure for several days in a dry environment before heavy use. Check the finish for any missed spots and touch them up as necessary. Proper care and an effective finish will enhance the lifespan of these furnishings and maintain their appearance over time.
Curing and Maintaining the Finish After Application
Allowing the finish to cure properly is crucial for durability. I keep the freshly painted items in a dry, well-ventilated area away from direct sunlight and moisture for at least 24 to 48 hours, depending on the specific product used.
Monitoring and Adjusting Conditions
During the curing process, I monitor temperature and humidity levels. Ideal conditions are typically between 65°F and 85°F (18°C – 29°C) with humidity below 70%. If necessary, I adjust the environment by using fans or dehumidifiers to achieve these conditions.
Long-Term Maintenance
To preserve the finish:
- Regularly clean surfaces with a mild soap and water solution. Avoid abrasive materials that can scratch the coating.
- Inspect yearly for signs of wear or damage, such as chips or scratches, and address them promptly to prevent further deterioration.
- Apply a protective wax or sealant designed for metal surfaces every season to enhance shine and create an additional protective layer.
Tips for Long-Lasting Results on Outdoor Furniture
Opt for high-quality, weather-resistant coatings specifically designed for outdoor use. These products add durability against environmental elements.
Regular cleaning with mild soap and water removes dirt and grime, preventing buildup that can damage the surface. A soft sponge or cloth works best for this purpose.
Consider using a UV protectant spray after finishing. This additional layer helps shield surfaces from sun damage, prolonging the lifespan of the finish.
Store pieces indoors or in a covered area during extreme weather conditions. Even well-finished items can succumb to harsh elements if left exposed.
Utilize soft covers when not in use. They offer extra protection from dust and moisture while allowing air circulation to eliminate humidity retention.
Conduct periodic inspections for scratches or chips. Quick touch-ups can prevent further deteriorating, maintaining a polished appearance.
| Maintenance Task | Frequency |
|---|---|
| Cleaning | Monthly |
| Inspection for damage | Every season |
| Reapply UV protectant | Annually |
| Touch-up paint or finish | As needed |
By maintaining vigilance and performing regular upkeep, it’s possible to achieve long-lasting beauty and functionality of outdoor settings.