Caleb Turner

Begin with a thorough cleaning using natural soap and warm water. Ensure every corner is attended to, as accumulated dirt can hide the wood’s true beauty. A soft cloth is optimal for this task, preventing scratches while lifting away years of grime.
After drying, assess the surface for scratches and dents. Using wood filler, I meticulously repair these imperfections, allowing it to dry before sanding gently to blend with the surrounding area. This step is crucial for a smooth finish.
Next, choose a suitable finish to enhance the wood’s character and protect it from future wear. Oils, waxes, or varnishes can bring warmth and shine back, but I prefer natural oils like tung or linseed for their protective qualities and ease of application. Applying in thin layers allows me to control the shine and texture.

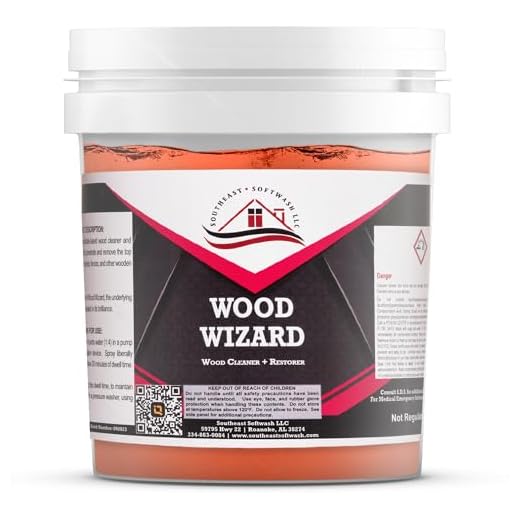

Finally, consider reupholstering or re-staining if the piece has fabric or a color that no longer fits your aesthetic. A fresh upholstery choice can breathe life into the item, making it a focal point in any space. Keep the original craftsmanship in mind while selecting materials, ensuring harmony with the wood’s essence.
Revitalizing Vintage Timber Creations
Begin with a thorough cleaning using a mixture of warm water and gentle soap. Apply it with a soft cloth, avoiding excess moisture. Don’t forget to dry the surface immediately to prevent damage.
Addressing Scratches and Dents
For minor imperfections, use a wax stick or crayon that matches the hue. Gently fill the scratches and buff the area with a soft cloth. For deeper dents, try applying a damp cloth and using an iron on a low setting to steam the wood. The steam will help raise the wood fibers.
Finish Restoration
After repairing, consider enhancing the appearance with suitable finishes. Choose oils like linseed or tung oil to nourish the material and bring back its natural glow. For a more durable finish, opt for polyurethane or varnish. Apply thin coats using a brush or cloth, sanding lightly between applications.
- Ensure proper ventilation during the application process.
- Test any product on an inconspicuous area first to avoid discoloration.
- Apply multiple thin layers instead of one thick coat for best results.
Assessing the Condition of Your Furniture
I begin by closely inspecting the surface for any signs of damage, such as scratches, dents, or discoloration. A thorough examination allows me to identify the areas that require attention first.
Next, I check for structural issues like loose joints or wobbling legs. I gently shake the piece to determine its stability. If I notice any instability, it indicates potential repairs needed.
I also look for signs of pest infestations. Tiny holes or sawdust near the furniture can signify wood-boring insects. If I find any evidence, I ensure to address this before proceeding with restoration.
Checking the finish is crucial. I assess if it’s worn out or peeling. I run my hand over the surface, feeling for rough patches or areas where the finish has deteriorated. A test in an inconspicuous spot can reveal how the finish reacts to cleaning products.
If the piece has a previous stain or paint, I consider whether it’s removable. I take a small area and test a solvent to see if it helps lift the old finish. This step gives me insight into the restoration method I might choose.
Lastly, I evaluate any sentimental or historical value. Understanding its background helps me decide how gently or aggressively to approach the transformation process. This consideration shapes my overall strategy for preservation.
Choosing the Right Cleaning Solutions
I recommend opting for gentle, pH-balanced cleaners specifically formulated for delicate surfaces. Look for products that contain natural ingredients to minimize the risk of damage.
For basic cleaning, a mixture of warm water with a few drops of mild dish soap can effectively remove dirt without harming the finish. Apply the solution using a soft cloth and avoid soaking the wood.
In cases where deeper cleaning is necessary, consider using a solution of equal parts water and white vinegar. This mixture cleans thoroughly while neutralizing odors. Always test on a hidden area first to ensure there’s no adverse reaction.
If you encounter stubborn stains or sticky residues, apply a small amount of mineral spirits with a soft cloth. This solvent is gentle yet effective for lifting grime without causing discoloration.
When dealing with wax or polish buildup, a specialized wax remover can be beneficial. Apply it according to the manufacturer’s instructions and follow up with a clean, dry cloth.
Always avoid abrasive cleaners, bleach, or ammonia, as they can erode finishes or discolor the material. Stay away from commercial all-purpose cleaners unless specified safe for natural wood.
Finally, ensure proper ventilation when using any cleaning solution, as some may release strong odors or fumes. Working in a well-ventilated space protects both your health and the integrity of the item being cleaned.
Removing Old Paint and Finish
To strip away unwanted coatings, I recommend using a chemical paint stripper that’s compatible with the type of finish on your piece. Apply the stripper evenly using a brush, ensuring full coverage. Allow it to sit for the time specified by the manufacturer, usually between 15 minutes to a couple of hours, depending on the product and layers to be removed.
Once the time has elapsed, carefully remove the softened material using a putty knife or a scraper. Always work in the direction of the grain to minimize damage to the surface beneath. Rinse the area with water or a damp cloth to neutralize any chemical residue, if required.
For fine details, consider using a small wire brush or steel wool to get into crevices without harming the surrounding wood. Wear gloves and a mask for safety when handling chemicals, and ensure proper ventilation in the workspace.
If the finish is stubborn, multiple applications may be necessary. After removing the paint, sand the surface lightly with fine grit sandpaper to smooth out any imperfections and prepare it for the next steps. Assess whether there are any additional treatments needed for any underlying damages, ensuring a clean slate for the next finish.
Repairing Scratches and Dents
To address scratches, I mix a tablespoon of olive oil with a tablespoon of vinegar. I apply this mixture onto the affected area using a soft cloth, rubbing gently in a circular motion until the scratch diminishes. This not only helps to mask the blemish but also nourishes the surface. For deeper scratches, I resort to a wood filler that closely matches the finish of the piece. After applying it, I wait for it to dry before sanding it smooth, then I reapply finish to blend it in.
Dents require a different approach. I utilize a damp cloth, placing it over the dent, and then I carefully apply heat with a clothes iron on a low setting. The steam from the cloth helps the wood fibers swell, allowing the dent to rise. I then finish by sanding the area lightly and reapplying the necessary finish for a seamless look.
For a quick fix on small scratches, I’ve found that a walnut can work wonders. Rubbing the nut over the scratch fills it with natural oils and darkens the area to match the surrounding wood. Always remember to buff the surface afterward with a clean cloth to ensure an even appearance.
Maintaining a consistent finish throughout the piece is key. I carefully blend any touch-ups with the surrounding areas, using a fine brush to apply touch-up markers that match the original color. This step is crucial for achieving a professional look after repairs.
Refinishing Techniques for a Fresh Look
Choose between oil-based or water-based stains for an appealing finish, depending on the desired effect. Oil-based products tend to enhance the natural grain and provide a rich color, while water-based options dry faster and emit fewer fumes.
Application Process
Utilize a high-quality brush or foam applicator to apply stain evenly. Work in the direction of the grain to avoid visible lap marks. Allow the first coat to dry thoroughly, then lightly sand with fine-grit paper before applying a second coat for depth.
Sealing and Protection
Once satisfied with the stain’s look, seal the surface with a suitable finish. Polyurethane provides durability, whereas wax offers a softer, natural sheen. For applied consistency, use a clean cloth or a brush to apply, following the manufacturer’s instructions.
| Finish Type | Characteristics | Best For |
|---|---|---|
| Oil-Based Polyurethane | Durable, amber tint | High-traffic areas |
| Water-Based Polyurethane | Clear, quick-drying | Indoor use with less odor |
| Wax | Soft, natural look | Low-traffic pieces |
| Shellac | Warm, natural finish | Indoor accent pieces |
Regular maintenance enhances longevity. Clean surfaces with a damp cloth and apply a fresh coat of wax or polish every few months to keep the luster intact. This approach ensures a continually appealing aspect and protects against forthcoming wear.
Applying Protective Coatings
Choosing the right type of protective coating is crucial for preserving the look and longevity of my restored items. I prefer using polyurethane varnishes for a durable finish that resists scratches and moisture. For a natural appearance, water-based finishes are an excellent choice, providing a clear coat that showcases the grain.
Before applying any coating, I ensure the surface is clean and free of debris. I use a fine-grit sandpaper to lightly sand the surface, which helps the finish adhere better. After sanding, I wipe down the area with a damp cloth to remove any dust particles.
I apply the protective layer using a high-quality brush or a foam applicator, working in the direction of the grain. Thin coats are more effective, allowing for better drying and preventing drips. Typically, I allow each coat to dry for at least 4-6 hours before lightly sanding again and adding subsequent layers. Two to three coats are generally sufficient for protection.
Consider UV protection if the piece will be exposed to sunlight, as this helps prevent fading over time. Additionally, I always read the manufacturer’s instructions for specific application tips and drying times. After the final coat, I let the item cure fully for several days before putting it back into use.
Adding New Hardware for Modern Appeal
Replace outdated knobs and handles with sleek, contemporary options to instantly refresh the look of your piece. This simple swap brings a touch of current design trends while allowing you to customize the aesthetic. Opt for materials like brushed nickel, matte black, or polished brass to create a striking contrast against the existing finish.
Consider the proportions of your item; larger hardware can make a bold statement, while smaller, minimalist designs can enhance a more understated elegance. Items like pulls or latches can also add functionality and visual interest.
Before installation, measure the existing holes to ensure compatibility. If necessary, patch any unused holes and drill new ones carefully to avoid damaging the surface. I recommend using a level to align new hardware precisely, ensuring a professional finish.
For a truly unique touch, explore custom options. Local artisans or online platforms offer personalized designs that reflect your style, turning standard items into conversation starters. Pairing personalized pieces with complementary colors or finishes enhances the overall appeal.
This approach not only updates the visual aspect but also improves usability, creating a perfect blend of style and practicality.
Incorporating Creative Upholstery Ideas
Transforming seating elements can dramatically alter the overall aesthetic of your piece. Choose bold fabrics that make a statement or subtle textures that enhance the existing character.
Selecting Fabrics
- Opt for durable materials like canvas or denim for high-traffic items.
- Consider natural fibers such as linen or cotton for a breathable option.
- Incorporate patterned upholstery to add visual interest, like stripes or florals.
Adding Unique Touches
Incorporate unexpected elements to elevate the look. Use contrasting piping along the seams to create a crisp outline. Decorative buttons can also provide a vintage charm that complements the style.
- Implement tufting for a sophisticated appearance; this can add depth and texture.
- Explore mix-and-match upholstery for a playful, eclectic vibe.
Usability should not be overlooked. Ensure padding is adequate for comfort and longevity. Layering foam with batting can give a cushioned feel while still maintaining support.
After reupholstering, accessorize with coordinating throw pillows or blankets that can bring additional style and comfort.
Maintaining Your Revived Furniture
Regular dusting with a soft, lint-free cloth helps keep surfaces clear of dirt and grime. I prefer microfiber as it doesn’t scratch the finish.
Utilize a specialized cleaner designed for the material of your piece to address stubborn stains or spills. Always test in an inconspicuous area first to ensure compatibility.
For polished items, apply a quality furniture polish occasionally. I apply it with a clean cloth in a circular motion, enhancing the shine while providing a protective layer.
Prevent exposure to direct sunlight, as UV rays can fade finishes and colors. Position items away from windows or use sheer curtains to diffuse light.
Humidity and temperature fluctuations can cause wood to warp. I maintain consistent indoor conditions and recommend using a humidifier or dehumidifier as needed.
Periodically inspect joints and hinges for tightness. Loose components can lead to structural issues. I tighten screws or replace hardware whenever necessary.
Consider occasional reconditioning of the finish. I found that applying a suitable wax or oil can rejuvenate the surface and extend its lifespan.
Always place coasters under drinks to prevent water rings, and use placemats for hot items, reducing wear on the surface.