First, focus on assessing the extent of the damage. Check for rust, cracks, or loose joints. For minor issues like surface rust, fine-grit sandpaper works wonders. Gently sand the affected areas until the rust is removed, making sure to wear a mask to avoid inhaling any particles.
Next, prepare a solution of equal parts vinegar and water for cleaning. This natural cleaner helps remove dirt and grime, allowing you to inspect the surface thoroughly. Wipe down the furniture with a soft cloth, paying close attention to crevices. After cleaning, rinse with water and dry completely to prevent further corrosion.
Once you have a clean slate, proceed to fill any cracks or holes with an appropriate metal filler. Follow the product instructions carefully; typically, you’ll need to apply the filler with a putty knife, ensuring a smooth finish. After it dries, sand it down to blend with the surrounding area.
Finally, consider applying a protective coat. Choose a high-quality exterior metal paint or sealant designed for outdoor use. This not only enhances the appearance but also creates a barrier against the elements, prolonging the life of your outdoor seating and tables.
Tips for Fixing Damaged Outdoor Seating
Apply a coat of rust-inhibiting primer to the affected areas after cleaning the surface thoroughly. This will enhance adherence for subsequent paint layers.
For severe dents or bends, utilize a rubber mallet or a block of wood. Position the block against the protrusion and gently tap until the surface is flush.
If parts are loose, tighten screws or bolts using a socket set. Ensure that the connections are not stripped; replace any cross-threaded hardware to maintain stability.
In cases of extensive wear, consider reinforcing joints with metal brackets. Use self-tapping screws to secure these brackets to ensure durability.
When addressing gaps or cracks, epoxy filler serves as an excellent bonding agent. Apply it carefully to avoid excess material that may require sanding post-curing.
Adopting a consistent maintenance schedule will prolong the lifespan of outdoor pieces. Regular inspections will help identify emerging issues before they escalate.
Finally, choose high-quality outdoor-grade paint to finish the project. This protects the structure from weather conditions and enhances its appearance.
Assessing Damage: Identify the Type of Repair Needed
First, examine the item thoroughly for visible fractures or bends. A careful inspection can reveal whether components need reinforcement or complete replacement. Look for rust, which indicates potential deterioration, and test joints for looseness, as this often indicates weakened areas.
Types of Damage
If the structure is dented, assess the depth and location. Minor dents can often be leveled out using a rubber mallet, while deeper deformities might require more extensive methods. For any cracked sections, consider purchasing a suitable filler or welding supplies based on the severity. Remember to account for connections between parts; loose screws or bolts can often be tightened but may require new hardware if stripped.
Identifying Materials
Determine the type of alloy used. Different metals have specific characteristics impacting repair methods. For aluminum, soldering is sometimes effective, while steel may need welding. Identifying the finish is also crucial–powder-coated surfaces require special care to avoid damaging the protective layer. Understanding these aspects will guide you in selecting the right approach to bring your outdoor items back to a usable state.
Gathering Required Tools and Materials for Repair
To successfully tackle the restoration of your outdoor seating, it’s essential to have the right tools and supplies ready. Start with a sturdy wrench set for tightening and loosening bolts or screws. A selection of screwdrivers, both flat-head and Phillips, will also be necessary for various fasteners.
Safety Gear
Always prioritize safety. Equip yourself with gloves to protect your hands from sharp edges and debris. Consider safety goggles if you’ll be sanding or grinding any rough spots.
Repair Materials
Gather essential materials such as welding rods or metal epoxy if welding is needed. For minor fixes, a high-quality metal paint will help touch up any areas after work is complete. Ensure you have sandpaper or a sanding block for surface preparation and smoothing out rough edges before applying paint or finishing materials.
Repairing Scratches and Rust Spots on Metal Surfaces
To effectively treat scratches and rust on your outdoor seating, I recommend the following steps:
- Clean the Area: Use a mixture of water and mild soap to remove dirt and debris. A soft cloth or sponge works best.
- Sand the Scratches: For shallow scratches, sand the area lightly with fine-grit sandpaper (around 320 grit) to smooth the surface. For deeper scratches, a coarser grit may be necessary to level the area before finishing with finer sandpaper.
- Address Rust Spots: Utilise a rust remover or a solution of vinegar and baking soda. Apply it to rusted spots, let it sit for about 30 minutes, then scrub with a wire brush or steel wool until the rust is gone.
- Rinse and Dry: Thoroughly rinse the treated areas with clean water to remove any chemicals, then dry completely. This step prevents further rusting.
- Apply Primer: For any exposed areas, apply a rust-inhibiting metal primer. This provides a protective layer and enhances adhesion for paint.
- Paint the Area: Once the primer is dry, use exterior metal paint matched to your original finish. Two coats may be necessary for complete coverage.
- Seal and Protect: Finish with a clear sealant designed for metal surfaces. This adds further protection against moisture and scratches.
After completing these steps, I monitor the treated areas regularly to ensure long-lasting results. Prompt attention to new scratches or rust spots can preserve the integrity and appearance of my outdoor furniture.
Fixing Loose Joints and Connections on Outdoor Seating
I recommend that the first step in stabilizing any loose connections is to carefully examine the affected areas for visible wear or separation. If joints appear to be merely unscrewed, I use the appropriate screwdriver or wrench to ensure they are tightened securely. In instances where screws or bolts are stripped, I opt for larger replacements or insert a wood or metal filler into the original hole to allow for better grip.
If the connections involve welded parts, I suggest using a strong adhesive designed for metal bonding when welding is not feasible. This can provide sufficient strength for lighter weight applications. Before applying adhesive, I ensure that both surfaces are clean and free of rust or residue.
For parts that require more reinforcement, I sometimes use corner braces or metal plates, bolting them onto the framework where joints are weak. This additional support can prolong the life of the structure and enhance its overall stability.
If joints are designed to allow for movement, like folding or collapsible features, ensure moving parts are well-lubricated to prevent friction that could lead to further loosening. I apply machine oil or a silicone-based lubricant, which can keep joints functioning smoothly.
Lastly, after all adjustments, I give the entire structure a good shake to test stability. This helps to catch any remaining loose areas that may require additional attention. Regular maintenance checks for loose joints ensure the longevity and safety of outdoor seating.
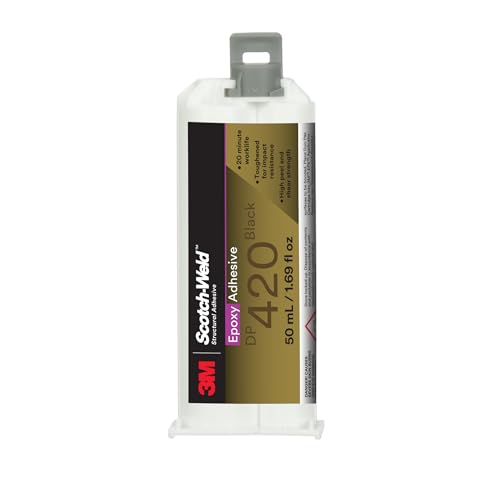
Reinforcing Weak Areas: Welding vs. Epoxy Adhesives
For strengthening areas with diminished integrity, I consider both welding and epoxy adhesives. Each method offers distinct advantages based on the type of damage and the materials involved.
Welding delivers unmatched strength. It creates a permanent bond by melting the base materials and fusing them together. This method suits structural repairs where load-bearing capabilities are essential. It’s recommended to use MIG or TIG welding for aluminum or steel components. Personally, I ensure proper safety measures are in place, such as protective gear and adequate ventilation.
Epoxy adhesives, on the other hand, provide a simpler application process without complex equipment. They work well on smaller cracks or points where welding might be impractical. After thorough cleaning of the surfaces, I apply the epoxy and allow it to cure completely. It’s crucial to select a high-quality adhesive formulated for metals to achieve a robust bond.
| Method | Advantages | Disadvantages |
|---|---|---|
| Welding | Strong, permanent bond; suitable for load-bearing areas | Requires equipment, skill, and safety precautions |
| Epoxy Adhesives | Easy to use; no specialized tools needed | Potentially less strong compared to welding |
Choosing between these two strategies depends on the extent of the damage and my comfort with the techniques. In many cases, I find a combination of both methods yields the best results, ensuring long-lasting stability for my outdoor seating.
Finishing Touches: Painting and Protecting Repaired Furniture
After addressing structural issues, focus on aesthetics and longevity. Choose high-quality outdoor paint specifically designed for metallic surfaces to ensure durability under various weather conditions.
Follow these steps for optimal results:
- Preparation: Clean the surface thoroughly to remove any dust, grease, or remnants from previous layers. Use a wire brush or sandpaper to ensure a smooth base.
- Primer Application: Apply a rust-inhibiting primer. This step enhances adhesion and prevents future corrosion.
- Painting: Use a spray or brush method to apply the paint in thin, even coats. Allow sufficient drying time between each layer, typically 24 hours.
- Sealer: Once the paint has cured, apply a protective sealer to further safeguard against the elements. Look for a clear coat that offers UV protection to prevent fading.
Regular maintenance is key to extending the life of your restored items:
- Inspect periodically for any signs of wear or damage.
- Reapply paint or sealant as needed, especially after harsh weather.
With these finishing touches, your rejuvenated pieces will enhance your outdoor space while withstanding the test of time.


