 Caleb Turner
For a stunning transformation of flat-pack pieces into rich, wood-like aesthetics, I recommend first sanding the surface gently to ensure better paint adhesion. Choose a high-quality primer that is compatible with the material of your chosen item; this step is crucial for achieving that authentic finish.
Next, select a paint, ideally in shades of brown or gray, formulated specifically for surfaces resembling timber. Utilize a foam roller for even coverage, and a brush can help achieve the desired texture in hard-to-reach areas. Patience is key here; allow each layer to dry thoroughly before applying the next, which helps create depth in the coloration.


Once the color application is complete, to add realism, consider glazing with a wash of a darker hue. This will accentuate any contours and provide a fine, aged appearance. Finally, seal your work with a protective varnish to enhance durability while maintaining a natural look.
Transforming Surfaces for a Wood-like Appearance
For authentic textures that mimic timber, I recommend starting with a high-quality primer designed for non-porous materials. This ensures that the subsequent layers adhere properly, creating a durable finish. Once the primer is dry, using a foam roller gives a smooth base layer, preventing brush marks.
Creating the Grain Effect
To achieve the desired grain, I apply a brown or tan tinted glaze. Working in sections, I brush on the glaze, and immediately follow it with a wood grain tool or a comb to create patterns resembling natural grain. Experimenting on scrap pieces first helps refine the technique.

Finishing Touches
After the glaze dries, sealing the surface with a satin or matte polyurethane varnish enhances the depth while protecting against wear. Multiple thin coats work better than a single heavy layer. For a natural appearance, sand lightly between applications to achieve a softer finish that resembles real timber.
Selecting the Right Paint Type for a Wood Finish
For achieving an authentic timber appearance, I recommend using acrylic or latex-based formulations. These options not only provide good adhesion but also offer flexibility during application, making it easier to avoid cracks and peeling over time.
Acrylic Paint
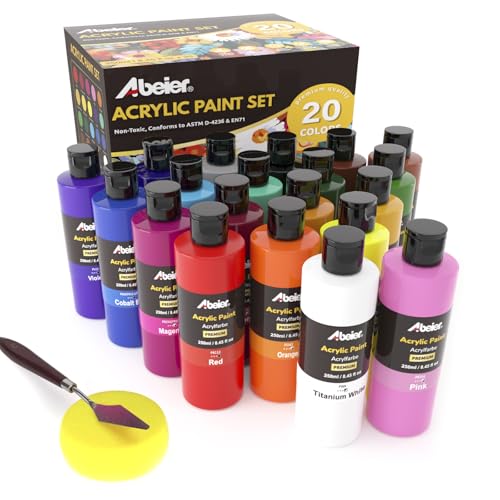
Acrylic formulations are water-based, which means they are low in fumes and quick to dry. This allows for multiple layers in a single day. Pick a matte or satin finish to enhance the realism of grain. When choosing colors, opt for those that mimic natural wood tones closely.
Chalk Paint
Chalk-based products can create a soft, textured finish reminiscent of aged timber. Their matte finish and ease of distressing enhance the overall aesthetic. To protect the surface, applying a clear topcoat is advisable, as chalk paints can be more susceptible to damage.
Preparing IKEA Furniture for Painting
Thorough cleaning is non-negotiable. I use a mixture of warm water and mild soap to eliminate dirt, grease, and dust. A microfiber cloth ensures a smooth surface for the next steps.
Once dry, I gently sand the entire surface with fine-grit sandpaper. This step is crucial for creating a matte finish that allows the new coating to adhere effectively.
After sanding, I wipe away the dust with a tack cloth. This prevents any particles from interfering with the new finish.
If the piece has any shiny areas, I repeat the sanding process. Uneven surfaces can impede a seamless transformation.
Next, I fill in any dents or scratches with wood filler. Following the manufacturer’s instructions is vital for achieving a uniform appearance; I ensure it’s completely dry before proceeding.
To protect non-painted areas, I apply painter’s tape along edges and surfaces where I want to avoid overspray or brush marks.
Finally, using a primer suitable for an oil or water-based finish will create an optimal base, enhancing the overall result. I make sure to choose a primer specifically designed for surfaces that will mimic natural material, as this will provide added depth.
Choosing the Best Brush and Painting Technique
Select a high-quality synthetic brush for applying your medium. Brushes with angled bristles work well for detailed areas, while wide brushes cover larger sections efficiently. A foam roller can also be useful for smooth surfaces, providing a uniform application.
Lay down a thin, even layer of your chosen coating. This technique prevents drips and ensures the finish resembles natural grain. Use long, sweeping strokes in the direction you want to mimic the texture of timber. For a more realistic effect, experiment with a stippling technique–lightly tapping the brush to create small impressions that resemble knots and grain.
Consider using a combination approach; apply the first coat with a brush and follow up with a roller for a lustrous appearance. After the initial drying, use a dry brush to add subtle highlights and shadows. This method adds depth and dimension, enhancing the overall replication of authentic wood.
Always clean your tools promptly after use, especially if you plan multiple sessions. Proper maintenance prolongs the lifespan of your brushes, ensuring optimal results on future projects.
Applying Base Coat for an Authentic Wood Look
For achieving a genuine appearance reminiscent of timber, applying a base coat is crucial. I begin with a primer that provides a solid, even foundation. A water-based primer is often the best choice due to its quick drying time and ease of cleanup. Apply the primer with a synthetic brush or foam roller to ensure an even coat across the surface.
After applying the primer, I allow it to dry completely, usually for about 1-2 hours. This step prevents any unwanted interactions with the subsequent layers. Once dry, lightly sand the surface using fine-grit sandpaper to create a smooth feel and enhance adhesion for the next layer.
I prefer using a shade of brown that mimics the undertone of the desired wood, often referred to as a base color. This base coat should be applied in thin layers to maintain a realistic texture. When applying the base coat, I use a brush in one direction to create the natural grain effect, ensuring to work quickly to avoid drips and uneven patches.
After the initial layer has dried, I check for any patches that may need touch-ups, which I address before moving on to the layering process. This careful application sets the stage for the final wood-like finish, enhancing the overall authenticity of the project.
Creating Wood Grain Effects with Glaze
Using a glaze is the key to achieving an authentic grain pattern. I recommend selecting a translucent glaze in a shade that complements your chosen base. This allows for a layered effect that mimics real timber.
Tools and Materials You Will Need
| Item | Description |
|---|---|
| Translucent Glaze | Choose a color that enhances the base coat. |
| Graining Tool | Utilize rubber combs or brushes designed for creating lines. |
| Rag or Cloth | For blending and softening the glaze. |
| Clear Sealer | To protect the finished surface. |
Apply the glaze with a wide brush, working in sections. I like to start at one end and swiftly spread the mixture. Follow with a graining tool, pressing it lightly into the glaze while pulling it through the wet surface to create lines that resemble natural wood texture.
To soften harsh lines, loop a clean rag through the freshly applied glaze, gently dabbing until the desired grain effect is achieved. Allow the glaze to dry fully before applying a clear sealer for added durability. This method provides depth and realism, ensuring the final finish is striking and convincing.
Sealing Your Painted Furniture for Longevity
Applying a protective topcoat is crucial for maintaining the quality and durability of your newly finished surfaces. I always recommend using a polyurethane sealer due to its excellent resistance to scratches, stains, and moisture. Choose a water-based option for low odor and quick drying, or an oil-based variant for a richer finish, depending on your preference and specific needs.
Application Techniques
Use a clean, high-quality synthetic brush or a foam applicator to achieve an even layer. Work in small sections, brushing in the direction of the grain for a seamless appearance. Avoid overworking the material; simply apply and let it settle. Thin coats are more effective than thick layers, so don’t rush this step.
Curing and Maintenance
Allow your sealant to cure completely, which may take several days. During this period, avoid placing heavy items on the surfaces. For ongoing maintenance, consider applying a fresh coat of sealer annually to keep everything protected and looking fresh. Regular dusting and gentle cleaning with a damp cloth prevent wear and keep the surfaces vibrant.
In addition, always be mindful of direct sunlight and heat sources. Position items away from harsh conditions to prolong the life of the finish. Following these guidelines ensures that your creations stay beautiful and functional for years to come.
Maintaining and Touching Up Your New Wood Finish
Regular upkeep extends the life of your newly transformed pieces. For routine cleaning, use a damp cloth to gently wipe surfaces. Avoid abrasive materials that can scratch the finish.
Identifying Wear and Tear
Inspect your items every few months for signs of fading or chipping. Pay attention to high-traffic areas, such as edges and corners, which are prone to wear.
Touch-Up Techniques
- For minor scratches, use a touch-up pen that matches your finish. Apply it carefully and blend it in with a soft cloth.
- If you notice larger areas of damage, lightly sand the affected area with fine-grit sandpaper, then reapply your glaze or finish to restore the original appearance.
- For persistent stains, consider a furniture polish that contains a tint similar to your finish. This can rejuvenate the color while adding a protective layer.
After completing any touch-ups, allow the area to dry completely before using the item again. Regular maintenance ensures lasting beauty and functionality in your pieces.
FAQ:
What materials do I need to paint IKEA furniture to resemble wood?
To achieve a wood-like finish on your IKEA furniture, gather the following materials: high-quality primer suitable for laminate surfaces, wood grain painting kit or wood effect paint, a detailed brush for wood grain texture, a foam roller for a smooth finish, sandpaper (medium and fine grit), clean cloths, and a sealant or topcoat for durability. Make sure to also have painter’s tape to protect areas you don’t want painted.
Can I paint my IKEA furniture without sanding it first?
While sanding is not strictly necessary, it is highly recommended for the best results. Sanding helps the primer adhere better to the surface, especially on laminate furniture. If you want to avoid dust, you can opt for a deglosser instead to prepare the surface. However, if you choose not to sand, be sure to apply a high-quality primer that is designed for slick surfaces to ensure a lasting finish.
How can I create a realistic wood grain effect when painting?
To create a realistic wood grain effect, use a wood grain painting kit which typically includes a wood grain tool. After applying the base coat, while the paint is still wet, use the wood grain tool to drag through the paint, resembling the natural lines and patterns found in real wood. Layering different shades of brown, tan, or even gray can add depth and authenticity to the finish. Practice on a scrap piece if you’re unfamiliar with the technique.
How long does it take for the paint to dry completely before using the furniture?
The drying time can vary depending on the type of paint and the environmental conditions. Generally, you should allow at least 24 hours for the paint to dry to the touch. However, for the best results, waiting up to a week before putting any items on the furniture is advisable. This allows the paint to cure fully and reduces the risk of damage. Always check the paint manufacturer’s recommendations for specific drying times.