Caleb Turner

To tackle the challenge of extracting dowels from your setup, I recommend using a gentle heating technique. Begin with a heat gun or a hairdryer on a low setting, directing the warm air toward the area surrounding the dowels for a few minutes. This helps soften any adhesive that may be causing them to stick.
Once the area is warmed, take a pair of pliers to grip the protruding section of the dowel firmly. Careful twisting and pulling can often dislodge it without damaging the surrounding surface. If necessary, consider using a flathead screwdriver to gently pry around the edges, ensuring not to mar the finish.
If resistance persists, a mixture of vinegar and warm water can aid in further loosening the adhesive. Soak a cloth in the solution and apply it to the area for several minutes. With a bit of patience and these practical steps, you can successfully remove those stubborn dowels and restore your piece.
Identifying the Type of Wooden Plug
Assessing the characteristics of the wooden insert is crucial for a successful removal process. First, check the shape and design. Common configurations include cylindrical, square, or oval forms. Identifying the shape aids in selecting the right tools for extraction.


Materials and Finish
Determine the material from which the insert is made. Hardwood or softwood options require different handling techniques. Examine the finish; glossy finishes may indicate a protective coating, while matte finishes suggest a natural wood type.
| Plug Type | Material | Common Tools |
|---|---|---|
| Cylindrical | Hardwood | Extractor or Pliers |
| Square | Softwood | Flathead Screwdriver |
| Oval | Plywood | Prise Tool |
Visual Indicators
Check for visible gaps or seams between the plug and the surrounding material. Gaps may indicate that the plug is not securely fitted. Look for any signs of wear or damage that can signify how deeply inserted the plug is. These clues offer insights into whether additional force might be necessary during removal.
Tools Needed for Plug Removal
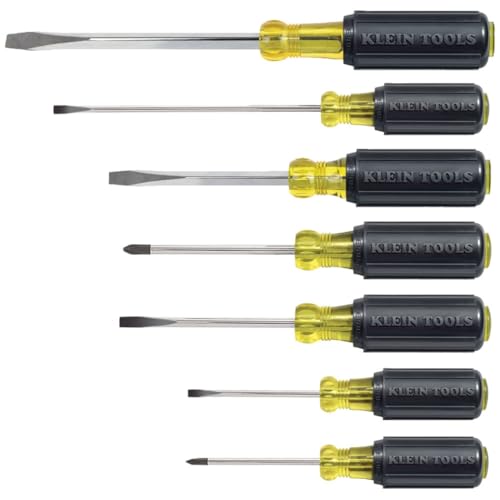
Begin with a small flathead screwdriver, which helps pry the insert gently from its seated position. A hammer may also be needed if the fit is particularly tight, allowing for a controlled force application to ease the piece out without damage.
Pliers and Extractors
Needlenose pliers are useful for gripping and twisting the remaining sections, especially if the wood fragment is partially exposed. If a portion is stuck inside, a plug extractor can provide a more precise grip, ensuring a clean removal.
Drilling Equipment
If resistance is too strong, drilling a small hole at the center of the stubborn piece can help. Use a drill bit that matches the size of the plug, ensuring not to penetrate too deep into the underlying material. This technique allows for easier extraction with the other tools.
Techniques for Extracting Stubborn Plugs
Applying heat can be a game-changer. Use a heat gun or hair dryer to warm the area surrounding the insert, making the adhesive softer and more pliable. Be cautious with the temperature to avoid damaging the surface.
Utilizing a pair of pliers can induce enough grip for extraction. If the plug has a texture or ridges, the pliers can secure a solid hold. Twist gently while pulling to dislodge it without causing damage.
If adhesive is the main issue, consider using a solvent. Products designed to weaken glue can be applied carefully around the edges. Allow time for absorption before attempting removal.
For deeply embedded items, a screw extractor can be particularly useful. Drill a small pilot hole in the center of the plug, then insert the extractor bit, turning it counterclockwise to pull the piece out.
Sometimes, creating a lever can aid the process. Insert a flathead screwdriver under the edge and gently pry upwards while being mindful of the surrounding material.
If the aforementioned methods fail, drilling may be necessary. Start with a small diameter bit and gradually increase size until enough material is removed to pull out the rest of the insert with pliers.
Always prioritize caution to minimize damage. Evaluating each situation based on the characteristics of the piece will yield the best approach for successful removal.
Cleaning Up After Plug Removal
Once I’ve successfully extracted the inserts, I ensure the area is clean and free of debris.
Here are the steps I take:
- Inspect the cavity left by the insert to check for any loose fragments of wood or adhesive. I use a small brush or a vacuum with a narrow attachment to remove dust and particles.
- If there’s any remaining glue or residue, I apply a gentle solvent like rubbing alcohol or a specialized adhesive remover to a cloth. I carefully wipe around the edge of the cavity, making sure not to damage the surrounding surface.
- For visible scratches or marks on the surface, I select a wood polish or wax appropriate for the finish of the item. I apply it with a soft cloth, buffing in circular motions to restore shine.
- Once the area is clean, I inspect the nearby surfaces for any deficiencies that may need attention. If necessary, I perform minor repairs to ensure everything is in order.
I also consider applying a matching finish to the exposed wood if some has been removed during the process. This step not only enhances the aesthetics but also provides additional protection.
Finally, I dispose of any waste materials appropriately, ensuring I maintain a tidy workspace. This thorough approach leaves my item looking pristine and ready for use.
Repairing Damage from Plug Extraction
Fill any depressions or scratches left after removing the components using wood filler that matches the finish. Apply it carefully to avoid excess. Allow the filler to dry according to the manufacturer’s instructions, ensuring a solid bond with the original surface.
Sanding the Area
Once the filler is dry, sand the area with fine-grit sandpaper until smooth. Feather the edges to blend it seamlessly with the surrounding finish. Wipe away dust with a damp cloth to prepare for refinishing.
Refinishing the Surface
Apply a matching stain or finish to the repaired area to achieve uniformity with the rest of the piece. Use a small brush for precise application. If needed, layer multiple coats, allowing sufficient drying time between applications. After achieving the desired depth of color, consider applying a protective topcoat to ensure durability.
Preventing Future Plug Issues
Utilizing wood fillers or matching screws can strengthen connections and minimize future problems. By pre-drilling holes before inserting plugs or using screws, I reduce the chances of splitting or breaking the surrounding material.
Regular Maintenance
Consistently inspect my furniture for signs of looseness or damage. Tightening screws or gently tapping plugs can help maintain integrity. Cleaning the areas where the joints meet also prevents debris buildup that can cause wear over time.
Choosing Quality Materials
Selecting high-quality connectors ensures long-term reliability. I prefer plugs and fasteners made from durable materials that endure stress and environmental changes better. This proactive choice reduces the frequency of potential issues down the line.
FAQ:
What tools do I need to remove wooden plugs from furniture?
To remove wooden plugs from furniture, you will typically need a few basic tools. A flathead screwdriver or a utility knife can help pry the plug out gently. If the plugs are particularly stubborn, a pair of pliers or tweezers can be useful for gripping and pulling them out. Additionally, having some wood glue or wood filler on hand may come in handy if you need to repair the hole after the plug is removed.
Can I remove wooden plugs without damaging the furniture?
Yes, it is possible to remove wooden plugs without damaging the furniture, but it requires careful handling. Start by using a flathead screwdriver to gently pry around the edges of the plug, using slow and steady pressure. If the plug is glued in place, you might need to apply heat using a heat gun or hair dryer to soften the glue before attempting to remove it. Always proceed slowly to minimize the risk of splintering the wood or damaging the surrounding area.
What should I do if the plug breaks during removal?
If the wooden plug breaks during removal, don’t panic. First, assess how much of the plug is still inside the hole. If there’s enough remaining for you to grip with pliers, try to pull it out gently. If not, you might need to use a drill to carefully remove the remaining pieces. Be cautious and drill slowly to avoid damaging the furniture. Once the old plug is fully removed, you can fill the hole with wood filler and sand it down to prepare for a replacement plug.
How can I replace a wooden plug after removal?
To replace a wooden plug after removal, first clean the hole to ensure a good fit for the new plug. Choose a plug that fits snugly in the hole, or you can make your own using a piece of wood. Apply wood glue to the plug, then gently tap it into place using a hammer. Allow the glue to dry completely according to the manufacturer’s instructions. Once the glue is dry, sand the surface smooth and finish as desired to match the surrounding area of the furniture.
What if the plug is too deep to reach with standard tools?
If the wooden plug is too deep to reach with standard tools, consider using a small extraction tool or a screw extractor kit designed for this purpose. Insert the extractor into the plug and turn it counterclockwise to grip and pull it out. If that doesn’t work, you may need to drill a small hole in the center of the plug and use a screw to create leverage for removal. Remember to exercise caution to avoid damaging the surrounding furniture.
What are the best tools for removing wooden plugs from furniture?
When it comes to removing wooden plugs from furniture, a few specific tools can make the task easier. Commonly used tools include a small screwdriver or a flathead pry bar, which can help gently lift the plug out of its hole. Additionally, a pair of pliers can be useful for gripping and pulling out stubborn plugs. If the plugs are particularly tight, a heat gun may be effective in loosening any adhesive that may have been used during installation. Always be cautious to avoid damaging the surrounding wood while using these tools.