
 Caleb Turner

First, assess the severity of the damage. If the imperfection is minor, like a small crack, a clear epoxy or specialized adhesive can provide a straightforward solution. Apply the adhesive following the manufacturer’s instructions, ensuring both surfaces are clean and dry before you start.
For more significant faults, consider using a glass repair kit, which often includes resin and hardening substances. Carefully mix the components and follow the guidelines provided. Inject the resin into the crack and allow it to cure as recommended.
In cases where parts are completely shattered, you might need to replace the whole panel. Measure the dimensions of the broken piece accurately and contact local glass suppliers or manufacturers to find an exact match. Always wear protective gloves when handling fragmented edges and ensure proper installation to prevent future issues.
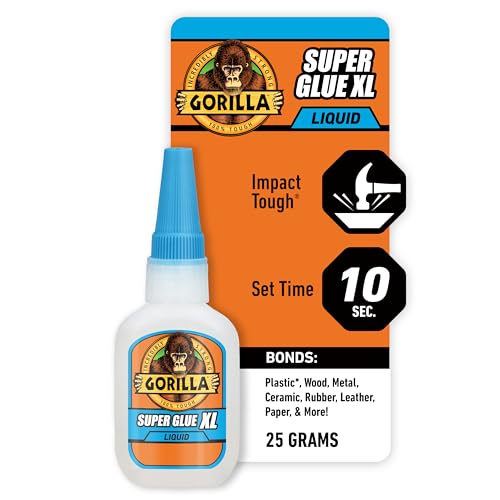

Additionally, if you prefer, professional services are available and can save time and effort, particularly for substantial repairs. They guarantee quality results with the right equipment to restore your pieces to their former condition.
Repair Techniques for Shattered Surfaces
I recommend first gathering necessary materials: clear epoxy adhesive, a soft cloth, and a flat surface for a workspace. Start by carefully cleaning the edges of the fractured pieces with a cloth to remove any dust or grease. Apply the epoxy to one side of the break, ensuring even coverage. Press the parts together firmly, holding them in place. Wipe away excess adhesive that may squeeze out. Allow ample time for the adhesive to cure as per the manufacturer’s instructions.

Reinforcement Options
If the structure has suffered structural damage, consider using metal brackets for added stability. Measure and cut the brackets to fit the affected areas. Attach the brackets using screws, ensuring they are flush against the surfaces for a seamless appearance. This extra support will prevent future incidents and maintain the aesthetic appeal.
Restoration Insights
<p.To achieve a polished look after completing repairs, use a glass cleaner to eliminate fingerprints or smudges. If the repair is noticeable, applying a decorative adhesive tape around the edges can create a distinct border, enhancing visual appeal while hiding imperfections.
Assessing the Damage to Your Glass Furniture
Begin by examining the piece thoroughly for any obvious cracks or chips. Use bright lighting to illuminate any hidden imperfections that may not be visible in dim surroundings. Check both sides of the surface to ensure no damage is overlooked.
Next, evaluate the extent of the harm. Small nicks and surface scratches can often be repaired with a polishing compound, while larger fractures may require more significant intervention. For severe breaks, I recommend preparing to discuss replacement options with a professional.
Make note of any sharp edges created by shattered sections. These can pose a safety risk, so consider using tape to cover jagged areas temporarily until further action is taken. Documenting the condition with photos can be helpful for both your records and when seeking advice from restoration experts.
Lastly, assess the overall structure of the supporting frame or base. An unstable foundation can lead to additional issues down the line, so it’s crucial to ensure that the furniture remains safe and functional despite the visible damage.
Choosing the Right Adhesive for Repair
Selecting an adhesive tailored for restoration is crucial for achieving a durable bond. Here are key options to consider:
Types of Adhesives
- Epoxy: This versatile option consists of two components–resin and hardener–and provides a strong, permanent bond. Ideal for large pieces or intricate repairs.
- Cyanoacrylate (Super Glue): Quick-setting and effective for minor cracks or breaks. It works well on non-porous surfaces and cures rapidly.
- PVA (Polyvinyl Acetate): Commonly used for household projects, it’s suitable for porous materials and offers moderate strength.
- Silicone Adhesive: Flexible and waterproof, this adhesive is excellent for bonding glass to other materials but may not provide the same strength as epoxy or cyanoacrylate.
Factors in Adhesive Selection
- Surface Compatibility: Ensure the adhesive is formulated specifically for glass to achieve the best outcome.
- Bonding Time: Consider how quickly you need the bond to set. Some adhesives offer instant hold, while others may require longer curing times.
- Clear Finish: For aesthetic purposes, a clear-drying adhesive is preferable to maintain the appearance of the item.
- Flexibility and Strength: Depending on the item’s use, choose an adhesive that can handle stress and movement without failing.
Conduct tests on small areas if uncertain about compatibility. Following the manufacturer’s instructions ensures optimal performance and longevity of the bond.
Step-by-Step Guide to Gluing Broken Glass
Gather materials: high-quality epoxy adhesive, acetone, clean cloth, and clamps or tape. Ensure your workspace is clear and well-ventilated.
Clean surfaces thoroughly with acetone to remove dust and grease. Dry completely before proceeding.
Mix the epoxy resin as per the manufacturer’s instructions. Use a disposable tool for accurate application.
Apply a thin layer of mixed adhesive on the edges of both pieces. Join them carefully, ensuring proper alignment.
Hold the pieces together using clamps or tape to maintain pressure while the adhesive cures. Check alignment periodically.
Allow curing time as recommended on the adhesive packaging. Avoid movement during this period.
Once cured, gently remove clamps or tape. Inspect the bond for stability. If necessary, sand down excess adhesive for a smoother finish.
Finally, clean the area again to remove any residue. Your repair is complete, and the restored item should be suitable for use.
Techniques for Polishing and Finishing Repaired Edges
Begin with wet sanding the repaired edges using fine-grit sandpaper, typically around 600 to 1000 grit. This smoothens the surface and removes any visible adhesive residue. Wet the sandpaper and the area to minimize scratches and keep the glass surface cool.
Polishing Process
After sanding, apply a glass polish product using a soft, lint-free cloth. Move in circular motions to buff the surface, enhancing clarity. Ensure the polish is specifically designed for glass to avoid damage. If the glass has deep scratches, consider a diamond polishing paste for better results.
Finishing Touches
- Clean the area with a glass cleaner to remove any polishing residue.
- Inspect the edge under bright light to ensure it meets your expectations.
- If needed, repeat the polishing process for a more refined finish.
- Apply a protective wax once polished for added shine and protection against future scratches.
When to Seek Professional Help for Glass Repair
If I notice significant cracking or shattering, I contact an expert right away. In cases where the structural integrity of the item is compromised, professional intervention is a must. Additionally, if the repair involves intricate shapes or high-value pieces, I rely on specialists to ensure the best outcome.
It’s essential to consider the following factors when deciding whether to hire a professional:
| Factor | Recommendation |
|---|---|
| Extent of Damage | Extensive breaks or multiple pieces require a pro. |
| Type of Item | High-value or sentimental pieces should be repaired by experts. |
| Safety Concerns | Cracked items that pose a risk should not be handled alone. |
| Complex Repairs | Difficult shapes or designs are best left to specialists. |
| Insurance Claims | Consult professionals for items needing insurance documentation. |
Seeking assistance can save time and prevent further issues. If I’m unsure of my skills or the appropriate techniques to use, I opt for professional help to ensure the repair is done correctly and safely.
Preventive Measures to Avoid Future Breakage
I recommend placing coasters or mats under decorative items to prevent scratches and potential fractures. These can absorb shock and minimize contact with hard surfaces.
Avoid excessive pressure on shelves and tables with delicate tops. Distribute weight evenly and keep heavier items towards the center to reduce stress on edges.
Regularly inspect for chips or imperfections that could worsen over time. Addressing these issues promptly can prevent larger problems later.
Position your pieces away from high-traffic areas to minimize accidental bumps. A well-planned layout can shield them from potential hazards.
Consider the installation of safety film on surfaces, which adds an extra layer of protection against shattering while reducing risks during minor impacts.
Utilize furniture pads or felt on the bottom of items that will rest on surfaces. This reduces friction and absorbs shock from movement.
Limit exposure to temperature fluctuations, as extreme changes can cause stress on materials. Keeping pieces in stable climates will help maintain integrity.
Educate family and guests about handling items carefully. Awareness can significantly reduce unintentional damage.
Incorporate a cleaning routine using non-abrasive materials to avoid scratches and keep surfaces looking pristine.
Lastly, storing seasonal or seldom-used pieces in protective covers can shield them from dust and accidental contact, prolonging their lifespan.


