
 Caleb Turner
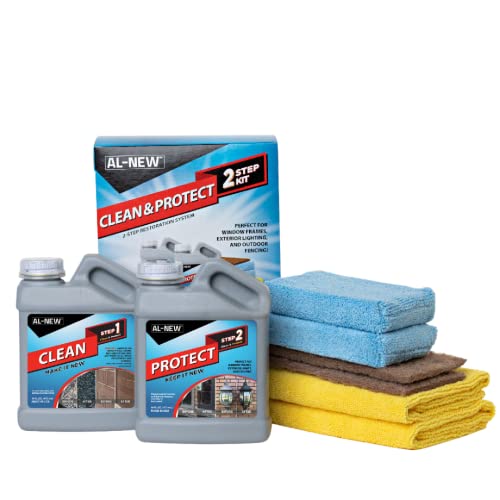
Begin with a solution of warm water and mild soap. Using a soft brush, gently scrub the surfaces to lift dirt and debris without causing damage. Ensure that the brush is suitable for the material so you don’t risk fraying or scratching.
Rinse thoroughly with a garden hose to eliminate any soap residue. Take care not to use high-pressure settings, which might compromise the integrity of the pieces. A soft cloth can assist in drying off any excess water, preventing spots or discoloration.
For stubborn stains, a paste of baking soda and water can be very effective. Apply it directly to the affected area, let it sit for a few minutes, then scrub gently and rinse. Completing this process will help to preserve the appearance and longevity of your outdoor seating arrangements.
Maintenance of Interlaced Outdoor Seating
Utilize a soft-bristle brush to thoroughly remove debris and dirt from the surface. Pay special attention to crevices where grime accumulates. A gentle vacuum with a brush attachment can also help lift particles that are difficult to dislodge.
Prepare a mild cleaning solution by mixing warm water with a few drops of dish soap. Dampen a cloth or sponge with this mixture and gently wipe down each section, ensuring that you do not oversaturate the material. For stubborn stains, consider using a paste of baking soda and water applied directly, followed by a soft scrub.


After you’ve treated the area, rinse with clean water. It’s important to eliminate any soap residue to prevent buildup over time. A garden hose works well for this, ensuring a light flow to avoid damaging the fibers.
For drying, position the items in a shaded spot to prevent sun damage. Exposure to direct sunlight can weaken the fibers and cause fading. Allow adequate time for the seating to dry completely before using it again.
| Cleaning Tips | Frequency |
|---|---|
| Brush off debris | Weekly |
| Wipe with soapy water | Monthly |
| Deep clean with baking soda | Seasonally |
Consider applying a protective spray designed for outdoor textiles. This will help repel dirt and moisture, extending the lifespan of the seating. Regular maintenance not only keeps the appearance fresh but also enhances durability against weather elements.
Gather Necessary Cleaning Supplies
For this task, I ensure I have specific tools and materials ready to achieve a thorough result. Here’s a concise list of what I find indispensable:
- Soft-bristle brush: Ideal for removing debris without causing damage.
- Mild soap: A gentle dish detergent works effectively without harsh chemicals.
- Water: I use a bucket of warm water for mixing with soap and rinsing.
- Spray bottle: This helps to apply the soapy solution uniformly.
- Microfiber cloths: Perfect for drying and wiping down surfaces post-cleaning.
- Garden hose: Useful for rinsing off soap residues thoroughly.
- Protective gloves: I wear these to keep my hands safe, especially when using certain cleaning solutions.
With these supplies on hand, I am prepared to maintain my outdoor seating space efficiently.
Remove Loose Debris and Dust
I use a soft-bristle broom or a handheld vacuum to sweep away any loose dirt, leaves, or debris from the surface and between the fibers. This initial step is crucial to prevent scratches during further cleaning. When using a vacuum, I make sure to choose a model with a brush attachment to effectively remove particles without causing damage.
If I encounter stubborn debris stuck in the crevices, a microfiber cloth is a great tool. Dampen it slightly to capture dust effectively, ensuring I don’t push dirt further into the material. For larger outdoor spaces, I find using a leaf blower can also be an efficient way to clear away unwanted items quickly.
<p I finish this step by inspecting the area for any lingering particles, ensuring the surface is free of dust and debris before moving on to deeper cleaning methods. This thorough approach lays the groundwork for achieving the best results with my maintenance routine.
Prepare a Cleaning Solution for Woven Materials
I recommend mixing warm water with a few drops of mild dish soap. This combination helps to lift dirt without damaging fibers. For tougher stains, adding a splash of white vinegar to the solution can enhance its cleaning power. Keep the ratio balanced – one part vinegar to three parts soapy water is effective.
Before applying this mixture, I test it on a small, inconspicuous area to ensure there’s no adverse reaction. Once verified, I use a soft-bristled brush or sponge dipped in the solution to gently scrub the surfaces, focusing on crevices where grime collects. Rinsing the brush periodically prevents dirt from being re-distributed.
After cleaning, I rinse everything thoroughly with clean water to remove any soap residue, which could attract more dirt if left behind. Allow the material to dry completely in a shaded area to prevent fading and maintain its integrity.
Scrub Woven Surfaces Carefully
Use a soft-bristle brush to scrub the textured areas gently. This will prevent damage while effectively removing grime.
Follow these steps for optimal results:
- Apply the prepared cleaning solution to the brush bristles.
- Work in small sections, focusing on one part at a time.
- Use circular motions to lift dirt without fraying the fibers.
- Rinse the brush frequently to avoid spreading loosened debris.
- Pay extra attention to seams and crevices where dirt tends to accumulate.
After scrubbing, use a damp cloth to wipe down the areas treated. This will help remove any residual cleaner and dirt. Allow everything to air dry completely before use to prevent moisture damage.
Rinse Off Cleaning Solution Thoroughly
After applying the cleaning mixture, it’s crucial to rinse everything completely to avoid residue buildup. I use a garden hose with a spray nozzle for a thorough wash, ensuring that all the areas get sufficient water flow. Start at the topmost point of the item and work your way down to let the dirty water flow away from the clean surfaces.
Focus on All Crevices
Pay special attention to corners and crevices, where grime may linger. I tilt or turn the piece if necessary to access hard-to-reach spots. A soft-bristle brush can help dislodge any stubborn particles during the rinsing phase.
Drying Process
After rinsing, I let the materials air dry completely. This step prevents mold and mildew growth, especially if the items will be stored away after use. If possible, placing them in a well-ventilated area speeds up the drying.
Dry the Furniture Properly to Prevent Mold
After rinsing the surfaces, I ensure to dry every piece thoroughly. Using clean, absorbent towels, I wipe down all areas, making sure to get into crevices where water can collect. If the weather allows, I place the items in direct sunlight for a natural drying effect, which helps reduce moisture levels significantly.
In shaded or indoor spaces, I set up a fan to promote air circulation around the furniture. I avoid putting them away until I’m confident they are completely dry, as any retained moisture can lead to mold growth, especially in humid climates. I make it a point to regularly inspect for any signs of mildew, addressing them immediately to preserve the integrity of my outdoor seating.
For additional protection, I consider applying a breathable fabric protector that repels moisture and resists dirt buildup. This step further reduces the likelihood of mold returning after cleaning. Keeping my outdoor items in optimal condition is a priority, and proper drying is a crucial part of that process.
Apply Protectant for Longevity
After thoroughly washing the outdoor seating, ensure you enhance its durability with a suitable protectant. I choose a product specifically designed for synthetic materials, as it provides a barrier against UV rays and moisture. This step helps in maintaining the color and integrity of the fibers.
Before application, verify that the area is dry and the surface is free of any residues from previous cleaning agents. I generally spray the protectant evenly over the surfaces, maintaining a distance of about 6 to 8 inches to ensure even coverage.
Allow the protectant to penetrate for the recommended time specified by the manufacturer, typically ranging from 30 minutes to 1 hour. Following this, I wipe off any excess with a clean, dry cloth to avoid accumulation, which can attract dirt.
For long-lasting protection, I apply this treatment at least once a season. Regular maintenance ensures the outdoor seating not only looks fresh but also withstands the elements effectively.
| Step | Action | Notes |
|---|---|---|
| 1 | Choose a protectant | Select one made for synthetic materials. |
| 2 | Ensure surfaces are dry | Check for cleaning solution residues. |
| 3 | Apply evenly | Maintain a distance of 6-8 inches. |
| 4 | Let it penetrate | Follow time guidelines on packaging. |
| 5 | Wipe off excess | Use a clean, dry cloth. |
| 6 | Schedule reapplication | At least once per season. |


