For immediate results, a solution of equal parts water and vinegar provides a straightforward approach to eliminating discoloration on your garden chairs. Using a soft brush, gently scrub the affected areas, then rinse thoroughly with a hose. This method not only addresses the surface issues but also helps inhibit future growth.
If persistent stains remain after vinegar treatment, a mixture of baking soda and water can work wonders. Combine three parts baking soda with one part water to form a paste, apply it directly to the stubborn spots, and let it sit for approximately 30 minutes before scrubbing again. The mild abrasiveness of baking soda can lift the most entrenched residues.
For those with synthetic materials, a diluted dish soap solution is beneficial. Mix a few drops of dish soap in a bucket of warm water, use a sponge to wipe down the surfaces, and rinse off with clear water. This method is gentle yet effective, preserving the integrity of your outdoor seating.
Make sure to regularly inspect your patio pieces and store them in a dry location whenever possible. Prevention plays a key role in maintaining their cleanliness and longevity. By incorporating these simple techniques, I’ve managed to keep my outdoor relaxation area inviting and pleasant to use.


Steps to Remove Unwanted Growth on Garden Items
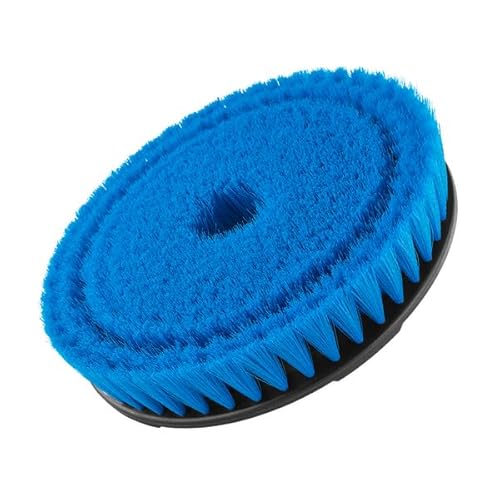
First, use a brush with stiff bristles to scrub affected areas thoroughly. Combine equal parts water and white vinegar in a spray bottle and apply it directly to the surfaces. Allow it to sit for at least 30 minutes before continuing.
Rinsing and Drying
After the vinegar solution has set, rinse the items with your garden hose. Ensure all residues are washed away. Sun exposure is crucial–leave them in sunlight for several hours to dry completely. This natural heat helps inhibit future issues.
Preventive Measures
To avoid recurrence, consider using a protective sealant designed for the material. Regularly inspect these items and wipe them down with a damp cloth after rain or heavy dew. Additionally, store items covered or indoors during prolonged bad weather.
Identifying Mold Types on Outdoor Furniture
Recognize the primary categories of unwanted growths to address them appropriately.
Common Varieties
- Black Fungus: Often appears as dark spots or patches. This type thrives in damp environments and is particularly prevalent on items left outside.
- Green Mold: Typically lighter in color and can be a sign of prolonged exposure to moisture. It often indicates a need for immediate attention to prevent further spread.
- White Fungal Growth: Soft, cottony lesions that often develop on wood. This variant can penetrate the material, leading to structural damage if left untreated.
Signs of Infestation
- Visual spots or discoloration on surfaces.
- Unpleasant odors emanating from the material.
- Softening or decay of the structure, especially in porous materials like wood.
- Allergic reactions or respiratory issues when near affected items.
By understanding the different types and symptoms, it’s easier to select an appropriate treatment method and safeguard your patio pieces effectively.
Gathering Necessary Cleaning Supplies
First, I gather specific items to tackle the issue effectively. A soft-bristle brush works well to loosen stubborn residues. Microfiber cloths are my choice for wiping surfaces without causing scratches.
Cleaning Solutions
Next, I opt for a cleaning mixture. White vinegar is my go-to due to its natural properties; it acts as a disinfectant and is safe for most surfaces. A mixture of water and mild dish soap also is effective and gentle. When necessary, I consider using a commercially available solution designed for tough stains.
Protective Gear
I don’t forget about personal protection. Rubber gloves prevent skin irritation and keep my hands safe. If I’m working in a well-ventilated area, a dust mask is worth wearing to avoid inhaling any particles during the process. Safety goggles are also beneficial to shield my eyes.
Preparing Your Outdoor Furniture for Cleaning
Before tackling any cleanup, clear the area around the items to make movement easier. Removing nearby plants, decorations, or other objects will provide sufficient space to work without obstacles.
Inspecting for Damage
Carefully examine each piece for signs of wear, such as cracks, rust, or any structural instability. Taking note of these issues will help determine if any repairs are necessary prior to maintenance efforts.
Protective Measures
Wear gloves and a mask to safeguard against allergens or irritants, especially if the surfaces have visible spores. It’s prudent to also cover nearby landscaping with tarps to prevent any cleaning solutions from damaging plant life.
Consider choosing a cloudy day for the task; direct sunlight can dry out cleaning solutions too quickly, making them less effective.
Finally, gather water hoses or buckets for rinsing and start with a quick rinse of the items to loosen any debris before applying any treatments.
Step-by-Step Cleaning Process for Different Materials
For wood surfaces, I mix equal parts white vinegar and water in a spray bottle. After spraying the solution on the affected areas, I let it sit for about 10 minutes. Then, using a soft-bristle brush, I gently scrub the wood to remove any discoloration. I finish by rinsing with clean water and drying thoroughly.
When dealing with metal components, I create a mixture of warm water and mild detergent. I dampen a cloth and wipe down the surfaces, paying attention to crevices where dirt may linger. After scrubbing, I rinse with clear water and dry with a microfiber cloth to prevent rust.
For synthetic materials like plastic or resin, I use a mixture of baking soda and warm water for a paste-like consistency. Applying the paste with a sponge, I scrub in circular motions. After about 10 minutes, I rinse with a hose, ensuring all residue is removed, and let it air dry.
If the item is upholstered, using a vacuum cleaner with an upholstery attachment helps eliminate loose dirt and debris. Next, I create a solution using mild dish soap mixed with water and apply it with a soft cloth. Gently blotting the fabric, I avoid soaking it. Finally, I remove any soap residue with a damp cloth and allow it to dry in a well-ventilated area.
- Wood: Vinegar-water solution, scrub, rinse, dry.
- Metal: Warm soapy water, wipe, rinse, dry.
- Synthetic: Baking soda paste, scrub, rinse, air dry.
- Upholstered: Vacuum, soapy water application, blot, air dry.
Drying and Protecting Furniture After Cleaning
Immediately after finishing the washing process, I prioritize thorough drying. I place items in a well-ventilated area, ideally under direct sunlight, as sunlight helps eliminate any lingering moisture. Using a fan can also expedite drying, particularly for cushioned seating. It’s important to ensure that no dampness remains, as this could lead to future issues.
Methods for Effective Drying
Here are specific techniques for drying different types of surfaces:
| Material | Drying Technique |
|---|---|
| Wood | Wipe with a clean, dry cloth; air dry in sunlight. |
| Metal | Use a fan directed at the surface; ensure no water pools. |
| Plastic | Let air dry, optimize sunlight exposure, and wipe excess water. |
| Cushioned Seats | Remove covers if possible; tumble dry on low or air dry in shade. |
Applying Protective Measures
Once completely dry, I treat the surface with appropriate protective products. For wooden items, a high-quality sealant or oil replenishes moisture and provides a barrier against future damage. Metal parts benefit from a rust-inhibiting spray, and synthetic materials might require a UV protectant to prevent color fading. I also ensure that fabrics are treated with a waterproof spray, enhancing resilience against moisture. Taking these precautions significantly extends the lifespan of my outdoor pieces.
Preventing Future Growth on Outdoor Items
To deter unwanted developments, ensure all surfaces are dry before storage. Moisture is a key factor in fostering unwanted organisms. Regularly check for dampness, especially during humid seasons.
Utilize Protective Covers
Using high-quality, breathable covers can guard against moisture accumulation. They allow air circulation while providing a barrier from precipitation and debris.
Choose the Right Location
Placing these pieces in a location that receives ample sunlight helps keep them dry. Sunlight also acts as a natural deterrent to unwanted developments. If possible, avoid shady or damp areas.
Consider applying specialized protective treatments suited for specific materials, which can form a barrier against moisture and environmental factors. Regular maintenance, including periodic inspections, is crucial to addressing issues before they escalate.


