
 Caleb Turner

If you’ve noticed unsightly dark patches on your outdoor seating, grab a bucket and some basic supplies. A mixture of warm water and mild dish soap works wonders; just combine a few drops of soap with water and use a sponge or soft brush to scrub the affected areas. This solution effectively breaks down the grime, restoring your seating’s original look.
For tougher stains, adding white vinegar to your mixture can enhance the cleaning process. Combine equal parts vinegar and water in a spray bottle and apply it directly to the problem areas. Let it sit for a few minutes before scrubbing gently, and you’ll see the buildup start to lift away.
After rinsing thoroughly with fresh water, it’s crucial to let your furniture dry completely. This prevents any future growth of mold or mildew, keeping your outdoor space polished and inviting. Regular maintenance every few weeks can help keep these issues at bay.

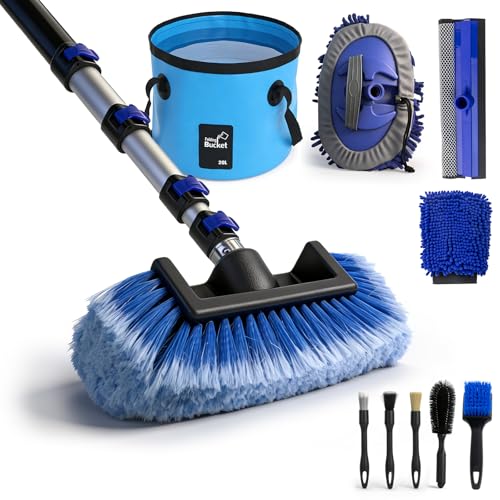

Removing Algae and Mold from Outdoor Seating
I recommend creating a mixture of warm water and mild soap to tackle any visible signs of algae or mold. Use a soft-bristled brush to apply the solution, gently scrubbing the affected areas. Rinse with clear water to ensure no soap residue remains.
Using Vinegar or Baking Soda
A solution of white vinegar mixed with water can effectively break down stubborn spots. Spray it directly on the problem areas and let it sit for about 15 minutes before scrubbing. Alternatively, a paste of baking soda and water works well; apply it to the surface, scrub lightly, and rinse.
Preventive Measures
To avoid future issues, consider placing your outdoor seating in a location with adequate sunlight. Regularly inspecting and wiping down the surfaces can help keep unwanted growth at bay.
Identify the Type of Green Stuff on Your Furniture
First, observe the appearance of the discoloration. If it has a fuzzy or hairy texture, it likely indicates the presence of mold or mildew. This can develop in shaded or damp areas, favored by humidity.
If you notice a slimy or greasy film, this could be algae, which thrives in warm, moist environments. Its green tint might be more pronounced on surfaces exposed to consistent moisture.
Another possibility is the presence of lichen, which often appears as crusty patches, sometimes resembling paint splotches. It’s commonly found on surfaces that haven’t been used or cleaned in a long time.
A yellow-green or olive shade often points to moss, typically found in consistently damp regions. This growth tends to cling tightly to surfaces, making it challenging to remove.
Examine the surrounding area for clues as well; nearby plants, trees, or moisture sources could inform the likely growth type. Identifying the exact organism allows for selecting the most suitable approach for removal without damaging the material.
Choose the Right Cleaning Supplies for the Job
Opt for biodegradable soaps to ensure safety and minimize environmental impact. A multipurpose cleaner works well for various materials and can effectively tackle stubborn residues.
For tougher challenges, consider a diluted bleach solution; this is especially useful for composite and plastic items. Test any substance on a small area before widespread application.
| Supply Type | Recommendation | Material Suitability |
|---|---|---|
| Biodegradable Soap | Use for routine maintenance | Wood, metal, plastic |
| Multipurpose Cleaner | Ideal for diverse surfaces | All types |
| Diluted Bleach Solution | Effective against algae and mold | Composite, plastic |
| Soft-Bristled Brush | Best for scrubbing without damage | All types |
| Microfiber Cloth | Perfect for final wipe-down | All types |
I also recommend having water handy for rinsing, as it helps to remove leftover cleaners and prevent residue buildup. Each material may require a specific approach, so aligning your supplies with the material type is crucial for maintenance and longevity.
Prepare a Cleaning Solution for Stubborn Stains
For persistent marks, I create a potent blend. In a spray bottle, I mix one cup of vinegar with one cup of warm water. This combination acts as a natural solvent, effectively breaking down tough residues. If the soiling persists, I add a couple of tablespoons of baking soda to the solution. The fizzing reaction intensifies the cleaning power, lifting the grime.
Alternative Solutions
Another option is concocting a dish soap mixture. I combine a few drops of mild dish detergent with warm water in a bowl. This solution cuts grease and works well on plastic and metal surfaces. To enhance its strength, I sometimes incorporate a tablespoon of lemon juice.
Using Commercial Products
If homemade remedies fall short, I consider specialized cleaners. I check the labels for formulas designed for outdoor surfaces, ensuring they’re safe for the material in question. Following the manufacturer’s instructions closely yields the best results.
Test the Cleaning Solution on a Small Area
Before applying the cleaner extensively, I always test it in an inconspicuous spot. This helps to gauge its effect on the material. I choose a corner or an area hidden from plain sight. A small amount goes a long way; I apply it using a soft cloth or sponge to avoid any damage.
Evaluate the Reaction
After a few minutes, I check for any adverse reactions, such as discoloration or material degradation. If the surface remains unscathed, I proceed with the cleaning process in other areas. If not, I make adjustments to the solution or select a different approach. This small step can save time and prevent potential mishaps.
Safety Precautions
Throughout this testing, I ensure I’m in a well-ventilated area and wearing gloves to protect my skin. Understanding how a cleaner interacts with the surface helps me achieve better results while minimizing risk.
Scrub the Affected Areas with Appropriate Tools
For stubborn marks, I use a soft-bristle brush or sponge. The brush’s stiffness helps lift the residue without damaging the surface. For delicate materials, I opt for a microfiber cloth to avoid scratches.
When tackling tough spots, I switch to a stiff scrub brush designed for outdoor use. I find that applying consistent pressure while scrubbing in circular motions yields better results. For crevices or intricate patterns, a small, handheld brush works effectively.
Additional Techniques
If rinsing is necessary, I have a spray bottle filled with water to keep the area moist while scrubbing. This prevents the cleaning solution from drying too quickly, allowing it to penetrate deeper into the stains.
Regular maintenance is also key; I periodically wipe down surfaces with a damp cloth to prevent buildup. This proactive approach makes future cleaning easier and less time-consuming.
Rinse Thoroughly to Remove Cleaning Residue
I always ensure I rinse the surfaces thoroughly after using any cleaning solution. This step is crucial to eliminate any lingering chemical residue that could attract dirt or damage the material over time. I use a garden hose with a spray attachment for even distribution of water, making sure to cover every area that was treated.
For areas with stubborn residues, I let the water run for a few seconds on high pressure to ensure a complete wash. If there are any pockets or hard-to-reach spots, I use a sponge or cloth to aid in removal. It’s essential to pay attention to corners and seams where dirt tends to accumulate.
Once rinsed, I inspect the surfaces to confirm that all remnants of the solution are gone. If any residue remains, I repeat the rinsing process until completely clean. Allowing the items to air dry will help prevent spots or streaks from forming.
| Tips for Effective Rinsing |
|---|
| Use a spray nozzle for even coverage. |
| Check for hidden areas that may need extra attention. |
| Inspect surfaces post-rinse to ensure no residues are left. |
Dry Furniture Properly to Prevent New Growth
Ensure surfaces are completely dry after cleaning. Moisture encourages regrowth of unwanted microorganisms. Here’s my approach to effectively drying the cleaned items:
- Use absorbent towels to wipe down all surfaces. This helps eliminate excess water.
- Position items in a sunny spot. Sunlight speeds up evaporation and acts as a natural disinfectant.
- If unavailable, set up fans directed at wet areas for enhanced airflow. Increased circulation aids in quick drying.
- Check for damp spots regularly. A thorough inspection will help identify areas that require additional attention.
- Consider using a moisture meter if you have one. This tool provides accurate readings of surface humidity.
By prioritizing a proper drying technique, I significantly reduce the risk of future growth, ensuring my outdoor space remains inviting and clean.
Regular Maintenance Tips to Avoid Future Build-Up
I’ve found that routine upkeep is key to preventing unwanted organisms from returning. Here are some actionable steps I take:
- Wipe down surfaces weekly with a damp cloth to remove dust and moisture, reducing growth opportunities.
- Utilize a protective cover when the items are not in use. This shields them from rain, dew, and sunlight.
- Inspect the environment regularly for overhanging trees or shrubs that might contribute to damp conditions.
- Ensure proper drainage around the area to prevent pooling of water, which invites unwanted growth.
My experience shows that keeping the area well-ventilated can also help. I make sure there’s enough airflow to promote drying.
Every few months, I recommend applying a sealant specifically designed for outdoor surfaces. This adds a protective layer against moisture and harmful elements.
Finally, be diligent about seasonal deep cleaning as needed. This keeps surfaces fresh and minimizes future issues.
Storing Furniture to Minimize Environmental Impact
Utilize breathable covers to shield items from moisture and UV rays, preventing mold growth and fading. This simple action extends the lifespan of your pieces and reduces waste.
Store items in a dry, shaded area to limit weather exposure. If indoors, ensure proper ventilation to discourage humidity buildup.
Consider disassembling larger components if possible, as compact storage lessens the carbon footprint during transportation or relocation.
Rotate and reposition items to avoid pressure points which can lead to wear or damage over time.
When possible, opt for eco-friendly insulating materials for padding or protection while in storage.
Evaluate your needs periodically and donate or recycle items no longer in use instead of discarding them. This practice supports sustainability and community resources.
Join local or online groups to exchange storage tips or arrange community storage exchanges, promoting shared resources while reducing individual environmental impacts.


