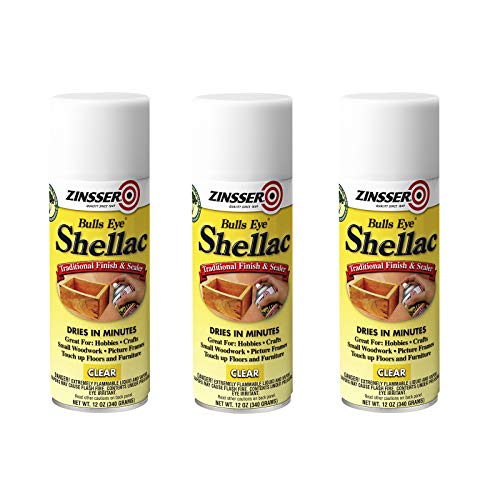


To attain a stunning, high-gloss finish on wooden surfaces, apply a traditional technique using shellac dissolved in alcohol. Begin by ensuring the piece is clean and free of any dust or grease. A microfiber cloth works best for this task.
Next, select a suitable applicator, such as a fine-grade pad made from cotton or wool. Dampen the pad with the shellac mixture, then apply it in a circular motion across the wood grain. This method allows for even distribution and enhances the natural beauty of the grain.
Allow each coat to dry thoroughly before proceeding with additional layers. Typically, two to three applications yield an impressive depth of color and shine. Buff the surface lightly with a soft cloth after the final layer is dry to achieve that mirror-like finish.

Regular maintenance with gentle cleaning solutions will keep the surface looking pristine, ensuring the piece remains a focal point in any space.
Choosing the Right Materials for French Polishing
Begin with high-quality shellac, as it serves as the foundation for the shine and protection desired in the finish. Opt for flakes, as they allow for better control over the solution’s concentration, mixing them with denatured alcohol to create a smooth application medium.


Use a fine-grit sandpaper or a abrasive pad for surface preparation. This step enhances adhesion, ensuring that the subsequent layers adhere properly without clogs or imperfections.
Choose a soft, lint-free cloth or a specially designed pad for applying the shellac. This will help in achieving an even and consistent layer. Consider using cotton or specialized wool as padding material, which facilitates a more uniform spread.
For color enhancement, consider incorporating a pigment in the shellac mix. This addition can enhance the natural beauty of the wood, but select pigments that are compatible with the alcohol base to ensure a balanced finish.
Do not overlook the importance of a proper workspace. Use a clean, dust-free environment to minimize the risk of particles settling into the finish, which can mar the final appearance.
Finally, invest in a quality brush for final touch-ups. A high-quality natural bristle brush or foam applicator allows for precise detailing and correction of any imperfections, ensuring a refined result.
Preparing the Surface for Polish Application
Ensure a clean, smooth base before any finishing touches. Begin with a thorough cleaning using a soft, lint-free cloth to remove dust and dirt. For stubborn stains, a mild soap solution can be effective; rinse with a damp cloth and dry properly.
Sanding Technique
Utilize fine-grit sandpaper (220 grit) to gently sand the surface in the direction of the grain. This step assists in leveling out imperfections and eliminating old finishes. Pay particular attention to areas that might require more smoothing, such as corners and edges. After sanding, remove any dust particles using a vacuum or a tack cloth for a pristine area.
Wood Conditioner Application
Applying wood conditioner enhances the absorption of the subsequent layers. Use a clean rag to apply a thin, even layer. Allow it to penetrate for about 15 minutes before wiping away excess product. This practice minimizes blotchiness and ensures a uniform appearance after finishing.
| Step | Action |
|---|---|
| Cleaning | Dust and dirt removal with a soft cloth; use soap for stubborn stains. |
| Sanding | Use 220 grit sandpaper; ensure to sand with the grain and focus on rough areas. |
| Dust Removal | Vacuum or wipe with a tack cloth to ensure a clean surface. |
| Conditioning | Apply wood conditioner; wait 15 minutes and wipe off excess. |
A well-prepped surface significantly affects the outcome, providing a superior finish. Proceed cautiously and ensure each step is completed meticulously for the best results.
Applying the First Coat of French Polish
Using a fine-grade pad, I dip it into the mixture ensuring it is saturated but not dripping. This allows for a smooth application while avoiding excessive buildup. I gently wipe the pad across the surface in a circular motion, working methodically and overlapping each pass slightly.
Technique Tips
- Start at one corner and move across the surface methodically to prevent missing spots.
- Maintain a light touch; pressing too hard can create streaks and uneven areas.
- Always keep the pad damp, replenishing it with the mixture as needed, but avoid over-saturation.
After covering the entire item, I allow the initial layer to dry completely, which usually takes around 30 minutes to an hour depending on environmental conditions. Once dry, I inspect for imperfections, sanding lightly if necessary with fine sandpaper to ensure a flawless base for subsequent layers.
Post-Application Care
- Clean the pad after use to ensure it remains effective for future applications.
- Store any leftover mixture properly to prolong its usability.
Consistent application is key. I aim for several thin coats, building up the finish gradually, achieving the desired depth and luster over time.
Techniques for Rubbing Out Between Coats
Begin rubbing out between applications after the initial drying period of each layer. A fine grit sandpaper, around 320 to 400 grit, can be used to smooth the surface. Sand lightly to avoid removing too much material, focusing on areas that may appear uneven or rough.
Using a sanding block can help maintain even pressure and avoid inadvertent gouging. Ensure that the edge of the block follows the shape of the item for an even finish. Always sand in the direction of the grain to prevent scratches, which can be particularly visible on dark woods.
After sanding, a vacuum or a soft cloth should be used to remove dust particles. This prevents any debris from marring the surface on subsequent layers. For an even finer finish, consider using a slightly damp cloth to further clean the area before applying the next coat.
Applying a rubber with a mixture of polish and a small amount of oil can enhance the shine and help the next layer blend seamlessly. Work in circular motions while maintaining a light touch. This technique allows for the polish to fill any small imperfections created during the sanding process.
Patience is key; allowing each coat to dry thoroughly before proceeding with the next layer is crucial to avoid cloudiness in the finish. By following these methods, each layer contributed to the overall aesthetic is further refined, leading to an impressive final appearance.
Fixing Common Issues in Surface Finishing
Uneven sheen can ruin the look of the finish. To correct this, apply a thin layer of shellac and allow it to dry completely. Then, use fine steel wool to gently buff the area, feathering the edges to blend with surrounding areas.
For scratches or dents, a simple method involves using a damp cloth over the affected area and applying heat gently with a soldering iron. The moisture will raise the wood fibers, making imperfections less visible. Follow up with a touch-up application of shellac to restore gloss.
Blushing, which appears as a cloudy layer, is often due to moisture trapped in the finish. To address this, try warming the surface with a hairdryer on a low setting while lightly buffing the area with fine steel wool to dissipate moisture. If the issue persists, a light sanding followed by reapplication of finish may be necessary.
Addressing Stains
- Use a mixture of olive oil and white vinegar to remove white water rings. Apply the solution on a soft cloth and rub gently.
- For dark stains, consider using a mixture of baking soda and water to form a paste. Apply it to the stain and let it sit for a few minutes before wiping it away.
Restoring Lustre
If the appearance becomes dull over time, a restoration process includes cleaning with a mild soap solution followed by a thorough rinse. After the surface is dry, apply a light coat of wax or a specialized finish product to rejuvenate the sheen.
Regular maintenance through gentle cleaning and periodic reapplication of protective coatings will ensure longevity of the finish and keep surfaces looking their best.
Finishing Touches: Buffing and Glossing
Begin with a clean, dry surface. Use a soft, lint-free cloth for buffing. It’s crucial to apply gentle pressure in a circular motion to achieve an even sheen. Avoid pressing too hard to prevent dulling the finish.
Choosing the Right Cloth
Select a high-quality cotton or microfiber cloth. These materials effectively lift dust and debris while enhancing the gloss. Avoid fabric that may leave lint or scratch the surface.
Glossing Technique
Apply a small amount of finishing wax to the cloth before buffing. Work the wax into the surface in a consistent manner, ensuring that it fills any minute imperfections. Allow the wax to dry for about 10 minutes before buffing it to a shine.
| Step | Description |
|---|---|
| 1 | Clean the surface with a soft cloth |
| 2 | Apply a small amount of wax |
| 3 | Buff in circular motions |
| 4 | Let the wax dry briefly |
| 5 | Finalize with another buffing |
Complete the process with a final buffing session to ensure a consistent, glossy finish. Repeat the buffing every few months or as needed to maintain appearance over time.
Maintaining French Polished Furniture
Regular dusting with a soft cloth prevents dirt accumulation and maintains shine. Schedule this task weekly to keep surfaces looking their best.
For light cleaning, a damp cloth with a few drops of mild soap works well. Wipe gently and immediately dry with a clean, dry cloth to prevent moisture damage. Avoid using excessive water.
Conditioning the surface every six months with a specialized wax or oil can enhance the luster and nourish the finish. Choose products designed specifically for such finishes to avoid dulling or damaging the surface.
Protect against heat and moisture by placing coasters under cups and using pads beneath hot items. Direct exposure can cause unsightly rings and marks.
Avoid harsh chemicals and abrasive cleaners that can strip the finish. Always test any new product on a small, inconspicuous area before full application.
Inspect for any signs of wear or damage periodically. Addressing chips or scratches promptly prevents further deterioration. For minor repairs, use a touch-up pen or similar product to disguise imperfections.
For long-term care, keep the piece in a controlled environment, away from direct sunlight and extreme temperature fluctuations. Fluctuations can cause the finish to crack or fade.
During seasonal changes, consider repositioning items or gently rotating them to maintain even wear across the surfaces.
Tools You Need for French Polishing
The first tool is a good-quality shellac. Opt for button or flake shellac, which must be dissolved in denatured alcohol. A second essential item is a soft lint-free cloth or pad, typically made of cotton or linen. This will act as an applicator during the process.
Investing in a suitable pad makes a difference; a traditional ‘rubber’ comprised of a folded cloth, filled with wad of cotton, provides excellent results. Ensure it is slightly dampened with the shellac mixture for proper application.
Additional Equipment
A fine-grit sandpaper or abrasive pad is important for surface preparation between layers. Multiple grades will allow for a smoother finish. A dust mask and safety goggles help maintain safety while working with shellac and solvents. Use a clean, dust-free environment to avoid particles settling on the surface.
Storage and Cleanup
Lastly, have solvents and cleaning materials on hand for maintaining tools and disposing of any used pads or cloths. An airtight container will be necessary for storing any leftover shellac mixture to maintain usability for future projects.
Understanding the Drying Times of French Polish
Allow each layer of shellac to dry thoroughly before applying subsequent coats. Generally, a drying period of about 30 minutes to an hour is sufficient between applications. This can vary depending on humidity and temperature; higher humidity may extend drying times, while warmer conditions can reduce them.
Testing for dryness is straightforward. Lightly pressing a fingertip on the surface will indicate if it’s ready. If it feels tacky, wait longer. Additionally, maintaining a moderate airflow while working can facilitate quicker drying without compromising the finish.
Factors Influencing Drying Times
Environmental conditions play a significant role. Low temperatures and high humidity can significantly delay the curing process. In such situations, consider heating the space slightly to aid in speedier drying without overheating.
Thickness of application impacts the time as well. Thicker layers require extended drying times, so applying thinner, even coats ensures a more uniform finish and faster overall completion.
Final Curing Period
After the final application, a longer curing time is recommended–ideally 24 hours or more before subjecting the surface to any use. This allows for optimal hardening of the finish, enhancing durability and appearance.
Monitoring these drying times ensures a beautiful, long-lasting sheen and prevents imperfections in the finish, achieving the desired aesthetic seamlessly.


