If your seating or storage items seem unsteady, using small pads under their legs is a straightforward solution. These pads can often be found in hardware stores and come in various materials such as rubber or felt, providing the grip needed to stabilize them on a non-uniform base.
Carefully measure the height difference at each leg. A spirit level can be beneficial here, ensuring precision. Once you identify which legs need elevation, select pads that correspond to those measurements. Adhesive options are particularly handy, allowing you to stick them directly to the bottom of furniture legs.
For a more tailored approach, consider adjustable glides. These devices can be screwed into the base and adjusted to accommodate variations in height. This is especially useful in areas where fluctuations in elevation are more pronounced, offering a customized solution to keep everything steady.
Another option involves using plywood strips under the uneven areas. Cut them to size and secure them in place for a solid base. This technique is effective for heavier items, distributing weight evenly across the support surface while ensuring stability.


Periodic checks are advantageous, especially if the structure settles or shifts. Regular maintenance can save time and prevent future issues with balance or alignment.
Addressing Imbalances in Your Space
The quickest solution I found involves using small adjustable pads or shims. These can be placed under the legs of the item, allowing for precise adjustments. Ensuring that you have a consistent surface feels like a simple but effective first step.
Materials Needed
| Item | Purpose |
|---|---|
| Adjustable furniture pads | Support and stabilize various surfaces |
| Wood or plastic shims | Fill gaps for a stable base |
| Leveling app | Check incline and ensure balance |
| Measuring tape | Measure heights for accurate placement |
Step-by-Step Guide
Start by determining the highest point of the ground beneath the item. Next, adjust the pads or shims under the legs accordingly. If the base is particularly unsteady, I suggest using a laser level or bubble level to guarantee the proper alignment. Regular checks may be needed, especially if the surroundings fluctuate over time, ensuring that the adjustments remain effective.
Identifying the Type of Uneven Surface
Begin with a thorough inspection of the area. Look for signs of sagging, bulging, or slanting, which can indicate variations in the substructure. Use a level tool along key points; this provides a clear perspective on any discrepancies.

Check for any gaps between the base of your piece and the ground. A feeler gauge can help identify small variances. This will guide your choice of adjustment techniques.
Determine if the issue arises from foundational problems or simply natural settling. If you notice cracks in walls or ceilings, it may suggest more significant concerns requiring professional evaluation.
Assess material types within the space. Hardwood, tile, and carpet can behave differently under weight. Be mindful of how the materials interact when assessing the surface.
Identify seasonal changes in your environment. Humidity and temperature fluctuations can influence the shape of wooden surfaces, altering flatness over time. Observing these patterns helps anticipate future adjustments.
Lastly, track the wear and tear on surrounding structures. Signs of wear might indicate the need for more comprehensive solutions in addressing sagging or tilting areas.
Measuring Furniture Stability
To evaluate the steadiness of your items, place a leveling tool, such as a spirit level, on top. If the bubble is centered, that piece is stable. If not, it may require adjustment.
For a finer assessment, check each corner of the structure. Use shims or pads to create uniform support. This ensures balance by compensating for dips or inclines.
Confirm that chairs or tables don’t wobble by gently pushing on each corner. If they sway, measure the height difference between the legs. This will help identify appropriate material to bring them to a steady stance.
In some cases, utilize a straight edge against the base. This technique highlights any gaps or misalignments, providing clear guidance on where adjustments are necessary.
For outdoor items exposed to the elements, re-measure periodically after weather changes. Environmental factors can shift the ground, affecting stability.
Choosing the Right Shims and Levelers
Select appropriate shims based on material and thickness required for your specific situation. Options include plastic, wooden, and metal shims. Plastic is weather-resistant and won’t warp; wood offers flexibility but may compress over time; metal provides durability for heavier items.
Types of Shims
- Plastic Shims: Lightweight, moisture-resistant, and ideal for indoor use.
- Wooden Shims: Versatile, easily cut to size, but can absorb moisture.
- Metal Shims: Best for heavy-duty applications, offering maximum support.
Levelers Options
- Adjustable Levelers: Perfect for fine-tuning height adjustments, often found in pedestals.
- Threaded Levelers: Screw-based systems that allow precise height changes; useful for static pieces.
- Self-adhesive Pads: Simple solutions that lift corners of structures but require careful application.
Measure the discrepancy of your setup before purchasing. It’s helpful to have several sizes on hand to ensure compatibility, allowing for quick adjustments without repeated trips to the store.
Use a combination of shims and levelers if the height deviation is significant. Shims can fill larger gaps while levelers manage minor adjustments, creating a stable and supported base.
Adjusting Chair and Table Legs
To correct stability issues, begin by examining each leg of your chairs and tables for length discrepancies. Use a ruler to measure the height of each leg from the ground to the bottom of the furniture. This helps in identifying which legs need adjustment.
If one or more legs are shorter, consider using adjustable leg levelers. These can be easily screwed into the base of the legs, allowing for height modification. They are particularly useful for occasional tables or dining chairs.
Alternatively, wooden or plastic shims can also be effective. Insert a shim beneath the shorter leg, adjusting the thickness until the piece sits flat. Cut shims to fit as needed, ensuring they are secure and do not slide out of place.
For wooden chairs, you might need to sand down longer legs slightly. Use a square to check if the leg is truly vertical after adjusting its length. This technique helps maintain a consistent aesthetic across your seating.
With metal frames, consider adhesive pads on the bottom of the legs or rubber grommets that fit snugly over the ends. These options can stabilize your items without the need for significant modifications.
Once adjustments are made, test the stability by placing weight on the furniture to ensure it doesn’t tilt or wobble. Reassess after usage; sometimes, further adjustments may be needed as materials settle or shift over time.
Using Rubber Furniture Pads
To enhance stability, I recommend installing rubber pads under the legs of your items. These pads not only create traction but also absorb shock, reducing wear on both the legs and the surface beneath. Choose pads that are sufficiently thick to compensate for the gaps caused by irregularities in the ground.
Selecting the Right Type
When choosing rubber pads, look for those with a non-slip surface. This feature prevents movement, especially on slick surfaces. Additionally, consider pads with varying hardness; softer pads can help absorb more shock, while firmer ones provide greater support.
Installation Tips
Ensure that the rubber pads are evenly distributed for balanced support. Clean the surface before placement to enhance adhesion. Regularly check the pads for wear and replace them as needed to maintain effectiveness. This simple adjustment can significantly mitigate wobbling and discomfort while using your seating and surfaces.
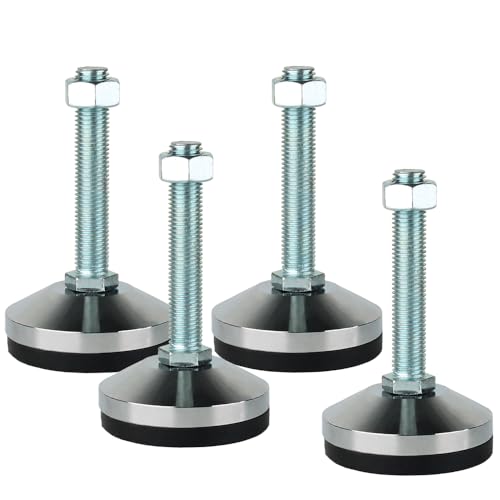
Employing Adjustable Furniture Feet
Utilize adjustable feet to address imbalances in a quick and straightforward manner. These components are designed to elevate specific corners, creating uniform contact with the surface beneath. I recommend locating adjustable glides that suit the aesthetic and weight of your items.
Start by removing any existing caps at the base of legs, and ensure the installation of adjustable glides aligns with the leg’s design. Most of these attachments allow for simple height manipulation, which facilitates precise adjustments according to varying terrain.
Turn each foot clockwise to increase the height, or counterclockwise to lower it. Employ a level to monitor the stability after each minor adjustment. This iterative process ensures a steady footing, allowing optimal utilization of your seating and tabletop areas.
For maximum performance, choose components that integrate well with materials in your home. A soft rubberized base can prevent slips while safeguarding the underlying surface from scratches.
Regularly inspect these glides for wear and tear, as maintaining the integrity of the setup is key to prolonged stability. Should any issues arise, prompt replacement can help preserve the functionality of your arrangement.
Implementing a Leveling Compound
To create a stable surface for your items, I often recommend using a leveling compound, which can fill in low spots and create a more uniform plane. Before starting, ensure the area is clean and free from debris.
Materials Needed
- Leveling compound
- Mixing bucket
- Mixing tool (drill attachment or paddle)
- Spatula or trowel
- Floor primer (if necessary)
- Measuring tape
Steps to Apply the Compound
- Measure the depth of low spots with a measuring tape.
- Prepare the surface by cleaning and applying primer if required by the compound’s instructions.
- Mix the leveling compound according to the manufacturer’s guidelines, ensuring a smooth consistency.
- Pour the mixture into the low areas and use a spatula or trowel to spread it evenly, following the manufacturer’s drying recommendations.
- Allow the compound to cure completely before placing items back onto the surface. This may take several hours or even days.
After the compound has dried, recheck for stability by placing your items back and adjusting them if needed. This process can significantly improve stability and comfort, reducing wear and tear on the legs of your pieces over time.
Rearranging Room Layout for Stability
Position heavy items such as bookshelves and entertainment centers against walls. This minimizes potential tipping and enhances support by distributing weight evenly.
Consider the arrangement of seating areas. Placing chairs and sofas closer together can provide a more stable base, reducing wobbling caused by shifting placement. Aligning these pieces with a wall can also add additional reassurance.
Create open pathways; avoid cluttering with too many items in one area. This not only allows for easier movement but also enhances balance by minimizing the chances of bumping into or shifting unstable pieces.
Utilize larger rugs under seating arrangements. A rug can offer a unified foundation that enhances grip and reduces movement, helping to keep chairs and tables steady.
Incorporate space-saving solutions like wall-mounted shelves. Elevating items off the ground frees up floor space and reduces the likelihood of instability.
Monitor shifting dynamics by observing traffic patterns. Arranging items based on movement flow keeps the area functional while promoting steady placement.
Prioritize symmetry in your layout. Balanced arrangements often yield a visually appealing and stable environment, helping to create a sense of order.
Lastly, periodically reassess your setup. Rooms evolve, and returning to refine arrangement can maintain a stable and aesthetically pleasing space.
Maintaining Furniture Level Over Time
Regularly check the support systems beneath your items to ensure ongoing stability. Inspect shims or pads for wear and replace any that show signs of damage. If adjustable feet are used, verify that they remain correctly set and haven’t shifted due to everyday use.
Routine Stability Assessments
Set a schedule for periodic evaluations. I suggest checking your arrangement every few months, especially in seasonal transitions when temperature and humidity changes can affect structures. Use a simple level or smartphone app for quick assessments of balance.
Addressing Shifts Promptly
If you notice a wobble or instability, take immediate action. Tighten screws and fittings on chairs and tables to avoid further complications. Add or adjust supports as needed to restore equilibrium. Ignoring small discrepancies can lead to larger issues later.
For locations with fluctuating humidity, consider investing in moisture barrier mats to protect from warping and shifting. Such preventive measures can greatly extend the life of your setup.


