
 Caleb Turner
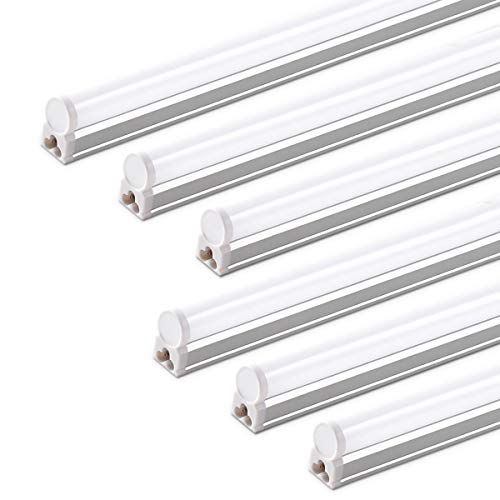
Begin by measuring the areas where you intend to apply the illumination. Identify ideal placements along beams or edges, ensuring the lengths of the flexible fixtures correspond to your dimensions. A tidy job starts with accurate measurements, so use a tape measure for precision.
Before securing the adhesive side, clean the surfaces to promote strong adhesion. A mixture of isopropyl alcohol and water works wonders for eliminating dust and grease. Allow the cleaned area to dry completely before proceeding.
For optimal efficiency, consider using a compatible power supply and a dimmer switch. This setup provides versatility in brightness, enabling you to create the desired ambiance. When connecting the strips, follow the manufacturer’s instructions for wiring and connections to ensure safety.

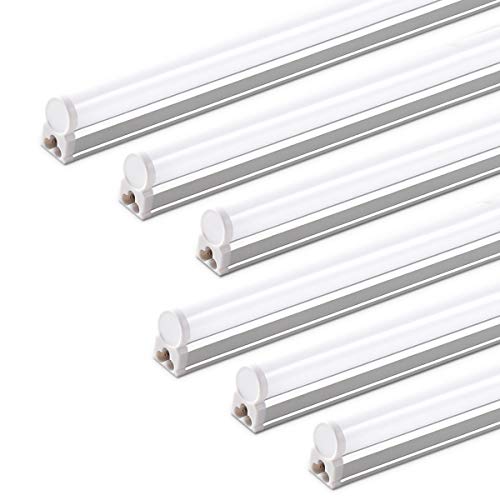


Finally, double-check all connections and settings before powering on. It’s best to do a test run to confirm that everything functions correctly. With careful planning and execution, you’ll achieve a well-lit and inviting atmosphere in your upper space.
Installing LED Tape in an Attic Space
Choose a mounting surface with a clean, dry, and smooth finish for the adhesive application. A thorough wiping with isopropyl alcohol effectively removes dust and oils that may affect bonding.
Measure the desired length meticulously, as precision ensures a neat installation. Use a tape measure and mark the cutting points on the strip before proceeding with scissors or a utility knife.
Begin by adhering one end of the strip firmly, allowing it to gradually follow the contours of the ceiling or rafters. Ensure no gaps form during placement to maintain a uniform glow.
Utilize corner connectors or extension cables if extending the strip around turns, ensuring continuity in the power connection. This prevents interruptions in illumination.
Secure any excess material with cable ties to avoid dangling wires that may pose a safety hazard. Check for any potential obstructions such as insulation or beams that could interfere with light distribution.
Connect the power supply and test the functionality before finalizing the position. If the area requires dimming features, consider integrating a compatible dimmer switch for enhanced versatility.
| Item | Purpose |
|---|---|
| Measuring Tape | To determine length needed |
| Scissors or Knife | For trimming the LED strip |
| Isopropyl Alcohol | To clean the surface before application |
| Cable Ties | To organize excess wiring |
| Dimmer Switch | For adjustable brightness |
Complete the setup by ensuring that all connections are secure and the installation is free from hazards. Test the full duration of use to confirm everything operates reliably over time.
Selecting the Right Type of Strip Light
Choosing the appropriate illumination source requires reviewing several critical factors. First, consider the luminosity requirements for your specific area. Higher wattage options are ideal for spaces needing bright illumination, while lower wattage variants work well in cozy settings.
Types of Illumination Sources
- LED: Energy-efficient and long-lasting. Excellent for task-oriented areas.
- RGB: Offers a variety of color choices, suitable for creating ambiance and mood.
- Cool White: Best for workspaces where clarity is necessary.
- Warm White: Creates a welcoming atmosphere, perfect for leisure spaces.
Length and Flexibility
Measure the intended installation surface accurately. Choose a length that accommodates those measurements, allowing for possible adjustments. Flexible models can bend around corners, making them adaptable for unconventional spaces.
Evaluate the adhesive backing for practical installation. Some variants come with enhanced adhesive for more substantial surfaces, while others allow for detachable options. This functionality is useful if modifications are necessary in the future.
Lastly, ensure compatibility with existing electrical systems. If unsure, consulting with an electrician can provide clarity on voltage and power specifications. By considering these elements, I guarantee that the selected product will meet all your needs.
Measuring the Loft Space for Proper Illumination
Begin measurements by determining the dimensions of the area you wish to illuminate. Use a tape measure for accuracy, noting the length, width, and height of the space. Be sure to check for any angles or slopes in the ceiling, as they can impact how the fixtures are placed.
Steps to Measure Effectively
- Measure length and width at the floor level.
- Measure height at the highest point of the ceiling.
- Account for any beams or obstructions that might affect placement.
Next, consider the layout. If the area is divided into sections, record the dimensions of each section. This helps in planning how many fixtures are necessary for consistent brightness throughout.
Calculating Required Lumens
To determine the required brightness, multiply the square footage of the area by the recommended lumens per square foot. For example, a 200-square-foot area typically needs around 2,000 to 4,000 lumens, depending on its intended use.
Finally, assess the power source availability. Check for outlets in the vicinity to facilitate installation without complicated wiring. These preparations ensure an effective setup for optimal glow.
Choosing the Ideal Location for Installation
I recommend assessing various zones to maximize illumination effectiveness. Corners often work well, providing a broader reach and minimizing shadows. Consider areas where you frequently carry out tasks; positioning the installation above these spots enhances usability.
Observing the height can influence placement. For lower ceilings, a side mount might create more direct illumination, while higher ceilings benefit from a top fixture to cast light downward effectively. Ensure the chosen place doesn’t obstruct pathways; keeping walkways clear creates a safer environment.
I suggest placing the installation along architectural features. Beams and ledges can serve as excellent anchors, integrating the illumination seamlessly into the existing structure. Additionally, consider proximity to power outlets to simplify wiring, avoiding excessive lengths that could complicate the setup.
Room shape also plays a role. Narrow spaces may require alignment along the longer walls to distribute brightness evenly, while open areas can accommodate various placements for flexibility. Evaluate natural light sources; during daylight, consider how shadows might affect efficiency and adjust accordingly.
Finally, conduct a test run with temporary placement. This allows me to visualize the impact before committing to permanent installation. Being mindful of these criteria facilitates achieving optimal results and enhances the overall atmosphere of the area.
Preparing the Surface for Strip Light Adherence
Begin by ensuring the area where the adhesive will go is completely clean. Use isopropyl alcohol and a lint-free cloth to wipe down surfaces, removing dust, grease, or any previous residues.
Check for any loose paint or peeling wallpaper. If present, scrape away any compromised areas to create a smooth surface. Uneven or rough textures can hinder proper adhesion.
Consider priming the surface if it is highly glossy. A matte finish allows better grip for the adhesive. Wait for the primer to dry completely before proceeding.
Evaluate the ambient temperature and humidity. Adhesives typically perform best within specific ranges. Aim for a stable environment to avoid issues related to temperature fluctuations.
- Ensure at least 24 hours of stable conditions before applying.
- Use a moisture meter if necessary to confirm surface dryness.
Test a small section with the adhesive to confirm sufficient sticking power before the full installation. This initial test can save time and materials in case adjustments are needed.
Electrical Considerations for Installation
Assess the electrical load capacity of your existing circuit before proceeding. Check the wattage of the chosen illumination fixtures; the combined wattage must not exceed 80% of the circuit’s capacity to avoid overload issues.
Ensure that the electrical supply meets the voltage requirements of your chosen fixtures. Most LED variants operate on low voltage, requiring a transformer or driver for proper functionality.
Consider the placement of outlets. If necessary, install additional wall sockets or junction boxes close to the installation area to avoid using extension cords, which can present safety risks.
Evaluate the type of wiring in your space. If it’s outdated, upgrading to ensure safe and efficient performance is essential. Consult a licensed electrician for recommendations and installation.
Install dimmer switches if you desire adjustable brightness. It’s important to choose dimmers compatible with LED products to prevent flickering and ensure smooth operation.
Prioritize proper insulation for any exposed wiring. Using conduit where necessary can help protect wires from damage and moisture, maintaining a safe environment.
Compliance with local building codes is mandatory. The guidelines often dictate certain safety standards; therefore, familiarizing yourself with them is key to a successful installation.
Finally, consider future accessibility. Ensure that connections, transformers, or any control mechanisms are easy to reach for maintenance or replacements.
Cutting and Connecting Strip Lights Accurately
For precise cuts on the flexible circuits, I measure the required length against the area where I intend to place them, marking the cuts with a fine-tip marker. The cutting points are usually indicated on the product itself, making it easier to ensure I cut at the right interval. Using sharp scissors or a utility knife provides clean edges, which is critical for maintaining the integrity of the connections.
After cutting, I peel the backing to expose the adhesive. I connect the segments by aligning the copper pads correctly. It’s vital to avoid bending or twisting the connectors excessively, ensuring a proper electrical connection. If using solder for connections, I prepare my working area, using flux and solder to ensure a reliable bond between components.
Connection Methods
I typically consider two main methods for linking segments: soldering or using connectors. For soldering, I heat the iron and apply it to the joint, ensuring a quick and efficient connection. It’s important to wait for the solder to cool completely before moving the assembly. In contrast, using connectors simplifies the procedure, often requiring just a push to secure the link, which can save time and reduce the risk of damage.
Testing the Setup
Once I connect everything, I power on the system before finalizing the installation. This step helps me identify any issues with connectivity. If certain sections do not light up, I check each connection to verify that the soldering or connector installation was executed correctly. This preliminary assessment prevents additional work post-installation.
| Connection Method | Advantages | Disadvantages |
|---|---|---|
| Soldering | Durable, secure connections | Requires tools and skills |
| Connectors | Quick and easy | May be less reliable over time |
Securing the Strip Light Properly
Utilizing adhesive backing is a straightforward method for attaching the illumination. Ensure the surface is meticulously cleaned and dry to maximize adhesion. I recommend applying pressure along the length of the tape after placement.
For added durability, consider using mounting clips or brackets. These can be spaced evenly along the installation area, providing extra support. Positioning them at corners or joints of the illumination can effectively prevent sagging.
If the application is in a high-traffic area, employing a secondary fastener, such as double-sided tape or silicone adhesive, will enhance security. This approach merges the ease of adhesive strips with the robustness of mechanical fixation.
Before finalizing installation, ensure that the fixtures are neatly aligned. Maintaining a straight line not only improves aesthetics but also reinforces the physical integrity of the setup. Regularly check the edges to confirm proper adherence over time.
In cases where the ceiling or wall texture may impede adhesion, consider using a lightweight mounting channel. This provides a flat surface for the illumination, ensuring a secure and level installation regardless of the underlying texture.
Lastly, always adhere to the manufacturer’s instructions regarding maximum weight and environmental conditions to prevent any safety hazards.
Testing the Strip Light After Installation
I recommend powering on the system immediately after securing all connections. This allows for a quick check on performance. Inspect for any flickering or uneven brightness. If inconsistencies appear, it might indicate a poor connection or a damaged segment of the fixture.
Next, assess the distribution of illumination across the area. This helps in confirming whether the selected units meet your expectations in terms of coverage. Move around to identify any blind spots, ensuring every corner is well-lit.
Test the dimming functionality if applicable. Adjust the brightness to confirm the system responds correctly. This feature is crucial for setting the right mood and reducing glare during different times of the day.
Evaluate the color temperature during the testing phase. Ensure it aligns with your intended ambiance. A warm hue creates a cozy feel, whereas a cool tint might be better for tasks that require focus.
Finally, give the installation some time to run. Observe the fixture for any overheating. Should any unusual heat be detected, double-check the mounting method and electrical connections to prevent potential hazards.
Maintaining Strip Lights for Longevity
Regularly inspect your illumination sources for signs of wear, such as flickering or discoloration. This can indicate loose connections or aging components.
Clean the surface gently with a soft, damp cloth to remove dust. Avoid harsh chemicals that can damage adhesives or circuitry.
Ensure proper ventilation if heat accumulation is a concern. Installing with adequate clearance helps prevent overheating. Consider using dimmers; they can enhance lifespan by reducing energy output during less critical hours.
Store spare materials in a controlled environment. Extreme temperatures or humidity can affect performance and adhesion.
Follow manufacturer guidelines regarding wattage and usage duration. Overloading might reduce both performance and lifespan significantly.
Be cautious when rearranging furniture or placing new items nearby. Physical damage can easily occur, which could compromise functionality.
Avoid frequent on-off cycles; this can wear down components faster. If possible, use timers or smart systems to manage usage efficiently.
By adhering to these recommendations, the longevity of your fixtures can be significantly improved, ensuring consistent performance over time.


