I recommend cleaning with a mixture of mild soap and warm water. Use a soft brush to remove dirt from the weave, avoiding harsh chemicals that could damage fibers. Rinse thoroughly and let air dry in a shaded area to prevent fading.
Once dried, inspect for any loose or damaged sections. I find that using a suitable adhesive designed for natural materials works well to secure any frayed ends. For more extensive repairs, consider replacing sections with new strands of similar material to maintain consistency.
To protect your seating from the elements, apply a specialized spray, ensuring it is compatible with the material. Regular maintenance, such as wiping down with a damp cloth and keeping them covered during severe weather, will greatly extend the life of your patio pieces.
Restoration Process for Rattan Seating
Begin with a thorough cleaning utilizing a soft brush and a mixture of mild soap and warm water. Avoid harsh chemicals that may damage the surface. Rinse off the soap thoroughly and let it dry completely in a shaded area to prevent fading.
Repairing Frayed Areas
For any areas showing signs of wear, use adhesive specifically designed for natural fibers. Carefully apply it to the frayed parts and press them together until set. If needed, reinforce with new strands of similar material, matching color and thickness as closely as possible.
Finishing Touches
Once repairs are complete, apply a protective sealant suitable for natural materials. This will extend the lifespan and maintain the appearance. A light sanding of the surface with fine sandpaper before sealing can enhance adhesion.
| Step | Materials Needed |
|---|---|
| 1. Clean thoroughly | Soft brush, mild soap, warm water |
| 2. Fix frayed areas | Adhesive, new strands (if needed) |
| 3. Seal and protect | Sealant, fine sandpaper |
Assessing the Condition of Your Natural Weave Seating
I begin with a thorough visual inspection of the piece. Look for any signs of damage such as cracks, breaks, or loose strands. Pay close attention to the joints and connections where different parts meet, as these areas often show the most wear.
Check for Structural Integrity
Gently apply pressure to various parts of the seating. Stability is key; any wobbling indicates a need for reinforcement. If the base feels unstable, consider using wood glue to secure loose connections.
Examine the Weaving
Inspect the weave for fraying or missing portions. If areas look thin or worn, note these for potential repair. I often find that minor replacements can restore the original appearance without a complete overhaul.
Don’t forget to check for mold or mildew, particularly if the item has been exposed to moisture. If present, clean the affected areas appropriately and ensure the piece dries completely before proceeding with any repairs.
Gathering Necessary Tools and Materials
Before proceeding with the revival of your woven items, it’s crucial to prepare a toolkit. Gather the following essentials:
- Soft Cloth: A clean, lint-free cloth for dusting and wiping surfaces.
- Brush: A soft-bristled brush to remove debris and dirt from the weave.
- Wood Cleaner: Opt for a gentle cleaner suitable for the type of wood used.
- Sandpaper: Fine-grit for smoothing any rough areas on wooden components.
- Wood Glue: Choose a strong adhesive for repairing any loose joints.
- Varnish or Sealant: For protection against weather conditions.
- Paintbrush: A good quality brush for applying varnish evenly.
In addition to tools, collect materials specially designed for woven surfaces:
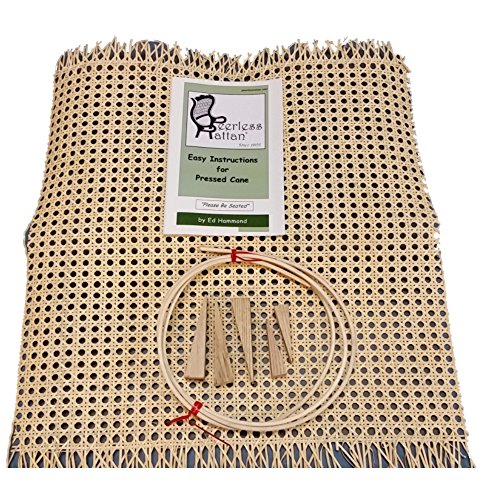
- Replacement Weaving Material: Identify the right type to match your original design.
- Twine or Cord: Useful for reweaving and securing strands.
Ensure you have adequate workspace with good lighting to inspect every detail effectively. Being well-equipped will streamline the process and enhance the final outcome.
Cleaning Cane Furniture: Step-by-Step Guide
Begin with a thorough dusting using a soft brush or cloth. This removes loose dirt and debris trapped in the weaves.
Next, create a cleaning solution with warm water and a few drops of mild dish soap. Dip a soft cloth into the mixture, wring it out to avoid excess moisture, and gently wipe the surface. Be cautious not to soak the material.
For stubborn stains, apply a paste made from baking soda and water directly to the affected area. Let it sit for about 15 minutes before gently scrubbing with a soft-bristled brush. Rinse the area with a damp cloth to remove residue.
After cleaning, use a damp cloth to wipe down all surfaces again to ensure no soap or cleaning agents remain. Follow this with a dry cloth to absorb any leftover moisture.
Once clean, allow each piece to air dry completely in a shaded spot to prevent discoloration or warping. Avoid direct sunlight as it can damage the fibers.
After drying, consider applying a small amount of furniture polish suitable for natural finishes. This adds a layer of protection and enhances the aesthetic. Apply it sparingly using a soft cloth.
Regular cleaning every few months helps maintain the beauty and longevity of your items, keeping them looking fresh and inviting.
Repairing Damaged Cane: Techniques and Tips
For minor frays or breaks, use boiling water to soften the reed. This allows for easier manipulation and straightening of the fibers. Once pliable, reshape the cane and secure it until it cools and hardens again.
Patch Small Holes or Breaks
To patch small holes, cut a piece of similar material to fit the damage. Use a strong adhesive to secure it in place, and once dry, sand it down gently to achieve a smooth surface that blends with the surrounding area.
Reinforce with Twine or String
For areas that require extra support, consider wrapping with twine or strong string. This not only adds durability but also can enhance the aesthetic appeal. Choose a color that complements the original material and wind it tightly around the damaged sections.
Applying New Finish to Restore Appearance
First, choose a high-quality outdoor sealant or protective finish suitable for your specific type of material. Make sure it offers UV protection and water resistance.
Prepare the surface by ensuring it is clean and dry. Lightly sand any rough areas to promote adhesion of the new coating. Wipe off any dust with a damp cloth, allowing it to dry completely.
Use a brush or roller for application, following the manufacturer’s instructions. Apply the finish evenly, focusing on areas that are most exposed to the elements. A thin initial coat works best for even coverage.
Allow the first coat to cure as recommended. Once dried, assess the appearance; if needed, apply a second coat for enhanced durability and an improved look.
After completing the process, ensure adequate drying time before exposing your outdoor pieces to weather conditions. This final step helps lock in the protective finish and enhances longevity.
Replacing Broken or Missing Cane Strips
First, I assess the broken or missing strips. I measure the length and width needed for each replacement accurately. Selecting a suitable replacement material is crucial; I look for natural rattan or a synthetic alternative based on the existing design and intended use.
Next, I remove the damaged sections carefully. This involves cutting the old strips at the joints with a sharp craft knife or scissors, ensuring not to harm the surrounding framework. Keeping the furniture steady while working is essential, so I have it properly supported.
For installation, I prepare the new strips by cutting them slightly longer than needed. This allows flexibility during attachment. I soak the new strips in warm water for about 30 minutes, as this softens them, making bending and weaving easier.
Starting from one end of the frame, I insert the soaked strip into the initial joint, securing it with a small amount of glue if necessary. Depending on the design, I weave or tuck it into place, ensuring tightness and uniformity. I keep an eye on the pattern to maintain consistency across the entire piece.
Once the replacement strips are installed, I trim any excess material at the ends to match the original finish. To ensure longevity, I apply a suitable protective finish, which can be a clear coat or varnish, to enhance durability and maintain appearance over time.
Finally, I allow everything to dry thoroughly before using the item again, ensuring the new components adhere properly and withstand everyday wear.
Preventing Future Wear: Maintenance Tips
Regularly inspect for signs of damage or wear. Catching issues early can save time and resources. Every few months, look for loose or frayed fibers and reinforce them immediately.
Cleaning is paramount. I use a soft brush or a vacuum with a brush attachment to remove dust and debris. Follow up with a damp cloth lightly soaked in a mild soap solution to prevent buildup that can cause deterioration.
Store items in a shaded area or cover them during harsh weather. Protecting from UV rays and moisture extends longevity significantly. If possible, bring pieces indoors during extreme conditions.
Periodically apply a protective finish specifically designed for woven materials. This acts as a barrier against environmental factors and enhances resistance to stains and liquids.
Ensure that items don’t sit in direct contact with wet surfaces. Use coasters or mats beneath, especially during rainy spells. This reduces moisture absorption and helps maintain structural integrity.
Lastly, consider routine re-caning for areas showing wear. Proactive care helps maintain aesthetics and usability, ensuring a longer lifespan.
| Action | Frequency |
|---|---|
| Inspect for damage | Every 3 months |
| Clean with brush/vacuum | Monthly |
| Apply protective finish | Annually |
| Store covered in inclement weather | As needed |
| Routine re-caning | As necessary |
Choosing the Right Outdoor Location for Longevity
The ideal spot for placement involves a combination of shade, shelter, and surface choice. Positioning your patio pieces under a tree or an umbrella can reduce direct sunlight exposure, minimizing fading and degradation.
Shade and Protection
- Avoid full sun for prolonged periods to prevent color fading.
- Consider using a canopy or pergola to shield from harsh elements.
- In windy areas, opt for a location that provides natural barriers, such as walls or hedges.
Surface Considerations
- Place pieces on a stable, flat surface to avoid tipping and uneven wear.
- Avoid concrete directly on soil; moisture and mold can arise from ground contact.
- Use outdoor rugs to add an extra protective layer and enhance aesthetics.
Regularly moving items helps avoid uneven wear patterns and prolongs their lifespan. Ensure your chosen area allows for ample airflow, which helps in drying after rain. Monitor your surroundings for any signs of damage from environmental factors, and adjust positioning as needed.
Finding Professional Help for Complex Repairs
For intricate issues far beyond my expertise, seeking out skilled artisans who specialize in the restoration of woven pieces is wise. It ensures that delicate repairs are handled with precision, maintaining the integrity of the item.
Here’s how to locate the right expert:
- Research Local Artisans: Look for workshops or individuals in your area who focus on furniture revival or wicker craftsmanship. Check online reviews and ask for recommendations.
- Verify Credentials: Ensure they have a proven track record with pieces similar to yours. Request to see examples of prior work or testimonials from previous clients.
- Request Consultations: Many professionals offer evaluations. Utilize this to get their insights and discuss potential strategies for fixes, which allows me to gauge their approach and knowledge.
When discussing complex repairs, I find clarity crucial:
- Describe the Problems: Be as detailed as possible about the damage, whether it’s significant structural issues or minor cosmetic flaws.
- Inquire About Techniques: Ask how they plan to address the issues. Their responses will indicate their familiarity with proper restoration methods.
- Discuss Timelines: Determine how long the repair process will take. Understanding their schedule helps me plan accordingly.
Don’t forget to talk costs. Knowing the financial aspect beforehand helps in making informed decisions:
- Obtain Written Estimates: Request a breakdown of costs, including labor, materials, and any additional fees.
- Compare Pricing: If multiple quotes are available, expanding my options may lead to finding a competitive rate.
Finally, trust plays a significant role in deciding whom to hire. I lean toward professionals who exhibit passion for their craft; their dedication often reflects in the quality of their work.