If you’re looking to change the hue of your wooden items, I highly recommend gathering the right materials before diving in. Begin with a quality stripper or sander to remove the existing finish, ensuring a smooth surface for your new look. A consistent application is key, so take your time during this preparatory stage.
Once you’ve achieved a clean slate, consider testing various stain options on a small, inconspicuous section of the piece. This allows you to see how the wood reacts and helps you select the ideal shade without committing to a larger area. Be mindful that different types of wood absorb stains differently, so your final result may vary.
Apply your chosen stain with a brush or cloth in the direction of the grain. I find that working in thin layers not only enhances the depth of the finish but also makes it easier to control the saturation. Finish with a clear protective coat to seal the new stain and ensure durability. Enjoy your refreshed item with its new appearance and character!
Restaining Guide
I recommend stripping the existing finish using a chemical stripper or sandpaper to prepare the surface. This step ensures the new stain adheres properly, providing a more uniform application.
Next, clean the piece thoroughly to remove dust and residues. After drying, apply a wood conditioner to promote even absorption of the new hue.
For the staining process, select a high-quality product that suits your desired shade. Use a brush or cloth to apply the stain in the direction of the wood grain. It’s essential to wipe off excess within a few minutes to avoid blotching.
Once the first coat is dry, evaluate the opacity. If the finish isn’t as intense as desired, apply additional coats, allowing adequate drying time between applications.
After achieving the desired result, seal the surface with a protective topcoat to enhance durability. Options include polyurethane or lacquer. Applying two to three thin layers will offer optimal protection while preserving the new look.
| Step | Detail |
|---|---|
| Preparation | Strip old finish, clean surface |
| Conditioning | Apply wood conditioner for evenness |
| Staining | Apply stain, wipe excess |
| Coats | Add layers as needed |
| Sealing | Topcoat for protection |
Choosing the Right Shade for Your Piece
Opt for a hue that complements your existing décor. I typically consider the color palette in the room. If the space is neutral, a bold, saturated tint can make the item a focal point. Conversely, if your surroundings are already vibrant, a softer tone can provide balance.
Analyze the lighting conditions. Natural light can alter perceptions of hues throughout the day. Test samples in different lighting to observe variations. I find that what looks warm in daylight might appear cooler when illuminated by artificial sources.
Consider the mood you want to create. Warm shades evoke coziness, while cool tones can bring calmness. If I aim for a relaxed feel, muted greens or blues work beautifully. For vibrant energy, I lean towards lively yellows or reds.
Think about the piece’s function. If it’s an item for heavy use, I choose darker shades or multi-tonal finishes that hide wear and tear more effectively. For decorative accents, I might select lighter or more intricate patterns.
Lastly, always test your selection with a small sample. I recommend applying swatches where the item will be displayed to see the true effect against walls and furnishings. This step saves me from potential regrets later on.
Preparing Surfaces for a New Stain
Begin by emptying all drawers and removing any hardware such as knobs and hinges. This prevents them from becoming damaged and ensures a clean staining process.
Next, clean the item thoroughly using a mixture of water and mild detergent. A soft cloth works best for this task to avoid scratches. After cleaning, rinse with plain water and allow the piece to dry completely.
Sand the exterior using medium-grit sandpaper to remove old finishes and to create a smooth surface for the new application. Focus on areas with imperfections and smooth them out. Follow up with fine-grit sandpaper to achieve an even finer finish.
Dust off the surface using a vacuum or a tack cloth. This step is crucial as even the smallest particles can affect the adherence of the new stain.
If the item has a glossy finish, using a deglosser may be necessary, as it helps to prepare the surface by dulling the shine for better absorption.
Finally, ensure to work in a well-ventilated area. Proper airflow minimizes inhalation of fumes and expedites the drying process, making for a safer and more enjoyable experience.
Selecting the Appropriate Stain Type
For optimal results, I recommend considering the following options for your project:
- Oil-Based Stains: These offer a rich finish and deep penetration, making them ideal for highlighting wood grain. They require longer drying times and cleanup involves solvents.
- Water-Based Stains: Quick drying and low in odor, these are favorable for indoor projects. They provide a more subtle finish and are easier to clean up, but may raise the grain of the wood.
- Gel Stains: These provide excellent control during application since they sit on top of the surface rather than penetrating deeply. This makes them suitable for vertical surfaces or pieces with intricate details.
- Hybrid Stains: Combining properties of both oil and water-based formulas, these stains can be a versatile choice. They offer fast drying while maintaining the depth of color typical of oil-based products.
To select the right option, consider the wood type you’re working with:
- For dense hardwoods like oak or walnut, oil-based stains may bring out more character.
- Pine or poplar can be beautifully enhanced with water-based options.
- Complex surfaces benefit from gel formulas, ensuring even application.
Check the manufacturer’s instructions for compatibility with your current finish to avoid issues during application. Eventually, testing a small area or scrap piece of wood can help gauge how the stain interacts with the surface before committing to the entire piece.
Applying the Stain: Tools and Techniques
Gather necessary tools: high-quality brushes or foam applicators, rags for wiping excess, and protective gloves. A drop cloth protects the work area from drips and spills. I prefer using a small paint tray to hold the stain, making application easier.
Prior to application, ensure the wood is clean and dust-free. Open the stain can and stir thoroughly for even distribution of pigments. Apply with a brush or foam applicator, following the wood grain to enhance the natural texture.
Work in sections, applying a generous amount of stain and wiping off any excess within 5-10 minutes. This prevents uneven dark spots. For a deeper tone, allow the first coat to dry completely before applying additional layers.
Check the manufacturer’s instructions for drying times, which can vary significantly. After the final coat, allow ample time for the stain to cure fully, which ensures durability and rich color.
Consider using a topcoat to protect the finish. Water-based polyurethane is an excellent choice for a clear finish that preserves the stain’s vibrancy while adding resilience.
Ensuring Even Stain Coverage
Before applying any stain, I recommend conducting a test on a small, inconspicuous area to check for even saturation. This approach helps in deciding the right technique that works best with the wood type. Employ a lint-free cloth or a foam brush for application; these tools minimize streaking by allowing smooth, consistent application.
Staining Technique
Utilize a circular or back-and-forth motion while applying the product, overlapping each stroke slightly. This method prevents uneven patches. Maintain a wet edge to avoid lap marks. If a section dries before I finish, I work that area again to blend the new stain with the previous application.
Inspecting Surface
After the first coat dries, I always check for areas that may have absorbed more pigment. If I spot inconsistencies, a light sanding followed by an additional coat can help achieve uniformity. Regularly stepping back from the piece allows me to observe the overall appearance, ensuring that no area is left untouched.
Sealing and Protecting the New Finish
After applying your chosen hue, safeguarding that new appearance is paramount. I recommend using a high-quality polyurethane or water-based topcoat depending on the intended use and desired finish. Both offer strong protection against scratches, water, and UV damage.
Before applying the sealer, ensure the stain has fully dried. Follow the instructions on your product for the recommended drying time, which typically ranges from 24 to 48 hours. This wait prevents issues like smudging or mixing.
| Sealer Type | Finish | Application Method |
|---|---|---|
| Oil-based Polyurethane | Glossy | Brush or Foam Pad |
| Water-based Polyurethane | Satin | Spray or Brush |
| Shellac | Glossy | Brush |
| Varnish | Gloss or Satin | Brush or Roller |
I typically apply at least two thin coats of sealer, allowing proper drying time in between. Sand lightly between layers with fine-grit sandpaper to ensure a smooth finish and better adhesion.
For surfaces that experience high traffic or are prone to wear, consider adding an extra coat for increased durability. Once the final layer is applied, allow it to cure properly, often taking a full week for optimal hardening. This patience pays off in longevity.
Ensure the area is well-ventilated during the sealing process to avoid inhaling fumes. Always wear protective gear such as masks and gloves to safeguard your health. Following these steps will help maintain the aesthetic appeal and protect against everyday usage.
Maintaining Your Restained Furniture
To preserve the look and longevity of your revamped pieces, regular care is essential. Begin by dusting surfaces with a soft cloth to remove debris that can lead to scratches.
For deeper cleaning, use a mixture of gentle soap and water–avoid harsh chemicals that can degrade the finish. Wipe the surface with a damp cloth, then dry thoroughly to prevent moisture damage.
Apply a high-quality wood conditioner every few months. This step enhances sheen and protects against fading or wear over time. Choose a conditioner that complements the new hue.
Avoid placing objects with unprotected bases directly on the varnished surface. Use coasters and felt pads to minimize contact and prevent scratches or stains.
Direct sunlight can fade the surface, so keep the piece out of intense light or use curtains to shield it. Rotating decorative items occasionally can also help maintain consistent exposure.
Inspect the finish annually for signs of wear or degradation. Address any scratches or dull spots promptly using appropriate touch-up products to keep the appearance fresh.
For outdoor pieces, apply a sealant formulated for exterior use to guard against the elements. This extra layer protects against moisture, UV rays, and temperature fluctuations.
By implementing these maintenance practices, I can ensure that my restored pieces remain beautiful and functional for years to come.
FAQ:
What materials do I need to restain furniture?
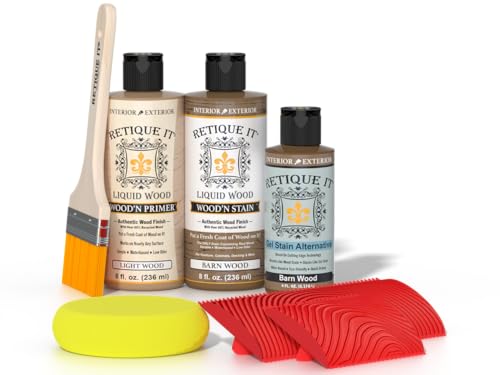
To restain furniture, you’ll need several materials: a fine-grit sandpaper for surface preparation, a wood stain in your desired color, a clean cloth or brush for application, a wood conditioner (if necessary), and a clear topcoat for protection. Additionally, having a drop cloth and some gloves will help keep your work area clean and protect your hands.
Can I restain furniture without stripping the old finish?
Yes, you can restain furniture without completely stripping the old finish, especially if you are using a darker stain or if the existing finish is in good condition. Lightly sanding the surface to scuff up the finish allows the new stain to adhere better. However, if the original color is significantly lighter than your desired stain, you might want to consider stripping the old finish for the best results.
How do I choose the right color of stain for my furniture?
Choosing the right color of stain depends on several factors including your existing decor, the type of wood, and the final look you wish to achieve. It can be helpful to test a few stain colors on an inconspicuous area of the furniture or on a scrap piece of the same wood. Keep in mind how the stain will look in different lighting conditions, and consider the overall tone—warm, cool, or neutral—that you want for your space.
What is the best way to apply wood stain to furniture?
The best way to apply wood stain is to use a clean cloth or a brush. Begin by applying a generous amount of stain to the wood, working in the direction of the grain. Use a clean cloth to wipe off the excess after a few minutes, depending on how deep you want the color to be. Allow the stain to dry completely before applying a protective topcoat, which adds durability and enhances the finish.
How long does it take for the stain to dry before I can use the furniture?
Generally, wood stain can take anywhere from 1 to 8 hours to dry, depending on the type of stain, temperature, humidity, and air circulation. Always check the manufacturer’s instructions for specific drying times. After the stain has dried, applying a topcoat may require additional drying time, so plan accordingly to ensure your furniture is ready for use without damaging the finish.
What materials do I need to restain furniture a different color?
To restain furniture, you will need several materials. First, gather sandpaper or a sanding block to prepare the surface by removing the old finish. You’ll also need a clean cloth or tack cloth to wipe away dust after sanding. Next, choose a wood stain in your desired color, and purchase a paintbrush or foam applicator for even application. Depending on the type of wood and your finish preference, you may also need a wood conditioner, which helps achieve a more uniform stain. Lastly, a sealant or topcoat, like polyurethane or lacquer, will protect the newly stained surface. Make sure to work in a well-ventilated area while completing this project to ensure safety and comfort.


