

The best approach involves utilizing a flathead screwdriver to gently pry up the metal pieces. Position the blade beneath the edge of the fastener, applying upward pressure while ensuring the wood surface is not damaged. Gradually lift the staple until it’s free. If the fastener is deeply embedded, consider using pliers to grip it once it’s partially lifted.
For a safer option, heat the area with a hairdryer for about a minute. This softens any adhesive and makes extraction smoother. With the area warmed, repeating the process with the screwdriver can yield better results.
If there are multiple fasteners, a staple remover tool can be a smart investment. With its specialized design, it can help speed up the process significantly without causing harm to the surrounding wood. A little patience goes a long way, ensuring that each piece is carefully extracted while maintaining the integrity of the surface.
Identify the Type of Staples Used
Before tackling the extraction process, I assess the kind of fasteners assigned to the piece. There are several variations to consider. First, I note the size; larger fasteners are often used in heavy-duty applications, while smaller versions are typically installed in lighter upholstery tasks. I pay attention to the length and width, as this combination influences the appropriate extraction technique.
Next, I examine the shape. Some fasteners have a flat crown, which sits flush with the surface, whereas others may feature a rounded crown that may require additional care during removal. There are also specific designs intended for various materials; for instance, certain types are optimized for holding fabric tightly against wooden surfaces, while others may be suited for a more straightforward disengagement process.
Check for Specialty Fasteners
In older pieces, I come across specialty fasteners, such as those designed for permanent installations. These can resemble traditional fasteners but have been treated for increased durability. Additionally, I look for any markings on the fasteners, which can indicate the manufacturer and potentially provide clues about the method best suited for disengagement.

Consider the Tool Requirements
Understanding the type of fasteners aids in determining the tools necessary for safe extraction. A flathead screwdriver works well for many standard designs, while heavier fasteners may require pliers or a specific staple puller. By identifying the fastener type upfront, I can prepare the right tools for a smoother process.
Gather Necessary Tools for Staple Ejection
To facilitate the extraction of fastening materials, I ensured I had a set of precise instruments at hand. Primarily, a flathead screwdriver works effectively; it allows for careful prying beneath the heads of the fasteners.
Additional Tools
I also found a pair of needle-nose pliers indispensable. These are perfect for gripping and pulling out any stubborn remnants that resist removal. A reliable utility knife serves well to slice through fabric or covering if needed, while safety gloves protect my hands from sharp edges.
Optional Tools
If the situation demands, a staple puller can be a worthwhile investment. This device provides a targeted approach for extracting multiple fasteners in one motion. A small hammer may assist in dislodging any deeply embedded pieces. Having a vacuum on standby helps in cleaning up debris, ensuring the area remains tidy after the task is completed.
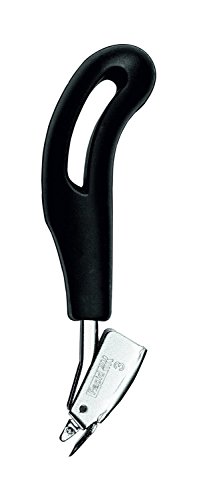
Use a Staple Puller for Easy Extraction
A staple puller offers the best method for extracting fasteners with minimal effort. Its design allows for precise leverage, making the process quicker and more efficient.
Steps to Utilize a Staple Puller
- Position the puller’s wedge under the staple.
- Gently press down on the handle to lift the staple out of the material.
- Inspect the staple’s extraction to ensure complete removal.
Advantages of a Staple Puller
- Reduces the risk of damaging surrounding surfaces.
- Minimizes strain on your hands compared to manual methods.
- Enhances control, especially in tight spaces.
After pulling out the staples, assess the area for any remnants that may need further attention to achieve a clean finish. This tool is not only efficient but also a reliable choice for various upholstery projects and repairs.
Carefully pry staples using a flathead screwdriver
To effectively extract fasteners, I take a flathead screwdriver and position its tip directly under the edge of the metallic piece. This allows me to create leverage. I gently lift upwards, ensuring not to damage the surrounding area. With a slow and steady motion, I work the screwdriver deeper beneath the fastener until it starts to loosen.

After the initial lift, I tilt the screwdriver slightly, which helps to further raise the fastener. If I encounter resistance, I repeat the process, moving around the perimeter of the item. This method minimizes the risk of splintering and preserves the integrity of the surface underneath.
As I pry, I keep a careful eye on any nearby edges or surfaces, protecting them with a cloth if necessary, to prevent scratches. Once a fastener is sufficiently lifted, I can easily pull it out with my fingers or pliers.
Protect the wood surface during removal
Before starting the extraction process, I place a soft cloth or a thick piece of cardboard beneath the area I’m working on. This minimizes the risk of scratching or denting the surface. For added protection, I use painter’s tape along the edges of where I’m working to shield any adjacent areas from accidental damage.
Use appropriate tools
Utilizing tools designed for this task helps maintain the integrity of the surface. A wide flathead screwdriver can distribute pressure evenly when prying, reducing the likelihood of marring. Additionally, I opt for a padded grip or a rubber mallet to apply force gently, should it be necessary. This helps safeguard the finish effectively.
Work methodically
I take my time during this process, focusing on one staple at a time. By applying steady, controlled pressure and avoiding sudden jerks, I minimize potential harm. Keeping the workspace organized also contributes to maintaining the condition of the surrounding area, reducing clutter that could lead to accidental impacts.
Remove any leftover staples or fragments
Inspect the area thoroughly for any remnants after the initial extraction process. It’s common for small pieces to remain embedded in the surface. Use a flashlight to illuminate dim corners and locate these fragments.
Tools for Picking Up Fragments
- Needle-nose pliers: Ideal for grabbing and pulling out tiny pieces.
- Magnet: Useful for attracting smaller metallic pieces that may be hard to see.
- Tweezers: Precision tools perfect for pinpointing and retrieving stubborn remnants.
Technique for Removal
- Gently grip any visible fragments with pliers or tweezers and pull straight out to avoid further damage.
- For stubborn bits, apply a bit of pressure while twisting lightly to coax them free.
- If a fragment is completely embedded and won’t budge, consider carefully drilling it out with a very small bit, ensuring to avoid splintering the surrounding area.
After all remnants are extracted, wipe the area clean with a soft cloth to remove dust and debris. This ensures your piece is left in pristine condition and ready for its next finish or treatment.
Repair any damage caused by staple removal
Begin by assessing any blemishes or imperfections left behind after extraction. Minor dents or scratches can often be smoothed using fine-grit sandpaper. Gently sand the affected area in a circular motion until the surface feels even.
If there are deeper scratches, consider filling these with a wood filler that matches the color of the surrounding area. Apply the filler with a putty knife, ensuring it fills the void completely. Allow it to dry according to the manufacturer’s instructions.
Once dried, sand the filled spot again to achieve a smooth finish, blending it with the surrounding surface. If necessary, repeat the filling and sanding process until the area is restored to your satisfaction.
After addressing imperfections, applying a suitable wood finish will enhance the overall appearance. Choose a stain or varnish that complements the original color, and apply it evenly using a clean cloth or brush. Allow it to dry thoroughly before using the piece again.
For larger areas affected, replacing the damaged section might be an option. Carefully cut out any severely damaged parts and replace them with new wood of the same type. Join the pieces using wood glue and secure them with clamps until the adhesive cures.
Finally, polish the entire surface to unify the finish and revive the wood’s natural luster, ensuring your item looks as good as new.
Consider Refinishing the Furniture After Removal
After extracting all metallic fasteners, I recommend evaluating the surface for signs of wear or damage. Minor scratches and dents can affect the overall aesthetic. To rejuvenate the piece, refinishing might be beneficial.
Begin by cleaning the surface thoroughly to eliminate dust and residues. Depending on the condition, I often opt for sanding to smooth out imperfections and create a consistent base. I use fine-grit sandpaper for this step, ensuring I follow the grain of the material.
Choosing the right finish is crucial. A clear polyurethane sealer protects and enhances the natural beauty, while stains can add a desired hue. It’s advisable to apply multiple light coats, allowing ample drying time between each application. This method enhances durability and appearance.
If a complete color change is intended, I may need to strip the existing finish first, followed by a meticulous sanding process. Always wear proper safety gear during this procedure, as chemical strippers can have strong fumes.
Finally, adding new hardware or decorative elements can give the piece a fresh look. This could include new knobs, handles, or even upholstery updates, making the item not only functional but a beautiful addition to my space.
Prevent Future Staple-Related Issues in Furniture
To avoid future complications with fasteners in your items, consider using adhesives, such as wood glue or specialized furniture adhesive, as an alternative for holding fabric or components together.
Prioritize using fabric or upholstery techniques that don’t rely on metal fasteners, like sewing or using Velcro. These methods reduce chances of damaging the surface in subsequent repairs or alterations.
Regularly inspect your pieces for signs of wear. Identifying loose fabric or components early allows for timely intervention, preventing more significant problems.
Store items in a controlled environment, minimizing exposure to humidity fluctuations that can affect the integrity of fasteners. Proper climate control can also help maintain the overall condition of the material.
| Tip | Description |
|---|---|
| Adhesives | Opt for strong, durable adhesives to hold components securely. |
| Sewing Techniques | Apply sewing methods for fabric attachment, reducing reliance on metal. |
| Regular Inspections | Check for wear regularly to catch issues before they escalate. |
| Controlled Environment | Keep furniture in stable humidity conditions to prevent damage. |
Consider using protective covers to shield items from dust and potential impact, which can lead to fastener displacement. This simple act will extend the life and appearance of your belongings.
When purchasing new pieces, ask about construction methods. Choosing items designed without metal fasteners can mitigate future concerns and save headaches during maintenance.