You must thoroughly clean your glossy pieces before anything else. A mixture of mild soap and water works wonders for removing dirt and grease. After cleaning, allow the surface to dry completely; any moisture will interfere with the subsequent steps.
Next, roughen the surface with fine-grit sandpaper. This creates micro-scratches that help new layers adhere better. Be sure to sand lightly, as overly aggressive sanding can cause damage. After sanding, wipe away the dust with a damp cloth and let it dry.


Using a high-quality primer tailored for glossy surfaces will prepare the foundation for your final coat. Apply it evenly, following the product instructions, and allow it to cure fully. This step ensures strong adhesion and a smooth finish.
Once the primer is ready, choose a paint designed for such surfaces. Opt for a satin or matte finish to reduce glare while maintaining the desired aesthetic. Apply thin coats, allowing each layer to dry before adding the next. Patience at this stage results in a flawless appearance.
After achieving your desired finish, don’t forget to apply a protective clear coat. This final layer guards against scratches and enhances durability. Give everything ample time to cure before using the pieces, ensuring your hard work pays off.
Preparation and Execution for Refinishing Glossy Surfaces
To achieve a flawless finish on a shiny surface, I always initiate the process by cleaning the item thoroughly. I use a mixture of mild detergent and water to remove dust and grease. Afterward, I let it dry completely.
Sanding is a critical step. I choose a fine-grit sandpaper, usually around 220 grit. Lightly scuff the shiny areas to create a better grip for the next layer, avoiding deep scratches. Keeping the surface smooth is vital, so I ensure not to over-sand any specific spot.
Next, I apply a primer specifically designed for glossy surfaces. I opt for a spray-on primer for an even application. After applying it, I let the primer cure as per the manufacturer’s instructions, generally a couple of hours.
Choosing the right topcoat is crucial as well. I prefer using an acrylic or alkyd-based substance for durability and smoothness. I use a high-quality brush or a foam applicator for the top layer, applying in thin, even coats to prevent dripping. Patience is important; I allow sufficient drying time between layers, usually around four hours.
In the final stage, I lightly sand between coats with very fine sandpaper to ensure an ultra-smooth finish. After applying the desired number of coats, I allow the item to cure for a few days before use, enhancing the durability of the new finish.
- Thorough cleaning
- Fine-grit sanding
- Applying a suitable primer
- Choosing the right topcoat
- Allowing proper curing time
Assessing the Condition of Lacquered Wood
Begin by examining the surface for any signs of damage. Look for scratches, chips, or areas that seem dull compared to the surrounding finish. These imperfections can indicate what treatment might be needed.
Check for peeling or flaking sections. If any part of the coating is coming off, it will require thorough removal before I can apply a new layer. A light scrape with a fingernail can help me determine if the finish is adhered properly.
Consider the overall sheen. If certain areas appear significantly less glossy, it may suggest wear that requires more extensive refinishing. I can use a soft cloth to assess the texture; if it feels coarse, the surface likely needs attention.
Inspect for discoloration or staining that might have occurred over time. This is particularly common in high-traffic areas. Any marks that remain after cleaning may need to be treated with a specific product before proceeding.
Finally, assess how the piece has been maintained in the past. Understanding the history can provide insight into potential issues. If it has received regular care, it may only need minor touch-ups; however, neglect could require more intensive restoration efforts.
Choosing the Right Paint for Lacquered Surfaces
I recommend selecting a high-quality product designed specifically for glossy finishes. These formulations adhere better and resist chipping or peeling. Here are the options I consider:
- Acrylic Latex: Water-based acrylics provide excellent adhesion and flexibility. They dry quickly and emit fewer fumes, making them suitable for indoor spaces.
- Oil-Based Enamel: Heavy-duty and long-lasting, enamel paints can be ideal for areas that experience wear and tear. However, ensure proper ventilation due to strong odors during application.
- Chalk Paint: Known for its matte finish, this type can be used with a topcoat to create a durable layer. Applying a primer first enhances its adherence to smooth surfaces.
Always check compatibility with existing gloss levels. A primer specifically formulated for slippery surfaces can bridge any gaps in adhesion and improve durability. Popular primers include shellac-based or bonding primers.
For a glossy finish, I suggest using a topcoat, like a polyurethane or a clear acrylic sealant. This step protects the surface and maintains its appeal over time.
Assess the sheen level you desire: satin, semi-gloss, or high gloss can alter the final appearance significantly. Make your selection based on the overall aesthetic you aim to achieve.
Finally, conducting a small test patch on an inconspicuous area ensures the result meets expectations before proceeding with the entire piece.
Preparing the Workspace for Painting
Clear the area where I’ll be working. Removing all items from the vicinity ensures a clutter-free environment, reducing distractions and potential damage to other belongings. An open space allows for easy movement and accessibility.
I always lay down a drop cloth or plastic sheeting to protect the floor from drips and spills. This small step saves a lot of cleanup time later and prevents any permanent staining on surfaces.
Good ventilation is critical. I open windows and use fans to ensure fresh air circulation, minimizing paint fumes. If necessary, I wear a mask to protect against inhaling any harmful particles.
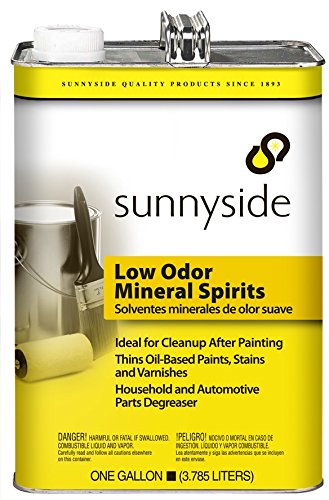
Next, I gather all necessary tools–brushes, rollers, trays, paint thinner, and cleaner. Having everything organized and within reach simplifies the process. Using high-quality tools contributes to a better application.
I keep solvents and cleaning supplies nearby for immediate cleanup of any spills or misapplied product. This prevents messes from hardening and becoming difficult to manage.
Lastly, I ensure proper lighting by positioning lamps strategically so I can see clearly what I’m doing. Bright, even light helps identify areas needing attention and ensures an even coat.
Properly Cleaning and Deglossing the Wood
I always begin by removing dust and grime using a mixture of warm water and mild soap. A soft cloth works best for this, ensuring a gentle approach to avoid damaging the surface. Rinse thoroughly with clean water and dry with a lint-free towel.
Next, I tackle the glossy finish. By utilizing a deglosser or a fine-grit sandpaper (around 220-grit), I carefully scuff the surface. This step is critical as it creates a profile for better adhesion of new layers. I ensure to sand in the direction of the grain to avoid scratches that may be visible later.
If I’m using a chemical deglosser, I apply it according to the manufacturer’s instructions, typically with a clean cloth. This product effectively dulls the finish without extensive sanding, which is particularly useful for intricate areas.
After deglossing, I wipe down the surface again with a damp cloth to remove any dust or residues from the sanding or deglossing process. Allow the piece to dry completely before proceeding to the next steps of preparation.
Applying Primer to Enhance Paint Adhesion
I always choose a high-quality primer specifically formulated for glossy surfaces to ensure strong adherence of the coating. Prior to application, I ensure the surface is clean and dry, free from dust and grease, as these can hinder proper adhesion.
Steps for Primer Application
Following these steps helps achieve optimal results:
- Lightly sand the surface to create a rough texture for better grip.
- Wipe away dust with a damp cloth and let it dry completely.
- Apply the primer using a high-density foam roller or a quality brush to achieve a smooth finish.
- Allow the primer to cure for the time specified by the manufacturer before applying the top coat.
Benefits of Using Primer
The right primer enhances the overall durability and longevity of the finish. It helps to seal the surface, providing a uniform base that improves the vibrancy of the color. It also reduces the number of coats needed for the top layer, which is both time and cost-efficient.
| Type of Primer | Features | Best Use |
|---|---|---|
| Shellac-based | Fast-drying, excellent stain blocking | High-gloss surfaces |
| Oil-based | Strong adhesion, smooth finish | Heavy-duty applications |
| Acrylic-based | Low-odor, easy cleanup | General use on various surfaces |
Techniques for Painting Lacquered Furniture
Begin with a high-quality spray application for a smooth finish. This method minimizes brush strokes and creates a more professional appearance. Choose a fine mist setting and maintain a consistent distance from the surface while spraying.
Utilize a foam roller for larger flat areas. It provides even coverage and helps avoid bubbles. Ensure the roller is well-primed with the coating before application to prevent streaking.
For edges and intricate details, a synthetic bristle brush works best. Dip the brush lightly in the liquid and wipe off excess to prevent drips. Apply with long, even strokes to maintain a clean edge.
Employ cross-hatching techniques during application. Start with horizontal strokes, followed by vertical ones to enhance adhesion and coverage. This approach helps in blending layers seamlessly.
Allow adequate drying time between layers. Check the manufacturer’s recommendations for optimal results. A light sanding between layers can improve overall smoothness and adherence.
Finish with a clear protective topcoat. This step is crucial for durability. Select a non-yellowing, water-based option to maintain the aesthetic appeal over time.
Drying and Curing Times for Optimal Results
Achieving the best outcome requires careful attention to drying and curing periods after applying finishes to surfaces. I always recommend allowing sufficient time for each layer to dry before handling the item or applying additional coats.
For most coatings, initial drying can take anywhere from 1 to 4 hours, depending on ambient temperature and humidity. However, I typically wait at least 24 hours before considering the piece ready for further treatment or light use.
Curing is an entirely different process and dictates that the coating reaches its maximum hardness and durability. This can take several days to weeks. For optimal results, I advise the following table:
| Stage | Drying Time | Curing Time |
|---|---|---|
| Initial Drying | 1-4 hours | 24 hours minimum |
| Recoat Time | 2-4 hours | 2-3 days |
| Light Use | 24-48 hours | Up to 2 weeks |
| Full Hardness | Not applicable | 3-4 weeks |
By adhering to these times, I consistently achieve a smooth and durable finish. I highly recommend allowing the piece to cure in a dust-free, well-ventilated environment to prevent imperfections. When in doubt, patience pays off; rushing the process often leads to unsatisfactory results.
Maintaining and Caring for Painted Furniture
Regular upkeep is key to preserving the finish on your newly coated items. Use a soft, damp cloth for routine dusting. Avoid harsh chemicals that may degrade the surface. Instead, opt for a mild soap solution for deeper cleaning.
Addressing Scratches and Scuffs
Minor marks can be treated effectively. I use a touch-up pen that matches the hue of the finish; it blends seamlessly with the existing color. For deeper scratches, fine-grit sandpaper followed by a touch-up application can restore the area.
Protective Measures
To prevent damage from spills or heat, always employ coasters and mats, particularly for hot items or liquids. Position your pieces away from direct sunlight to reduce fading. Additionally, consider applying a protective sealant every couple of years to enhance durability.
Inspect joints and hardware regularly; loose screws or fittings can lead to structural issues. Tighten them as needed and lubricate moving parts to ensure smooth operation.
FAQ:
What type of paint should I use for lacquered wood furniture?
For lacquered wood furniture, it is recommended to use a high-quality lacquer paint specifically designed for use on furniture. These paints provide a smooth finish and excellent durability. Look for water-based or solvent-based lacquer paints depending on your preference. Always check that the product is suitable for use on previously finished surfaces and ensures good adhesion.
How can I prepare lacquered wood furniture for painting?
The preparation of lacquered wood furniture is critical for achieving a good finish. Start by cleaning the surface thoroughly to remove any dust and grease. Then, lightly sand the lacquered surface with fine-grit sandpaper to create a better bonding surface for the paint. Make sure to wipe away any dust created by sanding. Depending on the condition of the surface, you may also need to apply a primer before painting to ensure proper adhesion and color consistency.
Is it necessary to apply a primer before painting lacquered wood?
Applying a primer before painting lacquered wood furniture can improve paint adhesion and provide a uniform base color. However, if using a paint specifically formulated for slick surfaces, it may not be necessary. If you decide to use a primer, choose one that is compatible with your chosen paint and appropriate for lacquered surfaces. Always read the manufacturer’s guidelines for the products you select to ensure compatibility.
Can I spray paint lacquered wood furniture?
Yes, you can spray paint lacquered wood furniture, and this method often yields a smooth, even finish. Use a spray paint that is designed for use on furniture or wood surfaces. Make sure to apply multiple thin coats rather than one thick coat to avoid drips and achieve better coverage. Keep the spray can at a consistent distance from the surface, and work in a well-ventilated area for safety.
What is the best way to maintain lacquered wood furniture after painting?
After painting lacquered wood furniture, maintenance is important to keep it looking its best. Gently dust the surface with a soft cloth regularly. For deeper cleaning, use a damp cloth with mild soap, avoiding harsh chemicals that may damage the finish. It’s also advisable to apply a wax or furniture polish periodically to protect the paint and maintain its shine. Keep the furniture away from direct sunlight to prevent fading over time.
What type of paint is best for lacquered wood furniture?
For lacquered wood furniture, choosing the right type of paint is critical to achieve a smooth and durable finish. Acrylic or water-based paints are generally good options as they adhere well to the lacquered surface. However, if you want a classic look, oil-based paints provide a rich finish but may require additional preparation. It’s also advisable to look for paints specifically formulated for furniture, as they offer better durability and a more polished appearance after drying.
How can I prepare my lacquered wood furniture for painting?
Preparation is key to ensuring that the paint adheres properly to lacquered wood furniture. First, clean the surface thoroughly with a mild detergent and water to remove any dirt or grease. Once dried, lightly sand the surface using fine-grit sandpaper (220-grit or higher) to create a slightly rough texture, which helps the paint stick. After sanding, wipe down the furniture with a damp cloth to remove any dust particles. Depending on the paint you choose, a primer may be necessary to further improve adhesion and finish quality. Allow everything to dry completely before applying the paint.


