Caleb Turner
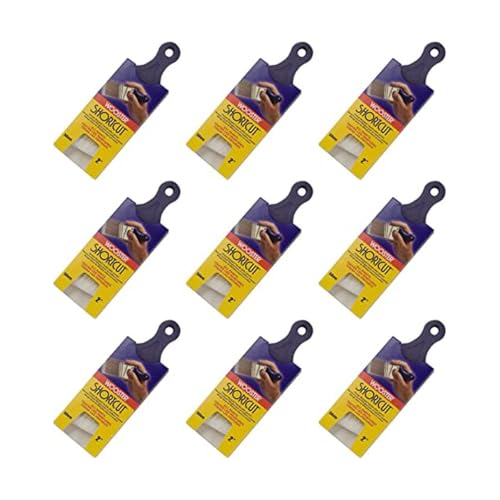
Gather all the necessary supplies: high-quality acrylic primer, a suitable color matte finish, and brushes specifically designed for intricate surfaces. Ensure a clean environment to work in, as proper ventilation will help both the drying process and reduce fumes from any chemical products.
Begin with a meticulous cleaning of the piece. Use a soft brush or vacuum to eliminate dust, followed by a damp cloth for any stubborn grime. Dry thoroughly before applying primer, as moisture can interfere with adhesion.
Apply a thin, even coat of primer, paying special attention to detailed areas. This step is vital for enhancing color vibrancy and ensuring durability. Let it cure fully before deciding on the final hue, as this can influence how the color appears on the intricate design.


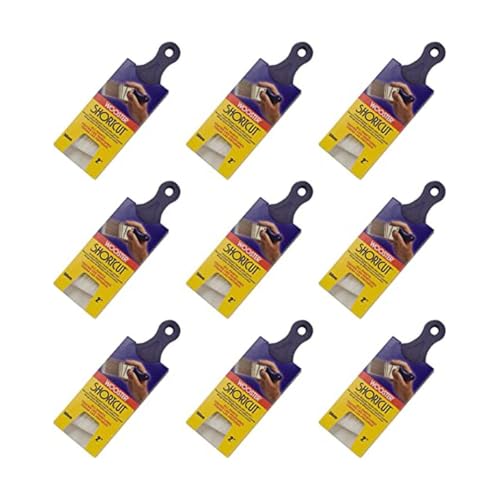

Choose colors that complement the aesthetic of the space. Light, pastel tones often breathe new life into vintage designs, while bold hues can make a striking statement. Use a high-quality brush or sponge for the color application, allowing the texture to shine through. Multiple thin layers work best for achieving a rich finish.
After the final coat has dried, apply a protective sealant to enhance resilience against wear and tear. This step provides a safeguard, maintaining the appearance for years to come. Your revitalized treasure will now beautifully merge with your decor while preserving its heritage.
Preparing for a Refresh
First, thoroughly clean the piece. I use a mixture of warm water and mild soap, scrubbing gently with a soft brush to get into the crevices while avoiding damage. Once clean, rinse it off and let it dry completely in a well-ventilated area.
Inspect for any signs of wear, such as loose strands or breaks in the weave. Repair these issues with a strong adhesive or by weaving in new strands if necessary. This step ensures that the structure remains solid and ready for an updated look.
Selecting Materials
Choosing the right coating is key. I prefer using a high-quality spray or brush-on option designed for similar surfaces, looking for something that offers durability and flexibility. To prevent peeling, it’s crucial to select a formula meant for products that experience movement, as traditional coatings can crack over time.
Before starting, I always test the product on a small, inconspicuous area, allowing it to dry completely to check for any adverse reactions. This will confirm whether the finish adheres properly to the surface.
Application Technique
When it’s time to apply the finish, I hold the spray can or brush at a consistent distance from the surface, ensuring even coverage. I apply several thin layers rather than one thick one, allowing each coat to dry thoroughly before adding the next. This method reduces drips and ensures a smooth, even appearance.
Finally, after finishing, I always let the item cure for at least 24-48 hours before using it again. This period allows the finish to harden and provides a longer-lasting result.
Choosing the Right Paint for Wicker
For overhauling your vintage woven items, selecting the appropriate finish is crucial. I recommend using acrylic latex or spray enamel as they adhere well to natural fibers and offer durability.
- Acrylic latex: This water-based option is ideal for indoor pieces due to its easy cleanup and reduced toxic fumes.
- Spray enamel: Provides a smoother, even coat which is beneficial for intricate designs found in woven structures.
Always opt for exterior-grade materials if the item will be outside; these are specially formulated to withstand the elements, preventing peeling or fading.
Gloss and satin finishes are preferable, as they enhance the texture while providing a protective barrier. Avoid flat finishes, as they absorb moisture and dirt, making maintenance difficult.
Before proceeding, test your chosen product on a small, inconspicuous area. This allows you to judge the color and finish without committing to the entire piece.
Remember to reference the manufacturer’s guidelines regarding drying times and recoat recommendations to achieve the best results.
Preparing the Wicker Surface for Painting
To ensure a lasting finish on the rattan pieces, I start by thoroughly cleaning the surface. Using warm soapy water and a soft-bristled brush, I scrub away dust, dirt, and any old finishes that may interfere with adhesion.
After cleaning, I let the surface dry completely. It’s important to avoid any moisture that could affect the new coating. Once dry, I inspect for loose fibers or damaged areas that need attention. I use scissors to trim any frayed strands, as well as sandpaper for uneven spots to create a smooth base.
Repairing Damage
If there are significant breaks or fractures, I apply a suitable adhesive designed for natural materials. Holding the pieces together until the glue sets helps restore structural integrity. After repairs, it’s vital to allow ample time for curing, ensuring that everything is stable before I proceed.
Priming the Surface
Applying a primer specifically formulated for porous materials enhances the bond of the top layer. I choose a spray primer for even coverage, making sure to get into all the crevices. Once applied, I wait for the recommended drying time, checking that the primer has dried clear and even. This step provides an optimal canvas for the final coating.
- Clean thoroughly with soapy water.
- Trim any loose fibers or damaged areas.
- Repair any significant breaks with adhesive.
- Apply a primer designed for porous surfaces.
With these preparations, the textured nature of the natural weaving is ready to accept the new finish, ensuring a rejuvenated appearance.
Selecting the Appropriate Tools for the Job
For a successful transformation of vintage woven pieces, I focus on using the right tools. The first step is to gather a selection of brushes. Opt for a variety of sizes: a wide brush for larger surfaces and a smaller, angular brush to reach intricate designs and curves.
Recommended Brushes and Tools
Here is a table to help you choose the essential tools:
| Tool | Purpose |
|---|---|
| Wide Flat Brush | Ideal for even coverage on flat areas |
| Angled Brush | Perfect for corners and detailed sections |
| Foam Roller | Efficient for smooth application on larger areas |
| Detail Brush | Great for touch-ups and fine detailing |
| Sandpaper | Necessary for surface preparation and smoothing |
| Drop Cloth | Protects surrounding surfaces from drips and spills |
| Masking Tape | Helps achieve clean edges and prevents overspray |
I also find that wearing gloves aids in maintaining cleanliness while handling tools and materials. A mask is a good idea to prevent inhaling any particles, especially during the prepping stage. Investing in quality tools can significantly affect the final outcome, so I prioritize durable options for longevity and optimal results.
Lastly, organizing my workspace enhances efficiency. Keeping brushes clean and properly stored prevents cross-contamination of colors and ensures each tool is ready for use when needed.
Techniques for Applying Paint Evenly
To achieve a smooth finish, I prefer using a spray gun or an aerosol can. This method allows for an even application and minimizes brush strokes. Holding the nozzle about 6-12 inches from the surface helps in distributing the color evenly. I make sure to apply multiple thin coats rather than a single thick one, allowing each coat to dry thoroughly before adding the next.
Brush Techniques
When using a brush, I opt for a high-quality synthetic bristle option. I work with the weave’s natural pattern, applying gentle, even strokes. I avoid over-brushing, which can cause the layer to become uneven. Dipping the brush lightly in the color, I tap off excess to prevent drips and runs.
Post-Application Tips
After finishing, I inspect the surface for any missed spots or inconsistencies. If needed, a light sanding between coats can enhance adherence and evenness. A clean cloth removes dust before the next layer is applied, ensuring a polished look. Using these techniques guarantees a professional appearance on my restored piece.
Ensuring Proper Drying Time Between Coats
I always allow sufficient drying time between layers to achieve a smooth, even finish. Typically, a waiting period of at least 24 hours is advisable. This duration varies depending on the type of product used; for water-based options, expect quicker drying, while oil-based variations may require additional time.
It’s crucial to check the manufacturer’s instructions on the specific product for recommended drying durations. In humid conditions, I’d extend the wait, as moisture can hinder drying and lead to an uneven result.
Using a fan or placing the piece in a well-ventilated area can expedite the drying process. However, avoid direct sunlight, which might cause the coating to dry too fast, resulting in potential peeling or cracking.
Before adding another coat, I lightly touch the surface with my fingertip. If it feels tacky or if any residue transfers onto my skin, I give it more time. Patience at this stage yields a professional look that enhances the overall appearance of the item.
In summary, ensuring ample drying time between applications not only improves adhesion but also fortifies the finish. By respecting these intervals, I invest in a durable and aesthetically pleasing restoration.
Sealing the Finish for Longevity
To enhance the durability of the completed project, applying a high-quality sealant is key. This step protects the surface from moisture, wear, and environmental factors that can cause damage over time.
Choosing the Right Sealant
Consider these options:
- Polyurethane: Offers excellent protection and is available in both water-based and oil-based formulas. Water-based dries clear and is less odoriferous.
- Varnish: Provides a strong, glossy finish that seals surfaces well, but may require multiple coats for optimal protection.
- Clear Acrylic Sealers: Ideal for indoor settings, offering a flexible and water-resistant barrier. They are easy to work with and dry quickly.
Application Process
- Ensure the painted surface is completely dry before sealing.
- Use a high-quality brush or spray for even application.
- Apply a thin layer, allowing it to penetrate the surface; avoid thick applications that may lead to drips.
- Wait for the recommended drying time on the label before applying additional coats.
- Sand lightly between coats with fine-grit sandpaper to ensure adhesion and smoothness.
Regularly checking on the condition of the seal can help maintain the appearance and integrity of the finished piece. Reapply as needed, especially if the surface starts to feel rough or loses its sheen.
Maintaining Your Painted Wicker Creations
Regular cleaning and upkeep are crucial for preserving the appearance of my revitalized woven pieces. I use a soft, dry cloth to dust off surfaces weekly, avoiding any abrasive materials that could scratch or wear down the coating.
For deeper cleaning, I opt for a damp cloth with a mild soap solution. I ensure that I do not oversaturate the fabric to prevent moisture buildup, which can lead to mildew. After cleaning, I allow the items to air dry completely in a well-ventilated area.
Protecting Against Damage
Placement plays a key role in longevity. I avoid direct sunlight, as UV rays can fade colors and weaken finishes. Where possible, I position my pieces in shaded areas or use protective covers when not in use.
Reapplication of Sealants
Every year, I assess the finish for wear and damage. If I notice any chipping or dullness, I apply a fresh coat of sealant to maintain the barrier against environmental factors. This proactive approach ensures that my cherished woven items remain beautiful and functional for many years.
Tips for Repairing Damaged Rattan Baskets Before Coloring
Inspect the item thoroughly for any frayed strands or broken elements. For minor tears, use a small dab of wood glue or a specialized adhesive to bond the fibers back together securely.
Replacing Broken Parts
For sections that are too damaged to repair, consider replacing them. Seek out similar materials to maintain the original style. You can often find matching rattan or cane online or at local craft stores.
Reinforcing Integrity
Once repairs are made, reinforce the structure by wrapping weak areas with thin strands of flexible material, like wire or thread, to offer additional support without sacrificing aesthetics.
| Type of Damage | Suggested Repair Method | Materials Needed |
|---|---|---|
| Frayed Edges | Glue fibers together | Wood glue or craft adhesive |
| Broken Sections | Replace with new material | Similar rattan or cane |
| Structural Weakness | Wrap with flexible strands | Thin wire or strong thread |
After completing these repairs, allow sufficient time for adhesives to set before proceeding with the application process. This will ensure the longevity of your work and provide a solid base for finishing touches.
FAQ:
What type of paint is best for antique wicker furniture?
The best type of paint for antique wicker furniture is usually a high-quality acrylic or latex paint. These paints adhere well to the surface and provide a durable finish. It’s also advisable to use a spray paint designed for furniture to ensure even coverage without clogging the delicate weave of the wicker. Make sure to choose a paint that is suitable for indoor or outdoor use, depending on where the furniture will be placed.
How should I prepare wicker furniture before painting it?
Before painting wicker furniture, it’s critical to clean it thoroughly. Start by dusting off any loose dirt or debris, then wash the furniture with a mild soap solution to remove any grime. After washing, let it dry completely. If there are any old, flaking paint layers, gently sand them down to achieve a smooth surface. Additionally, inspecting the wicker for damage or loose fibers is important; any repairs should be made prior to painting.
Is it necessary to use a primer on wicker furniture before painting?
Using a primer on wicker furniture is recommended but not strictly necessary. A primer can help the paint adhere better and improve coverage, especially if you are painting over a darker color or an uneven surface. If you choose to use a primer, select one that is compatible with the type of paint you plan to use and suitable for wicker. If the furniture has already been painted and the surface is smooth, you might skip this step and directly apply the paint.
How long does the paint take to dry on wicker furniture?
The drying time for paint on wicker furniture can vary based on several factors including the type of paint used, humidity, and temperatures. Generally, acrylic or latex paints can take about 1 to 2 hours to become dry to the touch and 24 hours for a complete curing. However, it’s recommended to allow a longer drying period if you can, particularly if you plan to apply multiple coats. Always check the manufacturer’s recommendations on the paint can for specific drying times.
Can I use outdoor paint on wicker furniture that will stay indoors?
While you can technically use outdoor paint on indoor wicker furniture, it’s not usually necessary. Outdoor paints are formulated to withstand weather conditions and might have added chemicals that can emit strong odors or fumes. For indoor use, it’s typically better to select paints specifically designed for indoor furniture, as they will still provide durability without the potential for unpleasant odors or quicker wear. If you live in a particularly humid area, though, an outdoor paint could offer extra protection against moisture, even indoors.
What are the best types of paint to use on antique wicker furniture?
When painting antique wicker furniture, it’s advisable to use latex or acrylic paints. These types of paint are durable and flexible, which allows them to adhere well to the woven surfaces of wicker. Ensure that the paint is suitable for outdoor use if the furniture is going to be placed outside. Additionally, consider using a spray paint for an even finish, as it can reach the crevices in the wicker more easily than a brush. Always do a small test area first to see how the paint interacts with the surface.
What steps should I take to prepare antique wicker furniture for painting?
Preparing antique wicker furniture for painting involves several key steps. First, clean the surface thoroughly with a brush and a mild detergent solution to remove any dust, dirt, or grime. Allow it to dry completely. Next, inspect for any loose or damaged parts; these should be repaired before proceeding. Lightly sand the surface with fine-grit sandpaper to create a better adhesive base for the paint. After sanding, wipe down the furniture again to remove any dust particles. Finally, applying a primer specifically designed for wicker can help in achieving a smoother finish and enhancing paint adhesion. Following these steps will ensure a more polished final look once the painting is complete.