Caleb Turner

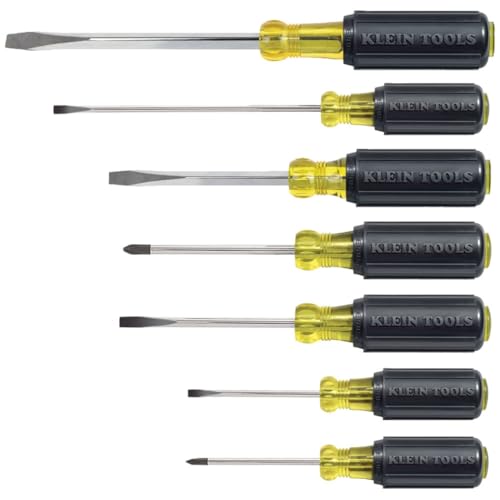
First, gather the necessary tools: a flathead screwdriver, a pair of pliers, and a small hammer. Carefully inspect the chosen piece to locate the head of the fastener, which often appears as a circular piece with a slot for a screwdriver.
Gently insert the flathead screwdriver into the slot, applying steady pressure while turning it counterclockwise. If the fastener is resistant, a few taps with the hammer can help dislodge any potential debris, making it easier to turn. Once it loosens, continue turning until it completely detaches.
Next, focus on the accompanying nut situated on the opposite side. Using pliers, grip the nut firmly and twist it counterclockwise. If it proves difficult to turn, applying penetrating oil may assist in loosening it. Continue turning until the nut is fully released.
Procedure for Detaching a Cam Fastener and its Counterpart
To successfully disconnect the fastener, I first employ a screwdriver specifically sized to fit the opening on the fastener’s face. I insert the screwdriver and turn it counterclockwise. This action loosens the underlying mechanism.
Once the fastener rotates freely, I continue by grabbing the nut situated behind the panel with pliers. Firmly gripping the nut, I turn it counterclockwise as well until it can be removed without resistance.


If either piece proves stubborn, I apply a little lubricant to the threading or interface to assist in easing the disconnection. I wait a few minutes for the lubricant to work before attempting to detach them again.
After successfully separating both components, I inspect them for any signs of wear or damage to ensure a smooth reinsertion if reassembly is necessary.
- Tools required: Flathead screwdriver, pliers, lubricant (optional).
- Work in a well-lit area to increase visibility.
- Handle pieces carefully to avoid injury or further damage.
Identifying the Type of Cam Lock
First, examine the external characteristics of the mechanism. Look for the shape and size of the head, which can range from round, square, or even triangular. Each design hints at the specific type of locking system in place.
Next, observe the slot where the key or tool fits. Common variations include:
- Flat slots – typically suited for standard screwdriver use.
- Circular slots – often require a unique key or tool designed for that lock.
- Keyhole patterns – indicate a traditional lock and often necessitate a standard key.
Additionally, assess the material of the locking device. Metal constructions usually offer increased durability, while plastic may suggest a less secure option.
Pay attention to the orientation of the lock. Some locks are specifically designed to turn in a particular direction, which can influence how they function. This detail can help in understanding its installation and removal.
Lastly, consult any accompanying hardware manuals or documentation if available. These resources frequently contain direct information on the exact type and specifications of the locking mechanism used.
Gathering the Necessary Tools for Removal
For a successful extraction process, I ensure I have the following items ready:
| Tool | Purpose |
|---|---|
| Flathead screwdriver | To pry open any coverings or loosen the grip on the mechanism. |
| Phillips screwdriver | For any screws that may be securing components in place. |
| Wrench | To grip and rotate any threaded elements securely. |
| Pliers | For gripping and pulling stubborn fasteners. |
| Utility knife | For cutting any adhesive materials that may interfere with removal. |
| Magnetizer | To retrieve any metal components that fall or become dislodged. |
| Tape measure | For measuring dimensions in case parts need precise alignment during reassembly. |
With these tools at hand, I can efficiently proceed with the extraction process while minimizing damage to the surrounding areas. Each tool has a specific role, ensuring a smooth operation and allowing me to tackle any unexpected challenges as they arise.
Accessing the Cam Lock Area on Furniture
To reach the section containing the mechanism, first clear the surrounding space to avoid obstruction and ensure safety. If the piece has a back or side panel, check for screws or fasteners that may need unscrewing. Slide or remove these panels carefully to expose the area housing the locking mechanism.
Inspect the perimeter for any additional components that might be securing the assembly in place. In some cases, staples or small nails could be present; these require removal before further access is possible. Use a flathead screwdriver or a pry tool gently to disengage these fixings without damaging nearby surfaces.
Once the access is clear, visually confirm the orientation of the mechanism. Identifying the specific installation direction will aid in understanding how to proceed with the disassembly. Look for any installation guides or markings that could indicate how the piece was originally secured.
If the area appears particularly cramped or obstructed, a flashlight can be useful for illuminating dark recesses. This additional light helps in examining the assembly closely, making it easier to pinpoint where to apply force for disassembly.
After confirming full access, I prepare to proceed with unfastening the mechanism with the gathered tools, ensuring a careful and controlled process to avoid damage to the surrounding materials.
Loosening the Cam Nut Without Damage
Applying gentle pressure is key. I begin by using a flathead screwdriver to slide it under the edge of the nut. This maneuver can help create a slight lift, allowing me to turn the nut more easily. It’s crucial to avoid excessive force to prevent stripping the threads.
Next, I utilize penetrating oil. Spraying a small amount around the nut and allowing it to soak for several minutes can help break the bond between the threads. This step can save a lot of effort during twisting.
If the nut still resists, I take a pair of pliers and grip the nut carefully. I twist slowly and firmly, ensuring that the tool makes contact only with the nut and not the surrounding material. This method often helps in breaking the initial seal.
When encountering stubborn components, heat might assist in loosening. I use a heat gun to apply mild heat around the area. The expansion of the metal can provide the necessary leeway for easier manipulation. I always caution against overheating to avoid burns or damage to nearby surfaces.
Lastly, should all else fail, I consider a rubber mallet. I lightly tap the surrounding area to help shift any debris or minor obstructions, making it easier to unscrew the nut without causing damage to the fixture. Care remains essential throughout this entire process to maintain the integrity of my furniture piece.
Removing the Cam Lock Mechanism Safely
Before proceeding, ensure the area around the mechanism is clear and stable. Cut through adhesives or seals that may secure the component in place without causing damage. Use a flashlight to inspect the lock closely, identifying potential weak spots.
Employ a flat head screwdriver to gently pry at the edge of the mechanism. Be cautious not to force it; a gradual approach helps prevent unnecessary breakage. If the component resists, double-check the orientation. Some mechanisms have a specific way they should be approached.
Utilizing Proper Leverage
Leverage is key. Introduce a small block of wood under the screwdriver to increase your force without direct pressure on the mechanism. This ensures minimal risk of cracking the surrounding material. If applicable, work in tandem with pliers to grip and rotate the mechanism gently.
Cleansing the Area Post-Removal
Once successful, clean the area with a suitable cleaner to remove any debris or dust. Inspect the surroundings to ensure no damage occurred during extraction. Evaluating the condition will save time and effort when installing a replacement or performing additional repairs.
Dealing with Stuck or Rusted Cam Nuts
If the securing piece is stuck due to rust or corrosion, a strategic approach is necessary. Start with the application of penetrating oil directly onto the threads. Allow it to soak for at least 15-20 minutes to break down the rust.
Here are steps to effectively handle the situation:
- Check the surrounding area for any dust or debris. Clean it thoroughly to ensure a better grip.
- Use a pair of pliers to grip the assembly securely, ensuring you don’t slip and damage the surrounding structure.
- Gently wiggle back and forth while applying increasing pressure. This motion can help loosen any rust grip.
- If resistance persists, heat application with a heat gun or hairdryer can expand the metal, aiding in loosening. Apply heat for a few seconds and then attempt to turn again.
- Should all else fail, resort to cutting tools. A rotary tool with a cutting disc can carefully slice through the assembly. Prioritize safety and avoid damaging the surrounding area.
After completion, clean the threads thoroughly to prevent future rust accumulation, and consider applying a lubricant for future assembly ease.
Inspecting the Lock for Damage Post-Removal
After taking out the mechanism, examine it thoroughly for any signs of wear or damage. Check the housing for cracks or deformities that could affect functionality. Inspect the internal components, such as the plate and the rotating parts, ensuring they move freely without resistance.
Signs of Damage to Look For
Look for scratches, rust, or corrosion on metal parts. These issues can lead to malfunction if not addressed promptly. If the mechanism feels loose or wobbly, it might indicate deterioration. Also, ensure that all pieces fit together properly and that there are no missing components.
Determining the Need for Replacement
If any damages are evident, consider replacing the mechanism. A worn-out part can compromise security and usability. Conversely, if everything appears intact, clean the parts before reinstallation to ensure optimal performance.
Reassembling or Replacing the Cam Lock
To successfully put the mechanism back together or to install a new one, follow these steps meticulously to ensure both security and functionality.
Reassembly Process
1. Align the new or existing mechanism correctly within the designated slot. Ensure that it fits snugly, allowing for smooth rotation.
2. Insert the securing fastener through the corresponding hole, ensuring it links firmly to the locking device.
3. Tighten the fastener using a suitable tool, being cautious not to overtighten, which may lead to misalignment.
Replacement Options
If the existing piece is damaged, choose a replacement that matches the dimensions and type. Below is a table summarizing different lock types and their characteristics:
| Lock Type | Material | Key Specifications |
|---|---|---|
| Standard Cam | Steel | Keyed, 90-degree turn |
| Security Cam | Brass | Keyed, resistant to picking |
| Adjustable Cam | Aluminum | Multiple engagement points |
After securing the new component, conduct a thorough test to ensure it functions properly and is aligned correctly. Regular maintenance can prevent future issues.
Preventive Measures for Future Installation
I recommend using high-quality fasteners to ensure stability. Steel components generally offer better durability compared to plastic alternatives. Additionally, always follow the manufacturer’s guidelines during assembly to minimize the risk of damage.
Proper Torque Application
Applying the correct amount of torque is essential when securing components. I use a torque wrench to avoid over-tightening, which can lead to stripping threads and impairing functionality.
Regular Maintenance Checks
Conduct routine inspections of joints and fastenings. I schedule these checks every six months, focusing on signs of wear or corrosion. Addressing minor issues early prevents more significant problems later.
Consider applying a lubricant to metal parts during assembly. This practice helps reduce friction, making future disassembly simpler. Always use a suitable lubricant as specified by the manufacturer.
Lastly, documenting any modifications or repairs is invaluable. I keep a log that describes parts used and any changes made, aiding in future maintenance or repairs.