Begin with a thorough inspection of unused items in your home. Look for tables, chairs, or shelves that can be easily altered. Seek out solid wood or sturdy metal structures as a base, ensuring durability in your transformation.
Gather basic tools: a drill, screwdrivers, sandpaper, and paint or stain. A fresh coat can quickly enhance the appearance of any piece, while sanding can reveal beautiful textures underneath. For those who enjoy more intricate work, consider adding unique hardware or upcycling decorative elements from other materials.
Explore creative options such as reimagining a ladder as a bookshelf or converting a wooden door into a desk. Utilize Pinterest or social media platforms for inspiration, which can spark your creativity and reveal countless design possibilities. Remember, each project is an opportunity to express your style while being environmentally conscious.


Finally, document your processes through photos. Sharing your results can inspire others and build a community of like-minded enthusiasts who appreciate the beauty of individuality in reclaimed pieces.
Creating Stylish Repurposed Items
Focus on sourcing quality wood from old pallets, doors, or pieces with a unique history. The character of reclaimed wood can add charm to any project. Ensure the material is free from rot or significant damage. Sanding surfaces smoothens imperfections, preparing them for finishing touches.
Choosing a New Purpose
Consider transforming an old dresser into a chic TV stand. Remove drawers to create open shelving or retain a few for added storage. This versatile use maximizes space while offering aesthetic appeal. Similarly, turning a vintage ladder into a bookshelf can bring a rustic flair to any room.
Applying Finishes
Utilize non-toxic paints or stains for a safe and sustainable approach. A matte finish can evoke a contemporary look, while a glossy coat might suit a more traditional aesthetic. Experiment with colors that complement your decor for added visual interest. Applying a protective sealant enhances durability and maintains the surface’s integrity.
Choosing the Right Materials for Upcycling
Begin by assessing what you already possess. Scraps of wood, old textiles, and hardware can serve as a foundation for creative projects. Reusing items you have on hand not only saves money but reduces waste.
Wood Options
Wood is a versatile material. Consider reclaimed wood from pallets, old doors, or furniture pieces. Before selecting, inspect for quality. Avoid materials with excessive warping or damage.
- Pallets: Great for rustic designs; ensure they are heat-treated rather than chemically treated.
- Old furniture: Look for solid wood pieces; these often have unique designs.
- Scavenged wood: Check local construction sites or recycling centers for leftover materials.
Other Materials
Beyond wood, numerous other resources can enhance projects:
- Textiles: Old curtains, sheets, and clothes can be transformed into upholstery or wall hangings.
- Metal: Consider using antique hardware, tin cans, or sheets; they add character and durability.
- Glass: Bottles and jars can serve as decorative elements or functional storage solutions.
Lastly, keep functionality in mind. Choose materials that will withstand daily use and match the purpose of the new piece. Experimentation is key; mixing different elements can lead to beautiful, one-of-a-kind creations.
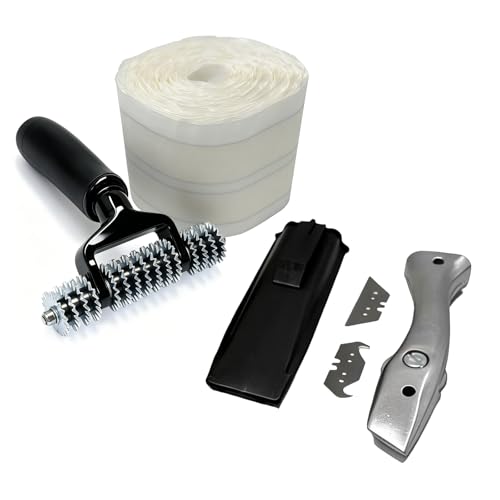
Essential Tools for Upcycling Projects
To get started with transforming old items into new treasures, having the right tools boosts productivity and creativity. Here’s a list of what you need for your projects:
- Screwdriver Set: A variety of sizes, both flathead and Phillips, ensures you can tackle different fittings.
- Pliers: Needle-nose and regular pliers help with gripping, bending, and cutting wires or reinforcements.
- Paint Brushes and Rollers: Different shapes for precision painting and covering large areas quickly.
- Saws: A hand saw or power saw for cutting wood, depending on the complexity of your task.
- Sandpaper: Various grits for smoothing surfaces and creating a perfect finish before painting.
- Drill: A cordless drill with multiple bits for making holes and driving screws efficiently.
Incorporating these tools can streamline operations and enhance the quality of your creations. Consider the following additional items to expand your capabilities:
- Measuring Tape: Essential for accurate dimensions when cutting and assembling pieces.
- Level: Ensures that your final product is straight and visually appealing.
- Clamps: Useful for holding items together while glue dries or when making adjustments.
- Utility Knife: Handy for quick cuts and precision work on various materials.
- Workshop Apron: Keeps tools and materials organized and protects clothing from dirt and damage.
Investing in quality tools pays off in durability and ease of use, making your creative process more enjoyable and productive. Adjust your toolkit based on specific projects to maximize efficiency and results.
Step-by-Step Guide to Refinishing Wood Items
Begin with a thorough cleaning of the piece using a mixture of warm water and mild soap. Remove any dust, dirt, or grease to create a blank slate for the next steps.
Next, assess the current finish. If it’s in poor condition, strip it using a chemical or semi-paste remover. Apply according to the product instructions, and ensure to wear gloves and work in a ventilated area. Once the old finish is softened, use a scraper to gently remove it.
After stripping, sand the surface using sandpaper, starting with a coarse grit and transitioning to a finer grit. This step smoothens imperfections and opens up the wood’s pores. Always sand in the direction of the grain to avoid scratches.
With the surface smooth and clean, it’s time for staining or painting. If choosing stain, apply it with a brush or cloth, and wipe away any excess after a few minutes for a subtle finish. For paint, two coats usually provide solid coverage and durability; ensure to let each coat dry thoroughly before applying the next.
Finally, protect the surface with a clear topcoat. Polyurethane or lacquer adds a durable finish. Brush it on carefully, allowing proper drying time between coats. Sand lightly between applications for added smoothness.
Upon completion, let the piece cure for the recommended time before use to ensure durability and longevity.
Creative Ideas for Repurposing Old Items
Transform vintage suitcases into unique side tables. Use sturdy wooden legs or antique furniture legs to create a functional and stylish accent.
Old wooden crates can become decorative shelving units. Stack them vertically or horizontally on walls for an eye-catching display while adding storage space.

Wine bottles can serve as charming garden edge markers. Paint them with non-toxic outdoor paint and place them along flower beds for a rustic look.
Tired of that old ladder? Prop it against a wall for an instant bookshelf. It’s perfect for displaying plants, books, or knick-knacks, adding character to any room.
Use mismatched teacups and saucers as small planters. They bring a vintage touch to your garden or windowsills, perfect for herbs or succulents.
Convert a wooden door into a table. Attach hairpin legs or repurposed furniture legs to create a stunning dining or coffee surface.
Old t-shirts can become colorful pillow covers. Simply cut and sew them for a fun and sentimental home accessory.
Repurpose an old bicycle into a garden feature. Hang flower pots from the handlebars and add trailing plants for a whimsical touch in your yard.
Shorten an old wooden bench to create outdoor seating. Sand and paint it to match your garden aesthetic, making it a cozy spot to relax.
Faded maps can be turned into wall art. Stretch them over a canvas frame for a personalized piece that reflects your travel adventures.
Glass jars are perfect for organizing small items. Decorate them with twine or paint to match your scheme, using them for everything from office supplies to pantry goods.
Turn an old mirror frame into a bulletin board. Add corkboard or fabric to the center for a functional piece that adds elegance to your space.
Use an old trunk as a coffee table. It not only provides a unique aesthetic but also serves as a storage solution for blankets and games.
Transform wooden pallets into outdoor seating. Sand them down, add cushions, and arrange them for a rustic lounge area.
Finally, old picture frames can be reimagined as serving trays. Attach handles to the sides for a crafty and practical item for gatherings.
Techniques for Adding Unique Designs and Finishes
I often incorporate stenciling to introduce intricate graphics or patterns on surfaces. Selecting reusable stencils allows me to personalize pieces, and applying high-quality paint ensures longevity and vibrancy. Layering different colors enhances depth.

For a rustic touch, I tend to use a technique called dry brushing. This involves lightly applying a contrasting color over a base coat with a dry brush. The effect creates a weathered appearance that adds character to previously plain wooden objects.
Decoupage is another method I enjoy, where I adhere decorative paper or fabric onto surfaces using a glue medium. This technique allows me to infuse unique designs, and adding a sealant afterwards protects the finish while maintaining its visual appeal.
Texturizing surfaces can elevate the overall style. I sometimes use sandpaper or a wire brush to distress wood, exposing the grain and giving a vintage vibe. Alternatively, applying textured paint or plaster transforms smooth areas into more tactile and visually interesting surfaces.
For a more industrial look, I explore using metal elements such as pipes or reclaimed hardware. Integrating these features not only offers unique aesthetics but also enhances functionality. Using patina or rust treatments on these metals can deepen the rugged charm.
Layering finishes is vital for dimension. I mix different types of waxes and varnishes to create multi-dimensional sheens. This technique can make surfaces appear glossy while revealing rich undertones beneath.
Lastly, incorporating natural elements like wood stains or oils enhances the inherent beauty of materials. I choose eco-friendly options to protect both the piece and the environment, allowing the natural grain to shine through without overwhelming it.
Steps to Ensure Furniture Durability After Upcycling
Choosing high-quality finishes is crucial. I prefer using polyurethane or varnish for a sturdier surface that resists scratches and moisture. Apply at least two coats for maximum protection, allowing sufficient drying time between applications.
Regularly check joints and fasteners. After completing the transformation, I revisit any screws or dowels to ensure they are tight and secure. Loose parts can significantly reduce stability.
Weatherproofing is vital for items meant for outdoor use. A product specifically designed for outdoor wood will help guard against the elements, extending longevity and maintaining appearance.
Utilize proper storage when not in use. For pieces that may not be used frequently, I store them in a dry, shaded area to prevent warping or fading from sunlight exposure.
Periodic maintenance enhances lifespan. Light sanding and reapplying finish every few years keeps surfaces looking fresh and protects against wear and tear.
| Maintenance Task | Frequency | Notes |
|---|---|---|
| Inspect joints and fasteners | Every 6 months | Tighten if necessary |
| Reapply finish | Every 3-5 years | Sand lightly before applying |
| Check for outdoor wear | Annually | Refinish if any damage is noted |
Selecting durable hardware can make a difference. Use metal brackets or reinforcements where necessary to increase strength, especially for larger pieces.
Lastly, always consider the load capacity of transformed items. Design with weight distribution in mind to prevent premature damage or collapse.
Marketing and Selling Your Revamped Creations
Focus on building a strong online presence. Utilize platforms like Instagram and Pinterest to showcase high-quality images of your transformed items. Regularly update your profiles with interesting before-and-after shots, process videos, and behind-the-scenes content that highlights your creativity.
Connect with Local Communities
Engage with local artisans, join craft fairs, and participate in community events to gain exposure. Collaborating with nearby businesses can also lead to mutually beneficial promotions, helping you reach a wider audience.
Leverage Online Marketplaces
Consider selling on websites such as Etsy or eBay, which cater specifically to handmade and unique items. Write compelling descriptions that tell the story of each piece, its transformation, and the materials used. Pricing should reflect the quality and effort invested, so conduct thorough research on similar offerings.
Utilize social media ads to target specific demographics. A well-placed advertisement can attract potential buyers interested in sustainable and unique home decor.
Encourage satisfied customers to share their experiences and pictures online. Word-of-mouth marketing is powerful in this niche, as personal recommendations foster trust and encourage new clients to explore your collection.
FAQ:
What materials can I use to create upcycled furniture?
You can use a variety of materials for upcycling furniture, such as old wooden pallets, discarded furniture pieces, glass, metal frames, and fabric remnants. The choice of materials often depends on the type of furniture you want to create. For example, wooden pallets can be repurposed into coffee tables or benches, while old dressers can be transformed into unique storage units. Be creative and think about how different materials can come together to form a cohesive piece.
How do I prepare old furniture for upcycling?
Preparing old furniture typically involves several steps. First, clean the surfaces thoroughly to remove any dirt, grease, or old finishes. If the piece has chipped paint or a worn surface, sanding it down can create a smoother base for painting or refinishing. Inspect for any damage and repair as needed; this may involve tightening screws or gluing broken pieces. Once the furniture is clean and repaired, you can proceed with painting, staining, or adding new hardware to give it a fresh look.
Can I upcycle furniture without any prior DIY experience?
Yes, you can upcycle furniture without prior DIY experience, especially if you start with simple projects. Look for straightforward tutorials that guide you through the process step by step. Basic skills like painting or sanding are quite manageable for beginners. As you gain confidence, you can explore more complex projects that may require additional skills or tools. The key is to have fun and experiment with your creativity while learning along the way.
What tools do I need to effectively upcycle furniture?
Basic tools for upcycling furniture include a screwdriver, a paintbrush or roller, sandpaper, a measuring tape, and a paint container. Depending on your project, you might also need wood glue, a jigsaw, or a drill. For tasks like sanding or painting, consider protective gear like gloves and a mask. Investing in good-quality tools can make the process smoother and more enjoyable.
What are some creative ideas for upcycled furniture projects?
There are countless creative ideas for upcycled furniture projects! Here are a few: turning an old door into a coffee table, using wooden crates as stylish storage solutions, or transforming a vintage suitcase into a unique side table. You could create a bookshelf from old wooden ladders, or make a bench from reclaimed wood and an old tire. The possibilities are limited only by your imagination, so think outside the box and let your personal style shine through!