Caleb Turner

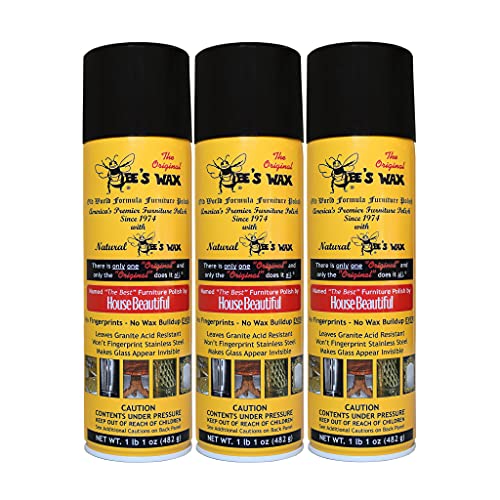
Regularly apply a high-quality beeswax polish to enhance and protect the surface of your wood items. This natural product not only gives a radiant finish but also creates a barrier against moisture and dust. Make sure to use a soft cloth for application to prevent scratches while buffing the surface.
To remove grime and fingerprints without harsh chemicals, mix equal parts of vinegar and olive oil. Gently rub this solution onto the wood with a microfiber cloth, ensuring you follow the grain. This technique not only cleans but also nourishes the natural oils present in high-quality timber.
Dust the surfaces frequently with a dry, soft cloth to prevent build-up that can dull the finish. Avoid using damp cloths, as excess moisture can lead to warping or damage over time. If deeper cleaning is needed, slightly dampen the cloth and follow up with a dry one to eliminate any moisture residue.
Position your prized pieces away from direct sunlight and heat sources to maintain their appearance and structural integrity. UV rays can cause fading and discoloration, while excessive heat can lead to cracking and other forms of deterioration.


Maintaining Radiance of Timber Pieces
Regular dusting with a microfiber cloth is vital. This prevents dirt buildup and allows the natural luster to reflect light effectively.
Utilizing a solution made of equal parts vinegar and olive oil can enhance the gleam. Apply sparingly with a soft cloth and buff gently to avoid streaks.
Periodic waxing provides a protective layer. Choose a quality paste, applying in small amounts with a soft cloth. Allow it to dry before buffing for a smooth finish.
Exposure to direct sunlight can harm the surface. Place pieces away from windows or use curtains and blinds to shield them from UV rays.
Humidity control is crucial; dry air can lead to cracks. Maintaining an optimal moisture level with a humidifier can prevent damage.
For deeper cleaning, mix mild soap with water. Use a damp cloth to wipe down surfaces, followed by a dry cloth to remove any residue.
Avoid abrasives and harsh chemicals that can strip the surface of its natural oils and finish. Stick to gentle, natural cleaners whenever possible.
Choosing the Right Cleaning Products for Wood
Opt for a pH-balanced cleaner specifically formulated for natural materials. Avoid harsh chemicals or abrasive agents that can strip the surface. Choose products with natural oils that enhance the luster without leaving a greasy residue.
I recommend testing any new product on a hidden area first to check for adverse reactions. If you prefer homemade solutions, a mixture of vinegar and water in a 1:10 ratio serves well, but always follow with a damp cloth to remove any residue.
For polishing, select beeswax-based or natural oil-based products. These help restore and maintain the surface texture while providing a protective coat. Look for items with no synthetic additives or artificial fragrances to ensure safety.
Some brands offer eco-friendly options, which are not only better for the environment but also gentle on finishes. Reading user reviews can help in making informed decisions about the best products available.
Regular application of the right products can safeguard against scratches and dullness, keeping your pieces looking their best for years to come.
Understanding Different Wood Finishes
Choosing the right finish affects the appearance and maintenance of your surfaces. Typically, options include oils, lacquers, varnishes, and polyurethane. Each has distinct characteristics that influence sheen, durability, and care requirements.
Oils
Natural oils like tung or linseed penetrate the grain, enhancing the wood’s color while providing a soft sheen. They require regular reapplication for moisture protection and to maintain their appearance. A clean, lint-free cloth is ideal for applying oil and buffing to a gentle glow.
Lacquers and Varnishes
These finishes form a hard protective layer. Lacquer dries quickly, making it suitable for more extensive projects but may require professional application for optimal results. Varnishes offer durability against scratches and moisture, though they take longer to cure. Regular dusting is necessary, and gentle cleansers should suffice for routine maintenance.
Polyurethane stands out for its robustness, available in various sheens from satin to high gloss. It’s generally moisture-resistant and holds up well over time. However, once applied, touch-ups can be challenging, necessitating complete refinishing if damage occurs.
Understanding these options enables informed choices tailored to personal tastes and usage scenarios, ensuring surfaces remain attractive and protected through the years.
Daily Maintenance Tips for Wooden Surfaces
Dust surfaces regularly with a soft, lint-free cloth to eliminate particles that may scratch the finish. I use microfiber cloths as they trap dust effectively without leaving residues.
Wipe up spills immediately with a damp cloth to prevent moisture damage. I prefer using distilled water as tap water may contain minerals that leave streaks.
For fingerprints or smudges, blend equal parts of vinegar and olive oil. I apply this mixture gently with a soft cloth, ensuring I wipe in the direction of the grain.
To avoid excessive wear, use coasters, table runners, or placemats. I always encourage guests to use them, as even hot items can cause long-term damage.
Regularly inspect hinges, joints, and drawer slides. A little wood lubricant can minimize friction and maintain smooth operation.
Consider applying a light coat of wax every few months. I prefer natural beeswax or carnauba wax, which enhances the surface without leaving a heavy layer.
Keep furniture away from direct sunlight and heat sources to prevent warping and fading. I rearrange pieces if I notice uneven exposure over time.
Proper Dusting Techniques for Wood Surfaces
I use a microfiber cloth for dusting, as it effectively traps particles without scratching the finish. I avoid feather dusters, which can disperse dust rather than remove it. Instead, I lightly dampen the cloth with water or a specialized wood cleaner for better results.
It’s helpful to dust in a systematic way, starting from the top surfaces and working downwards. I focus on horizontal areas like tables and shelves first, then move on to vertical surfaces such as cabinet faces and door frames. This prevents dust from settling again on already cleaned areas.
For intricate details or carved areas, I gently use a soft-bristled brush or a cotton swab to reach the dust lodged in crevices. I pay particular attention to high-traffic zones, as they accumulate dirt quickly.
I recommend dusting at least once a week. However, if my space is particularly prone to particles, I may increase the frequency. This habitual cleaning helps prevent buildup, making comprehensive cleaning easier.
| Dusting Tools | Usage Tips |
|---|---|
| Microfiber Cloth | Use dry or slightly dampened for maximum dust capture. |
| Soft-Bristled Brush | Ideal for delicate or intricate details. |
| Cotton Swab | Effective for small crevices and corners. |
| Vacuum with Brush Attachment | Good for larger surfaces and removing dust at the base. |
After completing the dusting, I ensure the area is clean and free from any remaining dust. Regular attention to this process helps maintain the beauty and integrity of my beloved pieces.
Using Natural Oils for a Glossy Finish
For achieving a brilliant sheen on surfaces, I recommend applying natural oils like linseed or tung oil. These oils penetrate the wood, enhancing its grain and providing a protective barrier against moisture and dirt.
Start by ensuring the surface is clean and free from dust. Use a soft cloth to rub the oil into the wood in small sections, following the direction of the grain. A thin layer is sufficient; applying too much can result in a sticky finish.
After application, let the oil sit for about 15-20 minutes, then buff the surface with a clean, dry cloth. This process helps to remove excess oil and brings out an attractive gloss. Rotating the cloth frequently prevents dull spots.
Reapply the oil every few months for maintenance. A single application enhances the look and durability, while consistent use over time builds up a beautiful luster.
Additionally, creating a mixture of equal parts vinegar and oil can serve as a natural polish. Use this solution sparingly, applying it in the same manner, and enjoy an enhanced shine without harsh chemicals.
Identifying and Treating Scratches on Wood
First, assess the depth of the scratch. Light scratches can often be treated with simple remedies, while deeper ones may require more extensive solutions. For superficial marks, gently rub a soft, lint-free cloth over the scratch to remove any dust. Then, apply a small amount of mineral oil or a specialized scratch remover directly onto the blemish.
Light Scratches
To address light scratches, consider using a mixture of vinegar and olive oil. Combine one part vinegar with two parts olive oil. Dampen a cloth with this solution and rub it along the scratch. This not only nourishes the finish but may also help disguise the scratch by filling in the wood’s pores.
Deeper Scratches
For deeper scratches, a wood filler or wax crayon that matches the grain and color of your piece can be a good option. Apply the filler to the scratch with a putty knife, smoothing it in line with the wood grain. After it dries, sand the area lightly with fine-grit sandpaper to ensure a flush finish, then polish the area gently with a clean cloth.
Protection Against Sunlight and Humidity
Position items away from direct sunlight to prevent fading and drying. Utilize protective window films or sheer drapes to diffuse harsh rays. Regularly rotate decor to ensure even exposure to light.
Managing Humidity Levels
Maintain moisture levels in the environment with a humidifier during dry seasons and a dehumidifier in damp conditions. Ideal indoor humidity ranges from 30% to 50%. Place moisture absorbers near wooden installations to combat excess humidity.
Protective Coatings
Consider applying a UV-resistant finish to surfaces to create a barrier against fading. Regularly check for wear and renew coatings as necessary. Always choose high-quality products for optimal results.
Periodic Deep Cleaning Techniques for Wood
For optimal results, I recommend conducting a thorough cleaning every six months. Start by removing all items from the surface, ensuring it’s completely bare.
Cleaning Solution Preparation
Create a gentle cleaning solution by mixing equal parts of white vinegar and water in a spray bottle. Avoid harsh chemicals that may damage the finish.
Technique Steps
- Spray the solution directly onto a microfiber cloth–never onto the wood itself.
- Wipe the surface in the direction of the grain to prevent scratches.
- For stubborn stains, lightly dampen the cloth with the solution and let it sit for a few minutes before wiping.
- After cleaning, use a soft, dry cloth to buff the surface and remove any excess moisture.
Consider a paste wax for added protection, which can enhance viscosity and provide a seamless finish. Apply it sparingly, focusing on corners and edges where wear typically occurs.
Deep Cleaning Schedule
- Every six months: Perform the vinegar solution cleaning and wax application.
- Annually: Consider a more intensive cleaning with a specialized wood cleaner, particularly for high-traffic areas.
Regular inspections can help address any imperfections or damage promptly, ensuring the longevity and appeal of the surfaces.
When to Seek Professional Restoration Services
If I notice significant damage such as deep scratches, gouges, or warping, it’s time to consult a restoration expert. These issues often require specialized knowledge and tools that are beyond my capabilities. When surfaces have lost their finish or developed uneven textures, a professional can restore their original luster effectively.
Complex Color Repairs
When the color of the surface is fading or has changed due to exposure to sunlight or cleaning products, it’s wise to seek professional help. Experts can blend and match colors with precision, ensuring that the restored area harmonizes with the surrounding finish.
Structural Concerns
If I observe any structural issues such as loose joints, wobbly legs, or signs of woodworm, professional intervention is necessary. These problems can worsen over time and may compromise the integrity of the piece if not addressed promptly. Trained restorers have the skills to stabilize and repair these issues properly.
FAQ:
What are the best products to use for keeping wooden furniture shiny?
To keep wooden furniture shiny, there are several products you can consider. Natural oils like lemon oil or beeswax are popular, as they nourish the wood and enhance its shine. Commercial furniture polishes are also effective, but be sure to choose one that is designed specifically for wood. Avoid products with harsh chemicals, which can damage the finish over time. Always check the labels and follow the manufacturer’s instructions for the best results.
How often should I polish my wooden furniture to maintain its shine?
It’s generally recommended to polish wooden furniture every three to six months, depending on the usage and the environment. High-traffic items, like dining tables, may benefit from more frequent polishing, while less-used pieces could require less regular attention. Observe the condition of your furniture; if it looks dull or the shine has diminished, it may be time for another polish. Regular dusting is also essential to prevent buildup that can dull the surface.
Can I use household items to make my furniture shine?
Yes, you can use several household items to make your wooden furniture shine. A mixture of equal parts vinegar and olive oil can create a natural polish. Just apply it with a soft cloth, rub it into the wood, and let it sit for a few minutes before buffing. Another option is using mayonnaise, which can help restore shine and moisturize the wood. However, always test a small area first to ensure it doesn’t damage the finish.
What steps should I follow to clean and shine my wooden furniture?
Begin by dusting the furniture with a soft cloth to remove any loose debris. Next, prepare a cleaner or polish suitable for wood. Apply the product according to the instructions, usually using a clean cloth. Work in small sections, applying gently and evenly to avoid streaks. Allow the product to settle for the recommended time, and then buff the area with a dry cloth to enhance the shine. Finally, admire your restored furniture and repeat the process as necessary to maintain its appearance.
What common mistakes should I avoid when caring for wooden furniture?
One common mistake is using water or excessive moisture, which can damage the wood and its finish. Avoid using abrasive cleaners as well, as they can scratch the surface. Be cautious with placing hot items directly on wood, as this can lead to burns or discoloration. Finally, don’t forget to test any new product on a hidden area first to ensure it doesn’t harm the finish. These small precautions can help maintain the beauty and longevity of your furniture.