
 Caleb Turner

Begin by gathering the necessary tools: sandpaper (varying grits), a paintbrush, a high-quality exterior wood sealer, and an appropriate cleaning solution. This preparation streamlines the process and ensures a polished result.
Next, thoroughly clean each piece using a solution of mild soap and water to remove dirt and grime. Rinse and allow it to dry completely. This step is critical, as any residue will hinder adherence of the sealant.
Utilize medium-grit sandpaper to gently strip away old finishes and imperfections, progressing to finer grits for a smooth surface. Pay attention to corners and intricate details, making sure to sand evenly. A well-prepared surface is the foundation for durability.
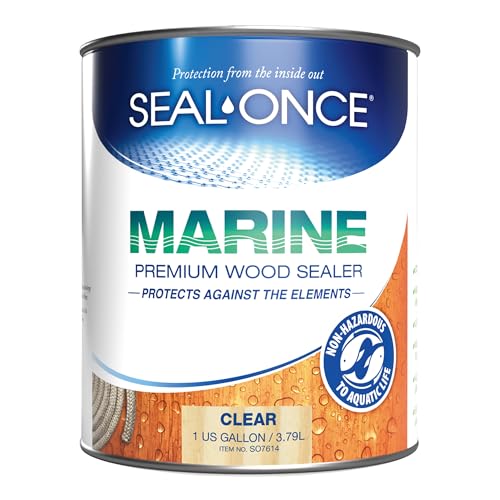


Once sanding is complete, it’s time to apply your chosen wood protector. Opt for a product designed for exterior use, as it will withstand the elements more effectively. Use a brush to ensure an even coat, and don’t hesitate to apply multiple layers for enhanced protection. Allow adequate drying time between applications to achieve the best finish.
Refinishing Process for Wooden Outdoor Items
Choose a dry, warm day to work on your project. Prepare the area by laying down a drop cloth to catch debris and protect surrounding surfaces.
Step 1: Cleaning
Start with a thorough cleaning. Use a mixture of water and mild soap to scrub the surfaces, removing dirt and mildew. Rinse with clean water and let them dry completely.
Step 2: Sanding
Utilize medium-grit sandpaper (around 120 grit) to remove old finish and smooth rough areas. Follow up with fine-grit sandpaper (220 grit) for a smooth finish. Always sand in the direction of the grain to avoid scratches.
- Wear a mask and goggles to protect yourself from dust.
- Ensure all dust is removed after sanding using a vacuum or a damp cloth.
Step 3: Staining or Sealing
For coloration, apply a high-quality outdoor stain, ensuring even coverage with a brush or cloth. Allow it to penetrate as directed, then wipe away excess. If sealing, opt for a clear outdoor sealant to protect against moisture.
- Apply a second coat if desired, following the manufacturer’s instructions.
- Let the item cure for the recommended time before use.
This process revitalizes the appearance and extends the lifespan, allowing for enjoyment of these pieces for years to come.
Assessing the Condition of Your Furniture
I carefully examine each piece for signs of wear and damage. I look for cracks, peeling paint, or discoloration. These indicators reveal how much exposure to elements the items have endured.
I run my fingers along the surfaces to detect rough patches or splinters. If I notice these imperfections, I know they need attention. I also check joints and connections, ensuring they’re secure and free from wobbling.
Next, I consider the finish. If it appears dull or faded, it’s a sign that the protective layer has diminished. A closer inspection reveals if any moisture has penetrated the wood, which could lead to rot.
I assess the overall stability of the structure. A solid foundation indicates that the piece is still functional, whereas significant instability might require deeper repairs before proceeding with restoration.
Finally, I document my findings. I take notes or photos, which help me prioritize the tasks ahead and plan an effective approach for revitalizing these items.
Choosing the Right Location for Refinishing
Locate a well-ventilated area for this task. Fresh air minimizes the inhalation of fumes from products used. If possible, choose a space outdoors away from direct sunlight to prevent uneven drying.
Flat, stable surfaces help maintain balance when working on various pieces. A garage, workshop, or any level platform can be ideal. Ensure the ground is clean to avoid contaminating surfaces.
Check weather conditions if working outside. Low humidity and mild temperatures are best, as high humidity can extend drying times and inhibit adhesion.
| Condition | Location Suggestion |
|---|---|
| Windy | Enclosed space or garage |
| Sunny | Shade or covered area |
| Rainy | Indoor workshop only |
| Dry, mild | Patio or backyard |
Protect surrounding areas with drop cloths to catch any drips or splatters. This keeps the workspace clean and prevents damage to other objects or surfaces.
A quiet location can enhance focus and reduce distractions. Consider setting up a time when you can work uninterrupted for best results.
Gathering Necessary Tools and Materials
I recommend compiling the following essential items to ensure a smooth restoration process. First, gather a set of hand tools: a scraper for removing old finishes, sandpaper (varying grits from coarse to fine), a polyurethane brush for applying new coatings, and a clean, lint-free cloth for wiping surfaces. Having a sturdy paintbrush will assist in reaching intricate areas.
Safety Gear
Safety gear cannot be overlooked. Equip yourself with gloves to protect your hands, safety goggles to shield your eyes from dust, and a mask to prevent inhalation of particulates during sanding and staining.
Cleaning Supplies
Before starting, have cleaning supplies ready. A mild soap and water solution works well for an initial clean, while mineral spirits or denatured alcohol can help remove stubborn residues. Ensure you have a bucket and sponge for washing surfaces adequately.
Finally, ensure you have a workspace properly organized with a drop cloth to protect the ground and all tools within easy reach. This preparation will help make the task more manageable and enjoyable.
Preparation: Cleaning and Sanding the Wood
Thoroughly clean the surface to remove dirt, grime, and any old finishes. I use a mixture of warm water and mild detergent or a specialized wood cleaner. A scrub brush or sponge is effective, but I make sure not to use anything abrasive that might scratch the finish.
After cleaning, allow the surface to dry completely. This step is crucial, as moisture can interfere with the next stages.
Sanding is the next task to ensure a smooth finish. I typically use medium-grit sandpaper (around 120-grit) for removing old finishes and smoothing rough areas. Here’s how I approach it:
- I start with the grain of the wood to minimize scratches.
- For intricate designs or tight corners, I use a smaller sanding block or even sand by hand for precision.
- After the initial sanding, I switch to fine-grit sandpaper (around 220-grit) to achieve a silky-smooth surface.
Once I’ve finished sanding, I ensure to wipe away all dust and debris with a damp cloth. I allow it to dry again before proceeding to any finishing products.
Checking for imperfections during this process is important. I inspect the surface for scratches or rough spots and address them accordingly. Ensuring a flawless foundation will lead to a more polished appearance in the final application.
Selecting Stains, Sealants, and Finishes
For enhancing the appearance and durability of exterior pieces, I focus on three main categories: stains, sealants, and topcoats. Each serves a distinct purpose in protecting and beautifying the surface.
Stains
Opt for oil-based or water-based stains based on your needs. Oil-based options penetrate deeper into the grain, offering a richer color and better moisture resistance. Water-based stains provide quicker drying times and lower VOC emissions. I prefer oil-based products for their longevity. Look for brands that specifically highlight UV protection to prevent fading and damage from sun exposure. Mixing different shades can create a custom look; always test it on a scrap piece before application.
Sealants and Finishes
Select a high-quality sealant for optimal protection against rain and humidity. Marine-grade sealants are excellent due to their water resistance and longevity. For added durability, I use a topcoat, such as polyurethane or spar varnish, to create a robust barrier. These coatings offer a glossy finish and maintain the chosen stain’s vibrancy. Make sure to choose a finish that matches your desired sheen–ranging from matte to high gloss–for the final touch.
Finally, always check the product instructions for compatibility with prior finishes. Proper layering will enhance adhesion and extend the lifespan of your protective layer.
Applying Stain and Sealant Properly
After preparing your surface, I follow a specific approach to ensure an even application of stain and sealant. First, I use a high-quality brush or a lint-free cloth to apply the stain. Working in small sections helps to maintain control and prevent lap marks.
Staining Technique
I start by applying a generous amount of stain, focusing on the wood grain direction. This method allows for better absorption. After several minutes, I wipe off excess stain with a clean cloth. This step is crucial to prevent sticky patches once the stain dries.
Sealant Application
Selecting a compatible sealant is key. I usually opt for a water-based sealant for easy cleanup. After letting the stain dry completely, I apply the sealant with a brush or a foam applicator, ensuring even coverage. I pay attention to joints and edges where moisture could penetrate. Multiple thin coats yield better protection than a single thick layer. I wait the recommended time between coats, often around 2-3 hours, before applying additional layers.
Final touches include inspecting the surface once the last coat is dry. If necessary, I lightly sand the surface with fine-grit sandpaper to guarantee a smooth finish before heading outdoors again.
Regular Maintenance and Care Tips
I recommend regularly inspecting your items for any signs of wear and tear. Look for cracks, peeling finishes, or signs of moisture damage. Immediate attention to these issues will prolong their lifespan.
To prevent moisture accumulation, ensure proper drainage in the area where your pieces are placed. Consider using protective covers during inclement weather to shield them from the elements.
Cleaning Routine
Establish a routine for cleaning. Use a soft brush or cloth to remove dust and debris. Avoid harsh chemicals; instead, use a mixture of mild soap and water for deeper cleaning. After washing, dry thoroughly to prevent water spots and damage.
Seasonal Treatments
I suggest applying a protective sealant at least once a year. This creates a barrier against UV rays and moisture. If you notice the color fading, reapplication of stain may be necessary. Always follow the manufacturer’s instructions for the best results.


