Caleb Turner
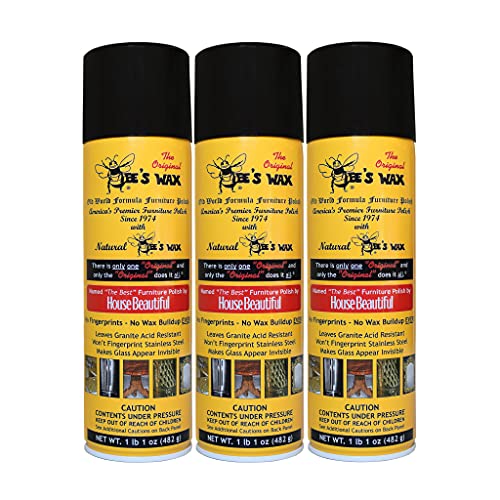
First, I reach for the white vinegar and olive oil mixture. By combining one part vinegar with two parts oil, I create a potent solution that works wonders. With a soft cloth, I gently rub this blend into the affected area, allowing it to penetrate for several minutes before wiping it away with a clean cloth.
An alternative remedy involves baking soda. I create a paste by mixing equal parts of baking soda and water. This combination can be applied with a soft cloth, using circular motions to lift the blemish. After a brief wait, I wipe it off with a damp cloth for a fresh finish.
If deeper damage persists, I consider using a touch-up marker that matches the stain or a wood crayon. Carefully filling in the mark with these products yields impressive results. After application, a light polish can help blend any visible differences, restoring harmony to the surface.
Repair Techniques for Damaged Surfaces From Felines
Mix equal parts of olive oil and vinegar. Apply with a soft cloth, rubbing in the direction of the grain. This not only helps in filling minor dents but also enhances the shine of the surface. Wipe away excess with a clean cloth to avoid residue.

Use of Wax Crayons
Select a wax crayon that closely matches the hue of the surface. Gently rub the crayon over the affected area, then smooth the surface with a soft cloth. This method allows for easy blending and can conceal blemishes effectively.

Wood Stain Markers
Choose a wood stain marker to match the finish of your item. Apply directly to the area, using controlled strokes to avoid over-saturation. Once dry, buff the area lightly to blend it seamlessly with the surrounding surface.
Assessing the Damage on Your Furniture
Examine the surface closely under good lighting. Determine the depth and length of the markings. If they are merely superficial, a simple polish may suffice, whereas deeper indentations may require more attention. Run your fingernail along the scratches; if it catches, this indicates more extensive damage.
Identify the finish type–whether it’s a natural wood, varnish, or polyurethane coating. This will affect the method I choose for repairs. If the finish feels rough in the affected areas, it may need sanding. This could help smooth the surface before applying any restorative products.
Be mindful of the surrounding areas; check for any signs of discoloration or environmental effects that could affect the restoration process. Documenting these details helps to assess whether an overall refinishing might be necessary later on.
Using a damp cloth, carefully clean the section to eliminate any dirt or dust accumulation. This step ensures that I can accurately evaluate the extent of the impairment without obstruction from debris.
Afterward, consider taking pictures of the defects for future reference, especially if I plan to consult an expert. This will aid in providing a clear understanding of the situation when discussing restoration techniques or products with professionals.
Choosing the Right Repair Materials
Selecting appropriate repair materials is crucial for effectively addressing imperfections on surfaces. Begin by considering the finish of the item. If it has a glossy veneer, opt for a specialized wood polish or filler that matches the sheen. For matte finishes, choose wax-based products that blend seamlessly.
Essential Materials
- Wood Filler: Ideal for deeper indentations, choose one that dries in a shade corresponding to the wood type.
- Crayon or Marker: These can be used to fill minor blemishes effectively. Ensure they are compatible with the finish.
- Wood Adhesive: For loose pieces, a strong adhesive is necessary to reattach them securely.
- Polish or Wax: This will restore luster and match the finish after repairs are made.
- Sandpaper: Use fine-grit paper for smoothing out repairs without damaging surrounding areas.
Tips for Selection
Consider the color. If your item features a unique hue, testing on an inconspicuous area ensures the right match. Pay attention to the texture, as smoother products may not adhere well to rustic finishes. Always prioritize high-quality items, as they lead to more durable results.
Lastly, having a variety of options on hand allows you to adapt to different surface conditions as needed. Every detail counts in achieving a polished and seamless repair.
Cleaning the Scratched Area Properly
First, I ensure the surface is free of dust and debris. A soft, damp cloth quickly removes loose particles without causing further harm. After cleaning, I let the area dry completely before proceeding.
Next, I select a gentle cleaning solution suitable for the finish of the item. A mixture of mild soap and water works well; I apply it with a soft cloth, ensuring not to oversaturate. This step helps to address any residual grime, allowing me to work on the marks more effectively.
I take care not to scrub harshly, as this could exacerbate existing damage. Instead, I use a circular motion to clean the affected area, following the grain of the material for a uniform finish.
Once the area is clean and dry, I assess the necessity of additional touch-ups before applying any repair products. Maintaining a clean workspace helps me focus on restoring the appearance without distractions.
Applying Wood Fillers for Deeper Marks
For deeper blemishes, using wood fillers provides a solution. Select a filler that matches the hue of your surface for a seamless finish. Two popular types are epoxy and latex-based fillers. I prefer an epoxy filler for its durability when dealing with significant imperfections.
Steps to Apply Wood Fillers
- Clean the area thoroughly to remove dust and debris.
- Using a putty knife, scoop a small amount of filler and press it firmly into the mark, ensuring it’s level with the surrounding area.
- Allow the filler to cure according to the manufacturer’s instructions, typically 24 hours.
- Once cured, sand the area with fine-grit sandpaper until it’s smooth. Wipe away any dust.
- Apply a matching finish or stain to blend the repair with the rest of the surface.
Additional Tips
- Test the filler on a hidden portion first to ensure color compatibility.
- If needed, apply additional filler to fill any remaining voids after the initial application has dried.
- Consider using a wood conditioner before staining to achieve an even color.
Patience is key. After completing the process, allow the finish to cure fully before using the piece again.
Using Touch-Up Markers for Surface Imperfections
Touch-up markers offer a quick solution for restoring the appearance of minor blemishes on a variety of surfaces. Choose a marker that matches the finish of your item; these typically come in a range of colors. Shake the marker lightly to mix the contents before application.
Apply the marker directly to the affected area, using a steady hand. It’s advisable to start with a light touch, gradually building up the color for a better match. If necessary, wipe away excess product with a soft cloth before it dries to avoid streaks. Allow the area to dry completely for optimal results.
If the finish isn’t blending as expected, consider using a smudge or blending tool. This accessory allows for smoother transitions between the touched-up area and the surrounding surface. Testing the marker on an inconspicuous spot first ensures that the color matches appropriately.
For best outcomes, it’s beneficial to apply a clear topcoat after the marker has dried. This layer adds protection and helps maintain the finish, ensuring the repairs last. Regular touch-ups can be part of a maintenance routine, keeping your cherished items looking their best over time.
Sealing and Protecting the Repaired Area
To ensure the longevity of the restored section, applying a quality finish is essential. I recommend using either a polyurethane sealant or a furniture wax, depending on the desired sheen and durability.
Choosing the Right Finish
Consider the existing sheen of your surface. If the area appears glossy, a water-based polyurethane works well, providing a clear protective layer. For satin or matte finishes, opt for an oil-based or a paste wax. Always perform a small patch test on an inconspicuous spot to check compatibility.
Application Process
Follow these steps to properly seal the repaired area:
| Step | Instructions |
|---|---|
| 1 | Ensure the repaired area is completely dry and no residue remains. |
| 2 | Apply a thin coat of the chosen finish using a high-quality brush or cloth. |
| 3 | Allow to dry as per the manufacturer’s instructions, typically 2-4 hours. |
| 4 | Lightly sand the surface with fine-grit sandpaper after the first coat has dried. |
| 5 | Wipe with a damp cloth to remove dust, then apply a second coat. |
| 6 | Let it cure for the recommended time – up to a week for full durability. |
Regular maintenance does not hurt. Reapply the finish annually or as needed to maintain the area’s resilience against damage. Storing cleaning supplies in a designated place away from the surface helps in preventing accidental spills or scratches in the future.
Preventing Future Scratches from Pets
Regular nail trimming simplifies maintaining the integrity of surfaces. Check every few weeks and trim back to avoid sharp edges that can cause damage.
Offering designated scratching posts or pads diverts attention away from valuable surfaces. Utilize various materials and placements to find what attracts your feline companion the most.
Utilizing Protective Covers
Employing protective sheets or covers specifically designed for surfaces can offer a barrier against potential clawing. Invest in high-quality options that blend well with your decor while offering coverage.
Training Techniques
Incorporating simple training methods can effectively minimize unwanted behavior. Use positive reinforcement when your pet interacts with designated scratching areas instead of the furniture.