
 Caleb Turner
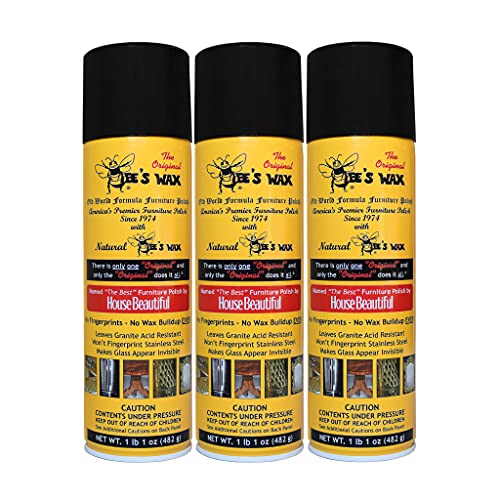
To maintain the elegance of your timber pieces, always use a microfiber cloth. This material effectively traps dust without scratching the delicate finish. Ensure the cloth is slightly dampened with water or a gentle cleaning solution formulated for natural materials.
Avoid harsh chemicals and abrasive scrubbers, as they can strip the protective layers and damage the integrity of your items. Instead, create a simple cleaning solution using equal parts vinegar and olive oil. This not only cleans but also provides conditioning benefits, helping to preserve the luster of your investments.
Apply the solution sparingly and buff with a dry cloth to prevent streaks and maximize shine. Regular upkeep every couple of weeks ensures that your cherished pieces retain their timeless appeal and resist the wear from daily use.
Choosing the right cleaning solution for wood surfaces
The best options for maintaining my wooden items include a mix of natural and commercial products. A solution made from equal parts of vinegar and water effectively eliminates grime while preserving the finish. For tougher stains, I opt for a gentle pH-balanced cleaner specifically designed for wood, ensuring it doesn’t strip away protective coatings.
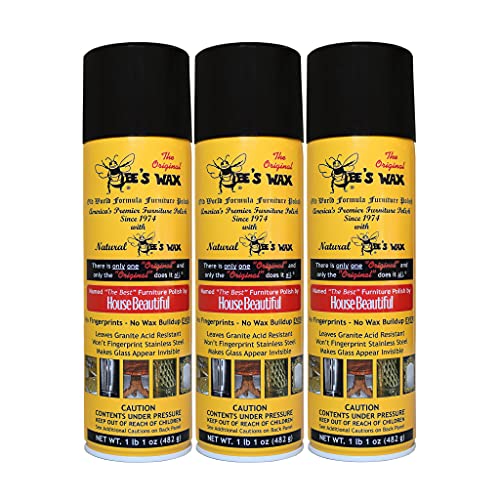

When selecting a cleaner, I consider the finish of the surface. Oiled or waxed finishes require different treatments than polyurethane. For oiled surfaces, I use a damp cloth with a few drops of mineral oil to nourish the wood, while for lacquered or varnished finishes, I prefer a soft microfiber cloth with a specialized cleaner that adds shine without causing damage.
Avoiding harsh chemicals is essential. I steer clear of bleach and ammonia-based products as they can discolor and deteriorate finishes. Additionally, I find that natural oils, such as lemon or olive oil mixed with vinegar, offer a safe alternative, providing moisture and enhancing the surface’s appearance.
For regular upkeep, using plain water with a touch of mild dish soap works wonders. I make sure to dampen the cloth and not soak the surface, preventing water damage. The right choice of cleaning solution not only preserves aesthetics but also prolongs the lifespan of the piece.
Gathering the Necessary Cleaning Tools and Supplies
For effective maintenance of my wooden surfaces, I ensure I have the right items available. Here’s a checklist of preferred tools and supplies:
Cleaning Tools
| Tool | Purpose |
|---|---|
| Microfiber Cloths | Soft and non-abrasive, ideal for trapping dust and dirt without scratching. |
| Sponge | Useful for applying cleaning solutions evenly, especially on larger areas. |
| Soft-Bristled Brush | Effective for reaching corners and intricate details without causing damage. |
| Bucket | Needed for mixing cleaning solutions and holding water. |
| Spray Bottle | Convenient for applying liquid cleaners directly to surfaces. |
Cleaning Supplies
| Supply | Function |
|---|---|
| Gentle All-Purpose Cleaner | Safe for various surfaces, effectively removes grime without harsh chemicals. |
| Vinegar | Natural option for disinfecting and cutting through grease. |
| Olive Oil or Beeswax | For conditioning and adding shine, helps restore luster. |
| Distilled Water | Non-mineralized, ideal for mixing with cleaners to avoid streaks. |
Assembling these tools and supplies makes the cleaning process straightforward and effective. I keep everything organized for easy access during my routine upkeep.
Testing the Cleaner on a Small, Inconspicuous Area
I always test any cleaning solution on a small section of the surface that isn’t easily visible. This approach allows me to see if the product causes any discoloration or damage before applying it to larger areas. In most cases, I choose a corner or the underside of a drawer for this purpose.
To perform the test, I dampen a cloth with the cleaner and gently rub it on the selected spot. I observe the area for a few minutes to monitor any adverse reactions, such as fading, bubbling, or peeling of the finish. If the surface remains unaffected after this time, I feel confident proceeding with the entire piece.
| Observation | Action |
|---|---|
| No discoloration or damage | Proceed with cleaning |
| Fading or discoloration | Try a different cleaner |
| Bubbling or peeling | Avoid using this product |
By taking this precaution, I ensure the longevity and appearance of my cherished pieces, resulting in a successful cleaning experience without compromising their finish.
Wiping Technique: Using the Right Cloth for Wooden Surfaces
I prefer microfiber cloths for cleaning fine cabinetry and tables. Their soft texture prevents scratches while effectively capturing dust and grime. I avoid using paper towels, as they can leave lint and can create small scratches on sensitive finishes.
For polished or varnished pieces, I dampen a microfiber cloth slightly with a suitable cleaner–too much moisture can damage the finish. When dealing with oiled surfaces, a dry cloth works best to prevent any unwanted buildup or residue. I also keep separate cloths for different cleaning purposes to avoid cross-contamination of products.
Using a circular motion allows me to cover larger areas without leaving streaks, providing a consistent appearance. For corners and detailed work, a cloth folded into a point helps reach those tight spots. I always apply light pressure, letting the cloth do the work instead of scrubbing aggressively, which can compromise the finish.
Regularly laundering my microfiber cloths ensures they remain effective and free from dirt buildup. I avoid using fabric softeners, as they can coat the fibers and diminish their ability to clean. Storing them in a clean, dry area prevents contamination, readying them for the next session.
Direction of cleaning: following the wood grain
Always clean in the direction of the grain. This approach minimizes the risk of scratches and preserves the natural finish of the surface.
Consider these tips when applying this method:
- Examine the surface closely to determine the grain pattern.
- Keep movements smooth and even, allowing the cleaning solution to lift dirt and grime without pushing it into the pores of the material.
- Use a gentle touch; excessive pressure can damage the finish.
The benefits of this technique include:
- Reduced risk of scratches, ensuring the beauty of the piece remains intact.
- Enhanced cleaning efficiency, as debris is easier to lift in this direction.
- Prolonged lifespan of the finish, maintaining its glow for longer.
Applying this method consistently will yield a visually appealing outcome and protect your pieces from unnecessary wear over time. Observing the natural lines of the surface contributes to a polished look after every clean.
Removing stubborn stains and sticky residue
For persistent marks and gooey remnants, a mixture of equal parts white vinegar and water works wonders. This blend effectively cuts through the tacky substances, making them easier to lift away.
Apply the solution to a soft cloth and gently rub the stained area. For tougher stains, let the mixture sit for a minute before wiping. It’s often beneficial to follow up with a second pass using a damp cloth to remove any vinegar residue.
In cases where sticky residues still cling, I have found that rubbing alcohol can be a reliable option. Use a cotton ball or soft cloth dipped in the alcohol and blot the area, avoiding excessive saturation. This method helps dissolve adhesives without harming the finish.
For more challenging stains, consider a baking soda paste made by mixing baking soda and a small amount of water. Gently rub this paste onto the stain with a soft cloth, then wipe clean with a damp cloth. Just be cautious not to scrub too hard, as this can scratch the surface.
If these methods do not yield the desired results, a specialty cleaner specifically formulated for the surface might be necessary. Always ensure to follow the manufacturer’s directions and test on a hidden section first to prevent any potential damage.
Drying and Polishing Wood After Cleaning
To achieve a pristine finish, I always ensure surfaces are thoroughly dried before applying any polish. Excess moisture can damage the varnish, leading to dullness or even warping.
Drying Techniques
- I prefer using a clean, dry microfiber cloth to absorb any remaining moisture. It’s gentle and effective.
- For larger areas, I allow natural air circulation by opening windows or using a fan, which helps speed up the drying process.
- Using a hairdryer on a low heat setting is also helpful for hard-to-reach spots, but I keep it at a distance to avoid overheating the surface.
Polishing for a Lustrous Shine
- Once dried, I choose a suitable wood polish or beeswax, applied sparingly with a microfiber or soft cloth.
- I work in small sections, using circular motions and following the grain to ensure even coverage.
- After a few minutes, I buff the area with a clean cloth to enhance the shine and remove any excess product.
This method not only protects the finish but also revitalizes the appearance, leaving the surface gleaming and well-maintained.
Maintaining wood furniture: regular cleaning schedule
I recommend establishing a routine that includes a weekly dusting and deep cleaning on a monthly basis. This approach not only preserves the finish but also prevents dirt buildup.
Weekly Maintenance
- Use a microfiber cloth to eliminate dust and particles.
- Check for any spills or spots that may need immediate attention.
- Perform quick spot cleaning on any areas that appear dirty.
Monthly Care
- Apply a suitable cleaning solution and follow the manufacturer’s instructions.
- Focus on commonly used surfaces to maintain their appearance.
- Inspect joints and connections for signs of wear or damage.
- Consider polishing after the deep clean to restore shine.
Adjust frequency based on the environment; for example, homes with pets may require more frequent attention. This schedule helps in maintaining the integrity and aesthetics of your pieces over time.
When to Seek Professional Cleaning Assistance
Engaging experts becomes necessary in several situations. If I notice extensive damage like scratches, dents, or deep stains that resist DIY efforts, a specialist’s intervention is warranted. This is vital for preserving the integrity of the material.
Specialized Stains and Treatments
In cases involving unique substances such as ink or specific food residues, a professional can apply targeted solutions that mitigate lasting effects. These individuals possess the knowledge to assess the damage correctly and provide tailored remedies.
Restoration Projects
Updating older or heirloom pieces can require advanced skills beyond typical maintenance. If I aim to restore antiques or valuable items, hiring professionals ensures that restoration techniques align with best practices, maintaining both value and appearance.
For larger pieces that are cumbersome to manage, I seek help as transporting them poses a risk of further wear. In any scenario where my attempts seem ineffective, consulting with a cleaning service can save time and resources, ensuring optimal care for valuable items.


