

Begin with a clean, dry surface. This step is crucial; any dust or residue will prevent adhesion and impact the final results. Utilize a soft cloth or microfiber towel to wipe down the area thoroughly.
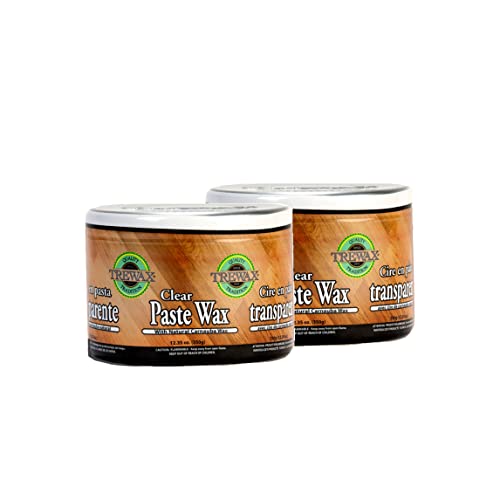
Next, choose the right type of product suitable for your specific item. There are variations designed for different finishes and levels of shine. I often prefer a natural, non-toxic option that enhances the grain without introducing harmful chemicals into the space.
Taking a small amount of the selected substance, apply it directly onto the applicator cloth. Work in manageable sections, using circular motions to evenly spread the mixture across the surface. This technique ensures that you’re covering every contour and detail uniformly.
After applying the initial coat, allow it to set according to the manufacturer’s instructions. Generally, a period of 15 to 30 minutes suffices before buffing. Use a clean, dry cloth to polish the area gently, emphasizing areas that might require a little extra attention.
For those looking to increase the longevity of the finish, consider reapplying every few months, or whenever you notice a loss of sheen. This routine maintenance can significantly enhance the visual appeal while providing added protection against wear and tear.
Choosing the Right Wax for Your Wood Type
Selecting the appropriate finish requires understanding the characteristics of different species. For dense varieties like oak or hickory, a hard, paste-type formula offers durability and a rich sheen. This type adheres well and can endure daily wear.
For softer types such as pine or cedar, a softer paste or liquid will penetrate and protect without overwhelming the grain. These formulations enhance the natural beauty while providing a more subtle glow.
| Wood Type | Recommended Formula | Key Benefits |
|---|---|---|
| Oak | Hard Paste | Durable, deep luster |
| Hickory | Hard Paste | Long-lasting protection |
| Pine | Soft Paste | Enhances grain, subtle shine |
| Cedar | Liquid Finish | Natural beauty, easy application |
For exotic species like teak or mahogany, a specialized blend is often necessary. These types benefit from formulations that enhance their natural oils and colors, ensuring a vibrant look.
Check the product label for natural ingredients like beeswax or carnauba, which are preferred for preserving the integrity of the surface while providing protection against moisture and dust.
Preparing the Surface for Application
Thoroughly clean the surface to eliminate dust, dirt, or grease. I typically use a damp cloth with a mild soap solution, ensuring to rinse well and dry completely. For stubborn stains or old finishes, fine-grit sandpaper helps create a smooth substrate. Sand in the direction of the grain for optimal results.
If the item has existing finish layers, test a small, inconspicuous area to see if they react with the cleaning agents. If the surface is too damaged or uneven, consider stripping it down to bare material for the best adhesion.
Before applying the protective coating, inspect for imperfections such as scratches or dents. Fill these with wood filler, allowing it to dry fully and then sand again until smooth. This step ensures a uniform appearance after the treatment.
Finally, vacuum or wipe the surface with a tack cloth to remove any remaining dust particles. This meticulous attention to detail guarantees a refined finish during the application process.
Application Techniques for Even Coating
For the most uniform finish, I prefer using a lint-free cloth or a soft natural bristle brush. This choice helps in preventing streaks, ensuring the product is evenly distributed across the surface.

Preparation of the Tool
Before applying the product, I lightly dampen the cloth with a small amount of the formulation, allowing it to absorb. This method controls the amount transferred to the surface, reducing the risk of buildup in corners or crevices.
Technique for Application
I work in circular motions, applying light pressure to blend the medium seamlessly into the grain. Particular attention to edges and joints is vital; I ensure to cover those areas thoroughly, using a delicate touch to avoid excess accumulation. After the application, I allow a few moments for it to set before buffing gently with a clean section of the cloth to achieve the desired lustrous finish.
How to Buff for a Smooth Finish
After the application process is complete, I prefer to let the surface cure for at least 15 to 30 minutes, allowing the product to set. For buffing, I grab a clean, soft cloth, preferably microfiber, as it minimizes the risk of scratching. A circular motion is my go-to; I start from one side and gradually work my way across the entire area.
The key is to apply light pressure. Too much force can create uneven spots. If I notice any excess build-up, I switch to a slightly damp cloth to gently remove it before proceeding with the buffing. I also make sure to change or flip the cloth frequently to avoid re-depositing any wax back onto the surface.

I often focus on corners and edges, where it’s easy for residue to accumulate. Patience pays off–buffing steadily will yield a consistent, glossy finish. For extra sheen, I might repeat the buffing process after a few hours or, for even better results, the next day. A clean, detailed buff not only enhances the appearance but also adds a layer of protection to the surface.
Removing Old Wax from Wood Furniture
I recommend beginning with a thorough cleaning of the surface. Use a soft cloth dampened with a mild soap solution to remove grime and dust. Ensure the area is dry before proceeding.
Next, choose an appropriate solvent to break down the existing layer. Options include:
- Mineral spirits
- Denatured alcohol
- Commercial wax removers
Apply the solvent to a lint-free cloth or an old cotton rag. Start in an inconspicuous area to check for adverse reactions. Gently rub the surface in circular motions, gradually lifting the old product. Reapply the solvent to the cloth as necessary.
After the old coating is removed, use a clean cloth to wipe away any residue left by the solvent. It’s essential that the surface is completely free of any chemicals before moving forward with refinishing.
For stubborn build-up, you can use a plastic scraper or a fine steel wool pad, ensuring to maintain a light hand to avoid damaging the surface beneath.
Finally, let the surface dry thoroughly. This step is crucial to ensure optimal adhesion of any new product applied later.
Maintaining Waxed Wood Surfaces Over Time
Regular upkeep is key to preserving the beauty of treated surfaces. I recommend reapplying the coating every 3 to 6 months, depending on usage and exposure to elements. This routine prevents the buildup of dirt and grime while enhancing the protective barrier.
Routine Cleaning
For routine maintenance, I use a soft, damp cloth to wipe down the surface. Avoid harsh chemicals; a mild soap solution can be effective. Always test on a small area first to ensure there’s no adverse reaction.
Inspection and Touch-ups
Periodically inspect for areas that require attention. If spots appear dull or lose their luster, gently buff the area with a soft cloth to restore shine. For deeper scratches, I apply a small amount of fresh material directly to the blemish and blend it in carefully.
Maintaining these surfaces isn’t only about appearance; it extends their lifespan. Keep an eye on the environment too–too much sunlight or humidity can affect performance, so consider using curtains or dehumidifiers in extreme conditions.
Adapting maintenance practices based on the wear and tear observed ensures longevity while preserving the character of the pieces.
Dealing with Scratches and Scuffs on Waxed Surfaces
To effectively treat blemishes on a treated surface, I recommend starting with a soft, damp cloth to gently wipe away any dust or debris. For light scratches, a wax-based repair stick in a matching color can be applied. This process fills in the imperfections while blending seamlessly with the surrounding finish. After applying the stick, I lightly buff the area with a soft cloth to smooth the surface.
Using Natural Oils for Deeper Marks
For deeper scuffs, natural oils like olive or coconut oil can be utilized. I apply a small amount directly onto the affected area and allow it to sit for a few minutes. This should help to hydrate the surface and minimize the appearance of the scratch. Afterward, I gently buff the spot with a clean cloth until it blends in with the rest of the surface.
Reapplying Protective Coating
If the damage is more extensive, reapplying a protective coating may be necessary. I ensure to first clean the area thoroughly, then apply a fresh layer of protective product evenly, allowing it to dry fully. This not only conceals flaws but also restores the luster and protection the surface needs.
Tips for Waxing Furniture with Intricate Details
Employ a soft-bristle brush to reach into crevices and ornate patterns. This tool allows me to apply product evenly without missing spots.
For highly detailed sections, I prefer using lint-free cloths. They provide better control and prevent fibers from getting stuck in nooks.
Stagger Application
Instead of tackling the entire piece at once, I concentrate on one area at a time:
- Apply a thin layer to a small section.
- Work it into details using a circular motion.
- Move on to the next area once finished, ensuring every part gets equal attention.
Test on a Hidden Spot
Before proceeding with intricate designs, I test the product on an inconspicuous area. This ensures compatibility and avoids damage.
In any complex design, patience is required. Reapplying as necessary helps achieve a uniform look while allowing the product to set properly in the less accessible areas.
Regular maintenance keeps embellishments looking sharp and prevents buildup that can obscure details. Routinely check for any drips or pooling that might require immediate attention.