 Caleb Turner

I recommend combining baking soda with water to create a paste that effectively tackles those unsightly marks left on your beloved pieces. Apply the mixture gently to the affected area with a soft cloth, using a circular motion. It’s important to test this method in an inconspicuous spot first to ensure compatibility with the wood finish.
Another technique involves using a mixture of equal parts vinegar and olive oil. Gently rub this solution onto the stained area with a microfiber cloth. The vinegar helps lift the residue without harming the wood, while the oil nourishes and enhances shine.
For persistent blemishes, a light application of toothpaste can work wonders. Use a white, non-gel variety, applying a small amount to the mark and rubbing gently with a cloth. Follow up by wiping with a damp cloth to remove any residue, leaving the surface clean and polished.
Eliminating Marks from Surfaces
Apply a mixture of equal parts olive oil and white vinegar to a soft cloth. Gently rub the affected area in circular motions. This method nourishes the wood while aiding in diminishing those unsightly marks.
If oil and vinegar don’t yield results, consider using baking soda. Make a paste with two parts baking soda and one part water. Use a soft cloth to apply the paste on the blemished area with a light touch. After a few minutes, wipe away with a damp cloth and dry thoroughly.


| Method | Materials | Steps |
|---|---|---|
| Oil and Vinegar | Olive Oil, White Vinegar | Mix, apply with cloth, rub gently. |
| Baking Soda Paste | Baking Soda, Water | Mix to paste, apply, wait, wipe off. |
Another alternative involves using a hairdryer. Set it on a low heat setting, and constantly move it over the stain while maintaining a safe distance to prevent scorching. This can help lift the moisture that causes the discoloration.
For deeper blemishes, fine steel wool can be effective. Lightly buff the spot with a fine grade wool, ensuring to follow the wood grain. Finish by applying a wood polish to restore luster.
Always perform a spot test on a less visible area before proceeding with any method, ensuring that the chosen technique does not cause further damage. After achieving satisfactory results, a coat of wax or polish will help protect the surface for the future.
Identifying the Type of Wood Finish
Check for a smooth, shiny surface, indicating a varnish or polyurethane. These finishes create a protective coat that reflects light. If the surface feels waxy, it’s likely finished with wax. This type produces a soft sheen and is easily scratched.
Water Test
Drop a small amount of water on the surface. If it beads up, a synthetic finish like lacquer or poly is present. Water that soaks in suggests an oil-based or natural finish. This test helps determine the compatibility of cleaning methods.
Color Depth
Assess the richness of the wood’s color; an oil finish often enhances the grain, giving it a warm, deep appearance. Conversely, a clear coat may leave the wood looking less saturated. The distinction guides appropriate maintenance and treatment approaches.
Always perform a spot test with any cleaning or restoration product to confirm compatibility with the specific finish type.
Gathering Necessary Materials for Cleaning
For effective treatment of the blemishes on your surfaces, gather the following supplies:
| Material | Purpose |
|---|---|
| White cloth or cotton balls | To apply the cleaning solution and buff the area |
| Olive oil or mayonnaise | Natural solvents to help lift the stains |
| Vinegar (optional) | For additional cleaning properties |
| Wood polish or wax | To restore the shine and protect the surface |
| Sponge or soft-bristled brush | For gentle scrubbing without damaging the finish |
Ensure to have these items ready prior to starting the cleaning process for optimal results.
Trying the Ironing Method for Minor Heat Rings
For minor blemishes on your surface, an effective approach is utilizing an iron. Begin by setting your iron to a low heat without steam.
Step-by-Step Instructions
Place a clean, dry cloth over the affected area. Ensure the fabric is free from prints or dyes that could transfer onto the surface. With the iron ready, gently glide it over the cloth for a few seconds at a time. Avoid pressing too hard; the goal is to allow the warmth to penetrate the fabric and reach the surface beneath.
Check progress frequently after every few seconds. Lift the cloth to assess the condition. Repeat the process until the blemishes diminish. If needed, you can apply a small amount of mineral oil or furniture polish afterwards to restore luster.
Precautions
Keep the iron moving to prevent scorching the surface. Test this method in an inconspicuous area first to ensure compatibility with your finish.
Applying Mayonnaise or Petroleum Jelly Technique
I recommend applying either mayonnaise or petroleum jelly directly onto the affected area. For mayonnaise, use a small amount and rub it gently into the mark with a soft, clean cloth. Let it sit for about 15 to 30 minutes, allowing the oils to penetrate the finish and help lift the stain.
If opting for petroleum jelly, spread a thin layer over the blemish and leave it for several hours, or even overnight, for optimal absorption. After the allotted time, wipe off the excess with a fresh cloth and assess the results. If necessary, repeat the process to achieve better outcomes.
Both options work effectively by moisturizing the wood finish and can help diminish those unsightly marks. Always test a small, inconspicuous area prior to broader application to ensure compatibility with the specific surface type.
Using Baking Soda Paste for Stubborn Marks
To tackle persistent blemishes, I recommend creating a paste with baking soda and water. This method is effective for various types of finishes and won’t cause significant damage to the surface.
Follow these steps:
- In a small bowl, mix two parts baking soda with one part water until a thick paste forms.
- Gently apply the paste onto the affected area using a soft cloth or sponge. Be careful not to rub too hard, as this could scratch the finish.
- Let the paste sit for about 10-15 minutes, allowing it to penetrate the stain.
- Wipe away the paste with a damp cloth, then dry the area thoroughly with a clean towel.
- If necessary, repeat the process until the mark fades.
This approach utilizes the mild abrasiveness of baking soda, which helps lift unwanted residues without harming the underlying layer. Always conduct a patch test in an inconspicuous area before applying it to ensure compatibility with the specific finish.
Testing Essential Oils for a Natural Solution
Experimenting with essential oils can yield promising results for treating unsightly marks on various surfaces. Lavender, lemon, and tea tree oils are excellent candidates to consider. To begin testing, gather the following:
- Small container for mixing
- Cotton balls or clean cloth
- Carrier oil (like olive or coconut oil)
Mix a few drops of your chosen essential oil with a tablespoon of carrier oil. Dip a cotton ball into the mixture, ensuring it is damp but not dripping.
Next, choose an inconspicuous area on the affected item. Apply the oil mixture and let it sit for about 10-15 minutes to gauge the reaction with the surface. Afterward, gently wipe it off with a clean cloth.
Evaluating Effectiveness
After testing, assess the area for any improvement. Look for the following:
- Enhanced shine
- Reduction in visibility of the mark
If results are satisfactory, proceed to apply the mixture to the marks directly, following a similar method. Make sure to always perform a patch test to protect the surface from potential damage.
Alternative Blends
Combining different oils can also enhance results. For instance, mixing lemon oil with tea tree oil may produce a more potent solution. Always prioritize gentle application to avoid further damaging the finish of your items.
Considering Commercial Products for Wood Repair
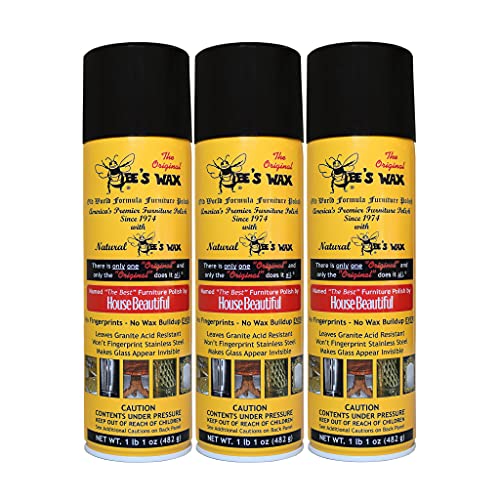
I’ve found that specialized formulas designed for restoring finishes can be quite beneficial. Products such as wood oils, waxes, and repair markers are tailored to blend with various types of surfaces, offering a seamless fix.
Recommended Commercial Options
One effective option is a high-quality wood polish. Look for formulas containing natural oils, which nourish and revitalize the damaged area. For more significant blemishes, consider a wood repair pen or marker that matches your furniture’s color. These are often easy to use and can significantly improve the appearance of scuff marks.
Look for Multi-Purpose Solutions
Choosing all-in-one products can save time and effort. There are several brands offering kits that include a cleaner, polish, and protective finish. These provide a comprehensive approach to minor surface issues, ensuring a unified appearance across the piece.
Preventing Future Heat Damage on Surfaces
To protect surfaces from unsightly marks, use coasters under hot items. Choose coasters made of natural materials like cork or silicone, which effectively absorb heat.
Additional Protection Techniques
- Avoid placing hot pots directly on tables; use trivets instead.
- Consider applying a high-quality furniture polish regularly to form a protective barrier.
- Utilize tablecloths or placemats during meal times to shield against temperature fluctuations.
Long-Term Care Strategies
- Keep humidity levels stable in your home; this can help maintain the integrity of the finish.
- Regular cleaning with a soft, damp cloth prevents buildup that can increase vulnerability.
- Reapply a wood conditioner periodically to nourish and protect the wood.
Implementing these practices not only minimizes potential damage but also ensures the longevity of your treasured pieces.
When to Consult a Professional for Repair
In situations where the damage appears extensive or multiple methods have failed, seeking assistance from an expert can prevent further deterioration. If the finish is deeply scorched or peeling, it may indicate that a simple DIY solution won’t suffice.
Signs Indicating Professional Help is Needed
Persistent stains after trying various remedies suggest that the underlying finish might be damaged. Additionally, if attempts have led to discoloration or a patchy appearance, consulting a specialist is advisable. When dealing with high-value antiques or heirlooms, expert restoration ensures preservation of both the aesthetics and value.
Time-Saving Considerations
If your schedule is busy, engaging a professional can save time and effort. Experienced restorers often have access to specialized tools and materials that could expedite the process, offering a streamlined solution to restore your treasured pieces efficiently.