 Caleb Turner

For optimal durability, I recommend using a high-quality, penetrating oil specifically formulated for exterior wooden materials. Applying a product containing UV protection will help preserve the natural beauty of your pieces while preventing fading and weathering. Ensure the surface is clean and dry before application to achieve the best results.
Select a suitable applicator, such as a brush or rag, to spread the oil evenly across all surfaces, paying close attention to any joints or crevices. I ensure that I apply a generous amount to saturate the wood adequately. After allowing the oil to soak for the manufacturer’s recommended time, I wipe away any excess to prevent a sticky surface.
Regular maintenance is key to keeping these constructs looking their best. I typically reapply the oil every six months to a year, depending on exposure to the elements. This practice not only enhances the aesthetic but also extends the life of the material significantly.
Applying Protective Coating to Redwood Creations
To safeguard against weather elements, utilizing a penetrating oil finish is essential. I recommend selecting products specifically designed to enhance the natural beauty while providing necessary protection.
- Choose a quality oil, like teak or linseed, for an authentic look.
- Before application, ensure the surface is clean and dry. Sanding lightly can help open pores for better absorption.
- Apply the oil liberally with a brush or lint-free cloth, working with the grain to ensure even coverage.
- After 15-20 minutes, wipe off excess oil to prevent a sticky residue.
- Allow it to cure for 24-48 hours before using the items outdoors.
Reapplication occurs annually or biannually, depending on exposure levels to sun and moisture.


Utilizing Sealants for Extended Durability
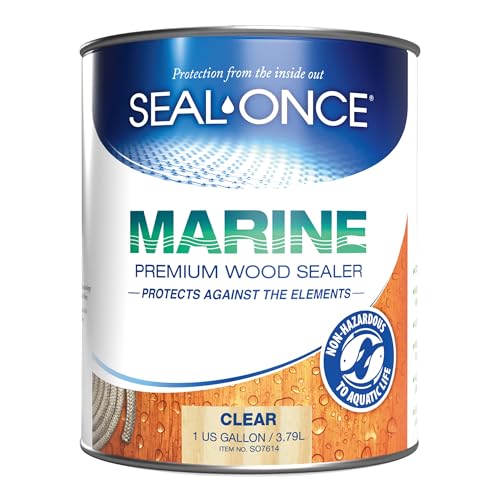
For long-lasting defense against harsh conditions, a clear marine-grade sealant can be beneficial. These products provide a tougher barrier against water and UV rays.
- Opt for a sealant labeled as water-repellent and UV-resistant.
- Apply it in a well-ventilated area, ensuring the surface is clean and smooth.
- Spray or brush the sealant evenly, following manufacturer guidelines for drying times.
- Usually, a second coat is recommended for maximum resilience.
Regular inspections for wear and tear will help catch any signs of degradation early, allowing for timely maintenance.
Choosing Stains for Enhanced Aesthetics
If you prefer a different hue, consider penetrating stains that allow the wood grain to show through. They can offer a stylish appearance while shielding against moisture.
- Select semi-transparent stains for a subtle change or solid stains for more color.
- Test the stain on a small area to see how it interacts with your wood palette.
- Follow the application instructions, typically involving two coats for optimal coverage.
Post-application, ensure the piece is allowed to cure properly before placing it in the open air.
Choosing the Right Finish for Redwood
For sealing and protecting your wooden pieces, oils are the best option. They penetrate the wood deeply, nourishing it while providing a natural look. I prefer using Tung oil or Danish oil, as they offer excellent resistance to moisture and UV damage.
Another viable choice is applying a polyurethane or spar varnish, which creates a protective surface layer. When selecting a product, opt for formulas specifically designed for outdoor applications to ensure durability against harsh weather.
| Type | Advantages | Disadvantages |
|---|---|---|
| Oils (Tung, Danish) | Deep penetration, natural appearance, easy to apply. | Requires frequent reapplication. |
| Polyurethane | Strong protective layer, long-lasting, resistant to scratches. | Can become yellow over time, requires careful application. |
| Spar Varnish | Excellent UV protection, durable. | Can be difficult to apply evenly. |
Consider clear coatings for those who want to preserve the natural grain. However, opaque options are excellent for adding color while providing UV protection; thus, choose based on your aesthetic preference.
Always test a small, inconspicuous area to see how the wood reacts to each product before proceeding with the entire project. This helps avoid any unwanted surprises in appearance or performance.
Preparing the Surface for Finishing
To achieve a smooth and durable coat on the wood, the initial stage involves meticulous preparation of the surface. Start by thoroughly cleaning the material to remove dirt and mildew. Using a soft cloth or sponge, wash the area with mild soap and water. Rinse well and allow it to dry completely before proceeding.
Inspecting the Surface
Next, examine the surface for any imperfections such as splinters, rough spots, or existing finishes that may hinder adhesion. Use sandpaper, preferably 120-grit for initial sanding, to smooth any rough areas. Follow up with finer 220-grit paper for a silky finish. Always sand in the direction of the grain to avoid any scratches.
Removing Dust
After sanding, it’s crucial to eliminate any dust that could interfere with the application of the protective layer. Utilize a vacuum or a tack cloth to thoroughly wipe the surface. Ensure that all dust particles are removed to achieve a flawless application.
- Clean with a soap solution and dry completely.
- Examine for splinters and rough areas.
- Sand starting with 120-grit, then refine with 220-grit.
- Remove all dust using a vacuum or tack cloth.
This meticulous approach to preparation guarantees a solid foundation for the protective coating, ensuring longevity and an appealing aesthetic for your pieces.
Applying Stain to Enhance Natural Color
I recommend using a high-quality wood stain specifically designed for outdoor applications. Begin by selecting shades that complement the inherent tones of the timber. Test different shades on a small section to visualize how each interacts with the natural grain before proceeding.
Application Techniques
Utilize a brush or a cloth for application, ensuring an even coat. Apply the stain in the direction of the grain to ensure maximum absorption. For a deeper color, I often recommend applying a second coat once the first has dried according to the manufacturer’s instructions. Pay attention to the drying times; they can vary based on humidity and temperature.
Maintenance of Color
After staining, consider a protective sealer to prolong the color and guard against UV damage. Reapply the sealer annually to maintain the rich appearance and prevent fading. Regular cleaning with a mild detergent and water will also help preserve the wood’s natural beauty.
Sealing with Varnish for Weather Resistance
To ensure durability against the elements, applying a quality varnish is a key step. I prefer marine-grade or polyurethane varnish; these products contain additives that enhance UV protection and moisture resistance. Aim for a satin or semi-gloss finish for a balance between aesthetics and functionality.
Before application, stir the varnish thoroughly to avoid any inconsistencies. Read the manufacturer’s instructions regarding thinning; sometimes a bit of mineral spirits is needed for the initial coat to ensure better penetration into the wood. I usually apply the first coat with a high-quality brush, ensuring even coverage and avoiding drips.
Allow adequate drying time between coats–typically 24 hours, depending on temperature and humidity levels. I recommend at least three coats for optimal protection. Lightly sand with fine-grit sandpaper between each application to enhance adhesion and achieve a smooth surface. This step reduces imperfections and promotes a flawless finish.
After the final coat, let the varnish cure completely–this can take up to a week. Ensuring full curing prevents any damage during exposure to rain or sun. Regular maintenance every couple of years with a recoat will help maintain a fresh appearance and bolster resistance to weather damage.
Maintaining and Reapplying Finish Over Time
I recommend conducting regular inspections of your piece every few months to assess its condition. Look for signs of wear, fading, or peeling to determine if a touch-up is necessary. If the surface feels rough or looks dull, it’s time to refresh the coating.
Cleaning the Surface
Begin by cleaning the surface with a mild detergent and water solution. Use a soft brush or cloth to gently remove any dirt or debris. Rinse thoroughly and allow it to dry completely before proceeding.
Reapplying the Coating
When reapplying, first lightly sand the area to ensure proper adhesion. Opt for a fine-grit sandpaper to avoid damaging the existing layer. After sanding, remove dust with a tack cloth. Then, apply the new layer of your chosen protective coating using a high-quality brush for even coverage. Follow manufacturer instructions for drying times between coats, typically two or more layers are ideal for optimal protection.
Keep track of your maintenance schedule in a notebook or digital log to ensure you address the needs of your piece consistently. This practice extends the lifespan and maintains the beauty of your outdoor investment.
Tips for Common Finishing Mistakes
Avoid rushing the surface preparation process. Sanding must be thorough to eliminate any rough spots and to allow the stain or sealer to penetrate effectively. I ensure I use the right grit sandpaper, starting with a coarser grit and gradually moving to a finer one for a smooth finish.
Temperature and Humidity
Check the weather conditions before applying any products. Extreme temperatures or high humidity can cause uneven application and slow drying times. I always aim for application on a dry, mild day, ideally between 50°F and 85°F, with low humidity for optimal results.
Test Before Committing
Before applying stain or sealant to the entire piece, I perform a test on a small hidden area. This helps me see how the product interacts with the wood’s natural color and grain. Adjustments can be made to the application techniques or product choice based on the test results.