Begin with a thorough cleaning to address any stains or dirt. Use a soft brush and a mild soap solution to gently scrub the surfaces. For tougher stains, create a paste using baking soda and water, apply it to the affected areas, and let it sit before rinsing off.
Next, consider re-stuffing. If the padding has lost its shape, carefully remove the old filling and replace it with high-density foam or outdoor-safe polyester fiberfill. This simple adjustment can breathe new life into your seating accessories.
Protect your refreshed items by applying a fabric protector designed for outdoor use. This will help repel water, dirt, and UV rays, prolonging the lifespan of your seating components.
Lastly, store your revitalized pieces indoors or use breathable covers when not in use. This precaution keeps them looking pristine for your next gathering.


Choosing the Right Fabric for Outdoor Cushions
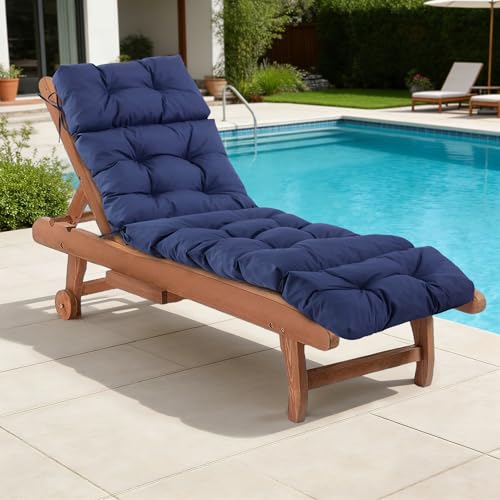
I prioritize UV-resistant materials like solution-dyed acrylic for their durability against sun exposure. These fabrics offer excellent color retention, minimizing fading over time.
Water-resistance is another key factor. Choosing fabrics with a water-repellent finish, such as polyester blends, helps in preventing moisture absorption and mold growth.
For breathability, I often opt for materials designed with this feature. Fabrics that allow air circulation help in reducing heat buildup and keeping the seating comfortable.
Ease of cleaning is essential. Look for textiles that are stain-resistant or can be easily wiped down. Fabrics treated with special coatings can repel dirt and spills effectively.
When I assess softness, I prefer a balance between comfort and sturdiness. Fabrics should feel inviting while also being tough enough to withstand regular use.
Before making a final decision, I always check for warranties or guarantees offered by manufacturers. Reliable brands typically stand behind their products, offering additional assurance of quality.
Considering environmental factors is also vital. Choosing eco-friendly materials can be a responsible option, benefiting both nature and personal values.
Measuring Cushion Dimensions Accurately
To ensure a precise fit, I begin by gathering essential tools: a measuring tape, a notepad, and a pen. I measure each dimension of the foam or pad individually, noting the width, depth, and thickness. This is critical as many seating elements have varying shapes and sizes.
Width and Depth
For width, I measure from one edge of the seating area to the other. I ensure the tape is straight and level for an accurate reading. For depth, I measure from the front to the back of the seating area. If there are any curves or irregular shapes, I carefully follow the contour with the measuring tape, making adjustments as needed.
Thickness
I measure the thickness by placing the tape on a flat surface and measuring from the top of the cushion to the bottom. It’s crucial to account for any seams or differences in height, especially if the padding is not uniform. After gathering all dimensions, I document them clearly, confirming accuracy before proceeding to the next steps of choosing materials and patterns.
Preparing Old Cushions for Recovery
Begin by cleaning the existing upholstery thoroughly. Use a vacuum to remove dust and dirt, followed by a mixture of mild soap and water for any stains. Make sure to rinse and dry them completely before proceeding.
Assessing Condition
Check for damage such as seams coming apart, mildew, or faded fabric. Any significant wear can indicate necessary repairs before new coverings can be applied. Address these issues to extend the life of the revamped seat pads.
Removing Old Fabric
Carefully take off the old material, noting how it is constructed. This will serve as a guide for attaching new fabric. Use a seam ripper or scissors to remove stitches without damaging the foam underneath.
| Step | Action |
|---|---|
| 1 | Clean the existing fabric |
| 2 | Inspect for damage |
| 3 | Remove the old covering |
By following these steps, I ensure that the base is ready for the new design. Pay attention to details and take your time, as these efforts will significantly influence the final look and durability of the seating elements.
Cutting the New Fabric to Size
I prioritize precision when cutting the replacement fabric. Begin by laying the material flat on a clean, level surface. It’s crucial to smooth out any wrinkles or creases to ensure accurate measurements.
Using the previously measured dimensions, I mark the fabric with a fabric marker or tailor’s chalk. I usually leave an extra inch around each side for seam allowances, which allows for proper finishing and prevents fraying.
Tools Needed
For this task, I utilize sharp fabric scissors to ensure clean edges. A rotary cutter and cutting mat can also be helpful for straight cuts, especially on larger pieces. Always double-check measurements before cutting to avoid mistakes.
Tips for Accuracy
I recommend cutting in one motion rather than sawing back and forth, as this minimizes fraying. It’s wise to cut one piece at a time to keep track of what I’m working with, especially if dealing with multiple sections. If working with patterned fabric, aligning the pattern is essential for a cohesive look once the pieces are assembled.
Applying Foam and Batting for Comfort
Select high-density foam that matches the desired firmness level. Aim for at least 2 inches in thickness for optimal support, ensuring durability during use. For an extra cushiony feel, consider adding a layer of batting on top.
Steps to enhance seating comfort:
- Measure the height and width of each section for precise foam cutting.
- Cut the foam with a sharp knife or electric knife for clean edges.
- Layer batting over the foam, providing a soft finish. Cut batting to size, leaving extra for wrapping.
Wrap the batting around the foam, pulling it tight and securing it with a staple gun on the underside of the cushion. This approach not only improves aesthetics but also enhances comfort dramatically.
Keep in mind:
- Choose a batting material, like polyester, for added softness and insulation.
- Consider multiple foam layers if looking for increased plushness.
- Test different foam densities to find the ideal balance between support and comfort.
By thoughtfully applying foam and batting, the renewed seating surfaces will provide an inviting and cozy experience.
Sewing techniques for durable seams
Using a straight stitch or a zigzag stitch offers strong options for securing edges. I prefer a straight stitch as it creates a streamlined finish, but zigzag stitches add flexibility, especially if the fabric stretches.
Selecting the right needle is critical; for thicker materials like canvas, a heavy-duty needle works best. It easily penetrates various layers and prevents breaking during sewing.
For added strength, I use French seams, which hide raw edges and provide a clean finish. To create one, after stitching the fabric rights sides together, trim the seam allowance before sewing again with the wrong sides together to encase the seam.
Topstitching adds a polished look while reinforcing seams. I often topstitch along edges, which also helps keep fabric layers aligned and prevents shifting during use.
For areas subject to stress, such as corners, I reinforce seams with bar tacks. This technique involves sewing a few tight stitches back and forth across the seam, adding stability to high-wear areas.
Incorporating bias tape along seams not only enhances durability but also gives a decorative finish. I find it effective in ensuring edges are well-finished and protected from fraying.
Lastly, I always backstitch at the beginning and end of my seams. This prevents unraveling and ensures that my stitches hold up against wear and tear.
Finishing touches and water-resistant treatments
I recommend applying a water-resistant treatment to enhance the longevity of your revitalized seat pads. Choose a suitable spray or liquid treatment designed specifically for fabrics. Make sure it is safe for your chosen material to avoid any discoloration or degradation.
Application steps
- Ensure the surface is clean and dry before application.
- Spray or apply the treatment evenly, holding the bottle at a distance recommended by the manufacturer.
- Allow adequate drying time as per instructions, generally 24-48 hours.
- For optimal protection, consider applying multiple layers.
After the treatment has dried, check for any areas that may need a touch-up. This step is crucial for areas that will face direct exposure to moisture or sunlight.
Additional protective measures
- Consider using cushion storage bags during inclement weather.
- Employ coatings like a fabric protectant or UV blocker to enhance durability against sun damage and fading.
- Regularly clean the fabric, using a mild soap solution to prevent mold and mildew buildup.
- Store the items indoors during prolonged periods of non-use for added protection.
By incorporating these measures, the aesthetics and comfort of your seating will be preserved for an extended period, making your outdoor space inviting and enjoyable.