
 Caleb Turner

Inspect the hinges and pivot points first. Over time, these can accumulate dust and debris, leading to stiffness or difficulty in operation. Clean them thoroughly with a gentle lubricant to ensure smooth movement.
Next, check the tensioning mechanism. If the mechanism appears slack or loose, adjust it according to the manufacturer’s instructions. This adjustment is key to maintaining the functionality of the device.
Additionally, evaluate the insulation and surrounding areas. If there are any gaps that could impact energy efficiency or safety, ensure they are sealed properly. I personally found that using high-quality weather stripping can make a significant difference in maintaining warmth.

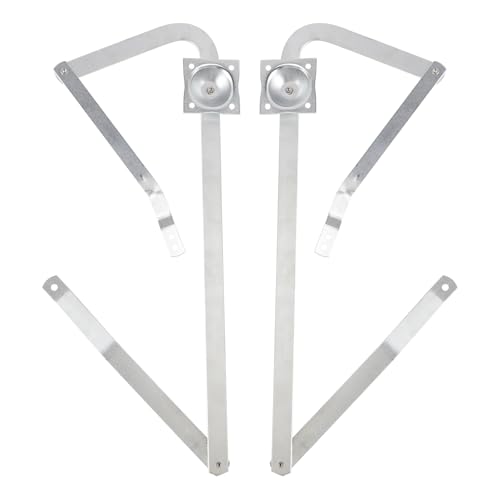
Lastly, if any components are damaged, replacement may be necessary. Keep a handy toolkit for common parts that may wear out. I recommend sourcing replacement pieces directly from the manufacturer to guarantee compatibility and durability.
Identify the Common Issues with Concertina Loft Ladders
To address a malfunctioning folding stairway, I recommend first examining the hinges and joints for any signs of wear or obstruction. Often, dirt or debris accumulates, hindering smooth operation. A simple cleaning can enhance functionality significantly.
Loose Fixtures
Another frequent issue arises from loose screws or fittings. Checking and re-tightening all connections can resolve stability concerns. Ensure that all components are secure to prevent wobbling during use.
Stiff Mechanism
If the access point isn’t extending or retracting smoothly, the mechanism may require lubrication. Applying a suitable lubricant along the moving parts can restore ease of movement, making it safe to operate again.
Gather Necessary Tools and Materials for Repair
Take the following items to ensure a smooth repair process:
- Adjustable wrench for loosening and tightening bolts.
- Screwdriver set (flathead and Phillips) to handle various screws.
- Pliers for gripping and manipulating small components.
- Measuring tape to assess dimensions if required.
- Replacement parts, such as hinges or springs, depending on identified issues.
- Lubricant spray, such as WD-40, for ensuring smooth operation of moving parts.
- Safety goggles to protect your eyes from debris.
- Sturdy step stool for reaching higher areas safely.
Make sure to check each item off the list as you gather them, ensuring all are on hand for efficient problem-solving.
Inspect and Tighten Loose Hinges and Fasteners
I check the hinges and fasteners for any looseness. Often, they can become unstable with regular use. Using a screwdriver or appropriate tool, I carefully turn the screws clockwise to tighten them. I ensure not to overtighten, as this can strip the screws or damage the surrounding material.
If a hinge is significantly worn or damaged, replacing it is sometimes necessary. I remove the old hinge by unscrewing it and replace it with a new one that matches the size and type. I pay close attention to alignment during installation to ensure smooth operation.
I also examine nuts and bolts; these may loosen over time. I use a wrench to secure them snugly, ensuring the whole structure remains stable. After tightening everything, I test the performance. If things feel solid and secure, I know the job is successful. Regular inspections should be part of maintenance to prevent future issues.
Replace Damaged or Worn Pulley Systems
Inspect the pulley system closely for signs of wear or damage. A malfunctioning pulley can hinder the operation of your access structure. If I notice fraying, cracking, or shifting of the pulleys, I prepare to replace them.
Removing the Old Pulleys
Begin by disconnecting the existing pulleys. Remove any screws or bolts holding them in place. Take care to remember the configuration; sometimes, taking a photo aids in reinstallation. Once removed, examine the attachment points for any further issues that might need addressing.
Installing New Pulleys
Select high-quality replacement pulleys compatible with your specific system. After positioning the new pulleys in the same manner as the old ones, secure them using the original screws or bolts. Ensure each pulley turns smoothly before reassembling other components.
After installation, test the operation of the entire mechanism to confirm that it functions correctly. Adjustments may be necessary to align everything perfectly. Regular maintenance checks on these components can extend the life of your access unit significantly.
Adjust or Realign Misaligned Sections
To align sections that are not in proper order, I extended the mechanism fully and examined each link for any sign of obstruction or misplacement. It’s crucial to ensure that every segment locks into place without friction or unnecessary gaps.
If I detect any sections that seem out of sync, I gently tap them back into alignment, making sure not to force any parts. A rubber mallet can aid in adjusting without causing damage. Tightening any loose hinges during this process maintains alignment and functionality.
For persistent misalignments, I slightly loosen the fasteners holding the misaligned sections. After realigning, I retighten them while holding the parts in their desired position. This step ensures the sections remain aligned during use.
I also check the guides and tracks for any debris or obstructions that might prevent smooth movement. Cleaning these areas can often resolve misalignment issues by allowing unrestricted sliding.
Once adjustments are made, I carefully open and close the mechanism multiple times to confirm that each section interacts smoothly with its neighbors. Fine-tuning might be required after a few trials to achieve perfect alignment.
Test the Ladder Operation After Repairs
After completing repairs, I always ensure to test the operation of the folding mechanism. This step is critical to confirm that everything is functioning smoothly and safely. I begin by fully extending the steps and then retracting them several times to verify there are no sticking points or unusual noises.
Checking Stability and Security
While extending and retracting, I pay close attention to the ladder’s stability. I verify that all sections align properly without wobbles. If instability is detected, I re-examine the connections and fasteners for proper tightening.
Performing a Load Test
When I’m confident of the ladder’s stability, I perform a load test. Using a weight that approximates an average user’s, I slowly put pressure on the lowest step while ensuring all parts endure the force without shifting or bending. It’s crucial that the weight distribution is even to assess overall safety.
| Test Steps | Actions | Expected Outcome |
|---|---|---|
| Extension and Retraction | Extend and retract multiple times | Smooth operation without noise |
| Stability Check | Observe for wobbles or misalignment | Solid and secure alignment |
| Load Test | Apply weight and observe | No bending or movement |
By following these testing processes, I can assure the safety and functionality of the installation for future use. Any issues identified during these tests lead me to reassess the repairs made, ensuring long-term reliability.
Maintain Your Concertina Loft Ladder for Longevity
Regular upkeep is necessary to ensure my folding access system remains safe and functional. I clean the components each season to remove dust and grease buildup, which can hinder movement. A damp cloth works well for this, followed by a dry one to prevent moisture accumulation.
Lubricate Moving Parts
I apply silicone-based lubricant to the hinges and moving mechanisms to keep them operating smoothly. This reduces friction and prevents wear over time. I avoid petroleum-based lubricants since they can attract dirt and grime.
Check for Signs of Wear
I routinely inspect for any cracks, loose fittings, or worn-out straps. Any signs of damage should be addressed immediately to avoid complications. If I notice any fraying or deterioration, I replace these parts without delay.
By following these maintenance tips, I can extend the life of my access system significantly and ensure it remains a reliable solution for accessing overhead spaces safely.




