 Caleb Turner

Begin with accurate measurement of the space where the supports will be installed. Select the proper size for your requirements, ensuring they align with the insulation materials being used. This step is crucial, as improper sizing can lead to gaps that compromise thermal efficiency.
Secure the base of each support unit on a clean, dry surface. Using construction adhesive alongside mechanical fasteners can enhance stability and longevity. Ensure the support is vertical and aligned to maintain consistent insulation coverage across the area.
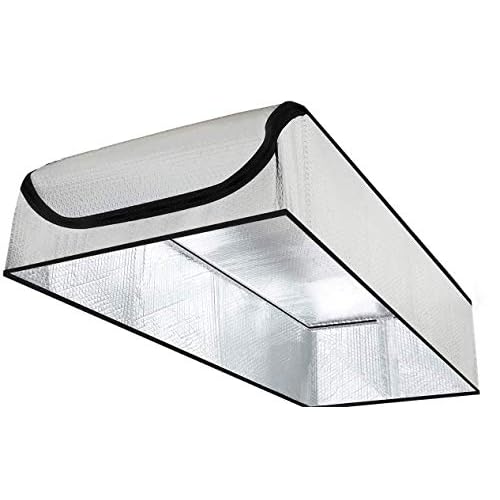

Once installed, check for proper spacing between the supports. Maintaining uniform intervals allows for optimal distribution of insulating material and aids in achieving desired thermal performance. After placement, inspect the installation to confirm all elements are firmly anchored before proceeding with the insulation application.
Installing Support Structures for Thermal Material
Begin with selecting appropriate support pieces. Standard height is typically between 200mm and 300mm, allowing for an optimal air gap above the coverage.
Next, measure the area where support structures will be positioned. Mark the locations, ensuring they are evenly spaced to distribute weight and maintain stability.

Use brackets or adjustable supports that fit securely within the space available in your upper area. This ensures that the supporting elements can accommodate varying heights and slopes, allowing for better adjustment.
- Place the first support into position, ensuring it’s level and secure.
- Drill holes into the beams or rafters if required, depending on the type of fasteners you’re using.
- Affix the support using screws or nails, ensuring it is firmly attached and can bear weight.
Repeat the process for each marked location. Consistency in spacing is key to properly distribute the load and avoid sagging.
- Double-check each support to maintain evenness.
- After installation, inspect for any looseness and tighten if necessary.
- Once all supports are secure, move on to placing the thermal material on top.
Conclude by reviewing the entire setup for stability and ensuring all supports are functioning correctly. This attention to detail guarantees longevity and efficiency in maintaining temperature control within the space.
Choosing the Right Insulation Material
For optimal energy conservation, I recommend selecting materials with high thermal resistance, commonly referred to as R-values. Fiberglass batts and rolls are popular due to their affordability and ease of installation. Look for options with an R-value of at least 38 for attic spaces.
Fiberglass vs. Mineral Wool
Mineral wool, or rock wool, offers superior fire resistance and soundproofing properties. It repels water, preventing mold growth, making it ideal for humid areas. Consider the application environment when deciding between fiberglass and mineral wool.
Rigid Foam Board
If space is a limitation, consider rigid foam board insulation. It provides a high R-value per inch, offering excellent thermal performance. Suitable for areas with limited depth, this option can be a game-changer in enhancing thermal efficiency.
Measuring Your Loft Space Accurately
Begin by taking precise measurements of all accessible areas. Use a laser tape measure for increased accuracy, ensuring to record both the width and length at various points to account for any irregularities in the structure.
Height Measurements
Pay special attention to the height of the space, as this can vary significantly. Measure from the highest point of the ceiling to the floor. For vertical areas with angled ceilings, measure at the wall’s base and at intervals across the span.
Calculating Volume and Area
Once you have all dimensions, calculate the area by multiplying length by width and the volume by combining areas with height measurements. This data is critical for determining the quantity of materials required for your project.
Gathering Necessary Tools for Installation
Before proceeding with the enhancement of your attic space, ensure you have all required tools on hand. A well-prepared setup can significantly streamline the task.
Essential Hand Tools
Collect a tape measure to accurately assess dimensions and ensure precise placement. A utility knife will be indispensable for cutting materials to fit snugly. Equip yourself with scissors for trimming flexible strips of insulation easily. A sturdy ruler can assist in achieving straight cuts, while a level will help verify that your framework is even.
Safety and Support Equipment
A reliable ladder is necessary for accessing the upper areas safely. Don’t overlook a pair of work gloves to protect your hands from potential hazards during the project. A dust mask and safety goggles are also wise additions, particularly when dealing with fibrous materials.
Consider having a clipboard and notepad for taking notes, especially when planning your layout or jotting down any adjustments. With the right tools gathered, you’re positioned for a smooth enhancement process in your attic. Align your equipment methodically to ensure efficiency and safety throughout.
Preparing the Loft Area for Insulation Legs
I clear the space where I plan to install support components by removing any stored items, debris, or dust. This ensures a safe and unobstructed environment for work.
I examine the rafters and the floor for signs of wear or damage. Any issues should be addressed before proceeding. If there are gaps or cracks in the structure, I seal them to prevent air leakage.
I inspect for any electrical wires, plumbing, or ventilation ducts. These should be noted to avoid interference during installation. If necessary, I secure these components safely out of my working area.
I take measurements of the space to ensure it will accommodate the new supports without hindrance. This step requires accuracy to prevent future problems.
I ensure that the area is well-lit. Utilizing portable lights may improve visibility and help spot any potential hazards.
I place a protective covering over the floor to avoid damage to existing surfaces and reduce mess during the installation process. A drop cloth serves this purpose effectively.
With the area cleared and organized, I’m set for the next phases without distraction. This preparation is pivotal for a smooth and successful process.
Installing the Insulation Legs Step-by-Step
Begin by positioning the support structures where needed, ensuring they are evenly spaced and securely anchored. This step is critical for maintaining stability.
Securing Support Structures
Utilize brackets and screws to fasten each support firmly to the existing beams. This provides the necessary strength to support any weight above. Verify that each is level using a spirit level.
Adding the Insulation Material
Carefully roll out the thermal barrier within the confines of the support framework. Ensure that there are no gaps or overlaps; this maximizes thermal performance. Cut the material accurately to fit snugly between the upright members.
Once in place, double-check each section to ensure complete coverage. Seal any seams with tape designed for insulation, preventing air leaks and enhancing overall energy conservation.
Ensuring Proper Ventilation After Installation
Maintain airflow by installing vents or maintaining existing ones to prevent moisture buildup. Adequate circulation helps avoid condensation, which can lead to mold. I recommend placing ventilators at opposing ends of the space to enhance airflow.
Regular Inspections
Conduct periodic examinations to ensure that the ventilation system operates efficiently. Look for blockages or obstructions, especially in winter when debris can accumulate. Keeping the vents free from dust and debris maximizes air exchange.
Monitor Humidity Levels
Utilize a hygrometer to keep an eye on moisture levels. Ideally, indoor humidity should remain between 30% and 50%. If it exceeds this range, consider additional ventilation options, such as mechanical fans or dehumidifiers, to control moisture effectively.
Common Mistakes to Avoid During Installation
A common error I’ve encountered is neglecting to properly measure the available space before selecting components. Failing to do this can lead to purchasing incorrect sizes, resulting in wasted materials and time.
Another frequent oversight is not securing the vertical supports firmly. If these are loose, they may not hold the weight of the covering, leading to sagging or potential collapse.
- Ensure every support is fastened according to the manufacturer’s instructions to maintain structural integrity.
- Check the stability of the frames under weight to ensure they won’t bend or break.
Ignoring the need for ventilation can also be problematic. Without adequate airflow, moisture build-up may occur, damaging both the structure and the insulation material.
- Always assess the planned layout to ensure there are ventilation pathways.
- Use breathable materials to facilitate air progress if necessary.
Forgetting to wear protective gear during the installation is another risk. It’s easy to ignore safety, but suitable clothing and gear can prevent injuries from sharp tools or heavy components.
Finally, rushing through the process can lead to mistakes. Taking your time ensures that each step is performed to the highest standard, resulting in a more reliable and efficient installation.
- Review each stage before proceeding to the next to avoid overlooking important details.
- Consider enlisting help if the task seems overwhelming, ensuring you have the support needed for a high-quality outcome.
Maintaining Your Insulation Structure Over Time
I regularly check the condition of my insulating framework at least once a year. This schedule helps identify any gaps, damage, or settling issues that may have arisen. If I notice any degradation, I take immediate action to repair it and ensure it remains effective.
Visual Inspection
A thorough visual assessment is key to spotting potential problems. I look for signs of moisture, mold, or pests. If I find any of these, I address them promptly to prevent further damage. When inspecting, I pay attention to:
| Issue | Action |
|---|---|
| Mold | Use a mold remover and ensure proper ventilation |
| Moisture | Identify sources and seal leaks or gaps |
| Pests | Contact pest control and reinforce entry points |
Reapplication and Upgrades
Every decade or so, I reassess whether to add additional layers of material to boost thermal performance or update to new materials for better efficiency. This not only helps maintain heat retention but also aligns with advancements in insulation technology.
By adhering to these practices and staying proactive, I ensure that my insulating system operates effectively, contributing to energy savings and comfort year-round.