
 Caleb Turner

To achieve a polished look, prepare a solution using equal parts vinegar and water. Soak a cloth in this mixture and gently rub the surface to remove grime and discoloration. The acidic nature of vinegar acts as a natural agent to lift stubborn residues without scratching the metal.
For deeper stains or rust, sprinkle baking soda directly onto the affected areas. This abrasive compound aids in loosening tight particles. After letting it sit for a few minutes, use a soft scrub pad to work the baking soda into the metal. Rinse thoroughly with warm water and dry immediately to prevent moisture from causing further damage.
To maintain the attractive finish, consider applying a thin layer of mineral oil or furniture wax once the surface is dry. This step provides a protective barrier, safeguarding against future tarnishing and wear. Regular maintenance will keep your industrial style pieces looking their best.
Cleaning Techniques for Metal Tubes
First, I use a solution of vinegar and water. Mixing one part vinegar with one part water creates an effective solution to tackle grime. I apply this mixture using a soft cloth, ensuring to scrub the surface gently.


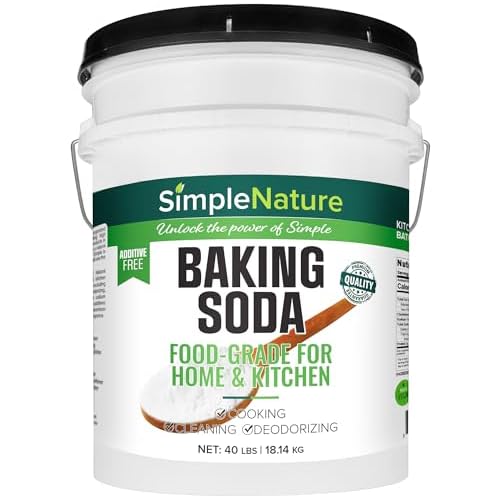
For tougher spots, I create a paste using baking soda and water. Applying this paste to stubborn stains allows it to sit for 10-15 minutes before scrubbing it off with a brush. This method effectively lifts dirt without damaging the finish.
Afterward, I rinse the surface thoroughly with warm water to ensure no residue remains. Drying it immediately with a clean cloth prevents rust formation.
To maintain a clean finish, I apply a light coat of mineral oil. This layer acts as a barrier against moisture and keeps the surface looking polished over time.
Regular inspections are necessary. If I notice any signs of residue or corrosion, I repeat the cleaning steps promptly to preserve the aesthetic appeal and longevity of the object.
Assessing the Condition of the Black Iron Pipe
Examine the surface for rust and corrosion, which can significantly impact both aesthetics and structural integrity. Use a wire brush to reveal the extent of any deterioration hidden under grime.
Check for dents or bends; any deformation can weaken the framework. Applying pressure can show whether the material can withstand weight without compromising stability.
Inspect the joints and welds carefully. Weak connections may require reinforcement, so look for gaps, cracks, or excessive wear that could affect overall strength.
Perform a moisture test. If moisture appears, it indicates potential leaks or prolonged exposure to humid conditions, worsening corrosion.
Evaluate the length and width as well. Measuring ensures compatibility with your intended design while maintaining structural soundness.
Assessing overall appearance is also crucial. Aesthetic flaws, even if minor, can detract from the finished piece, so consider if the surface can be improved or treated further.
Choosing the Right Cleaning Supplies and Tools
Opt for a degreaser that specifically targets rust and grime; non-toxic formulas are preferable for safety. Acquiring a soft-bristle brush helps reach crevices without causing scratches. A microfiber cloth is ideal for wiping down surfaces post-treatment, as it effectively traps dust and residues.
Recommended Supplies
Utilize baking soda and vinegar for a natural cleaning solution that effectively breaks down tough buildup. If required, sandpaper or steel wool can aid in removing stubborn rust; select finer grades to avoid damaging the finish. Ensure a good pair of gloves protects your hands while handling any abrasive materials.
Tools for Effective Maintenance
A spray bottle facilitates easy application of your chosen cleaning solution; this method offers precise control. Alternatively, a bucket can hold larger volumes for extensive cleaning tasks. Consider employing a toothbrush for detailed areas, which ensures thoroughness in every corner.
Removing Surface Rust and Debris
Begin by using a wire brush to scrub the surface, effectively dislodging loose rust and dirt. Choose one that fits comfortably in your hand for better control. Ensure all areas, including crevices, are addressed to eliminate all visible particles.
Applying a Rust Remover
For stubborn residue, I recommend applying a rust remover. Read product instructions carefully. Safety gear, such as gloves and goggles, is necessary to protect against irritants. After application, allow the solution to sit according to the guidelines and then scrub again with the wire brush. Rinse thoroughly with water to remove any chemical remnants.
Using Sandpaper or a Wire Wheel
In cases of heavier corrosion, finer sandpaper or a wire wheel attachment for a drill can be employed. Start with coarse grit to tackle severe spots, followed by finer abrasive options for a smoother finish. Sand until the surface appears clean and free from oxidation.
Lastly, ensure the surface is completely dry. This step is vital, as moisture can lead to further oxidation if not addressed promptly. Store items in a dry location to prolong their integrity after restoration.
Applying a Cleaning Solution for Stains
Prepare a mixture of equal parts vinegar and water or use a commercial degreaser. Apply the solution using a spray bottle or cloth.
For stubborn stains:
- Soak a cloth in the solution and place it over the stain for several minutes.
- Gently scrub the area with a soft-bristle brush to lift the marking.
- Rinse with clean water and dry thoroughly to prevent corrosion.
After removing the stains, consider using a mild soap with warm water for regular maintenance. This helps keep the surface looking good.
If discoloration persists even after treatment, a fine steel wool pad can be used cautiously to buff the area. Ensure to wipe away any debris afterward.
Drying and Preventing Future Rust
Ensure thorough drying immediately after any cleaning process. I use a microfiber cloth to wipe down surfaces, absorbing any remaining moisture. I leave the components in a warm, dry area with good airflow for at least a few hours to completely eliminate dampness.
Applying a rust preventive spray once the surfaces are dry is crucial. I look for products containing corrosion inhibitors, applying them evenly over all exposed areas. This forms a protective layer, minimizing future oxidation risks.
To maintain their condition long-term, I recommend periodic inspections. Every few months, I check for any signs of moisture buildup or scratches in the protective coating. If I notice any exposed spots, I immediately reapply the rust inhibitor to maintain the shield.
Storing items in a dry environment also plays a key role. Keeping them off direct contact with moisture-prone floors or walls can significantly extend their lifespan. Using coasters or mats can be an excellent addition when placing such objects on surfaces.
Lastly, I avoid using abrasive cleaning tools in the future. They can remove protective coatings and lead to rust development. Instead, I stick to soft cloths and gentle cleaning solutions to preserve the integrity of the surfaces.
Finishing Touches: Sealing the Cleaned Pipe
After ensuring the metal has been scrubbed and dried thoroughly, sealing is the next crucial step. Using a quality sealant helps protect against moisture and corrosion, prolonging the life of your makeover.
Recommended Sealants
| Type | Application Method | Drying Time |
|---|---|---|
| Clear Polyurethane | Brush or spray evenly | 1-4 hours |
| Oil-based Primer | Paint with a roller or brush | 24 hours |
| Rust-Preventive Spray | Spray from a distance | 30 minutes |
| Wax Finish | Buff using a cloth | 1 hour |
Apply the chosen sealant uniformly, ensuring to cover all areas, including seams and joints. Allow the material to cure fully per manufacturer instructions before using the item.
Additional Tips
Regular check-ups are recommended to maintain its protective layer. Reapply sealant as needed, especially in humid environments to prevent unexpected decay.
Maintenance Tips for Long-Lasting Cleanliness
Regular inspection of the material is necessary to maintain its pristine condition. Examine for any signs of wear, corrosion, or moisture accumulation that could lead to deterioration.
Keep the surrounding environment dry and free from humidity. Use dehumidifiers in areas where moisture tends to accumulate, preventing oxidation and rust buildup.
- Apply a protective coating periodically to decrease exposure to water and air. A clear sealant specifically designed for metal surfaces works well.
- Wipe down after each use to remove dust and oils that might accumulate. Soft, lint-free cloths are ideal for this purpose.
- Store items away from direct contact with damp surfaces or extreme temperatures, ensuring longevity.
In cases of reachability, I often use an automotive rust prevention spray or a similar product to enhance durability against future corrosion.
- Consider using a natural oil like linseed or mineral oil to create a barrier against moisture.
- Stay vigilant about inspecting joints and connections where moisture can collect. Regular checks can help catch issues early.
Investing some time in these simple practices can significantly extend the lifespan and appearance of your fixtures, ensuring they remain a stylish feature in your space.




