
 Caleb Turner

Apply a blend of olive oil and vinegar on a clean cloth and gently rub the affected area. This mixture not only nourishes the grain but also helps diminish the visibility of marks. In addition, a beeswax or carnauba wax can provide a protective layer, enhancing the wood’s natural beauty while concealing flaws.
Consider using a touch-up marker that closely matches the hue of the surface. This quick fix allows for precision in hiding imperfections without altering the overall aesthetics. For deeper dents, a steam method can help; place a damp cloth over the dent and apply an iron briefly. This will help the wood fibers swell back, restoring the original contour.
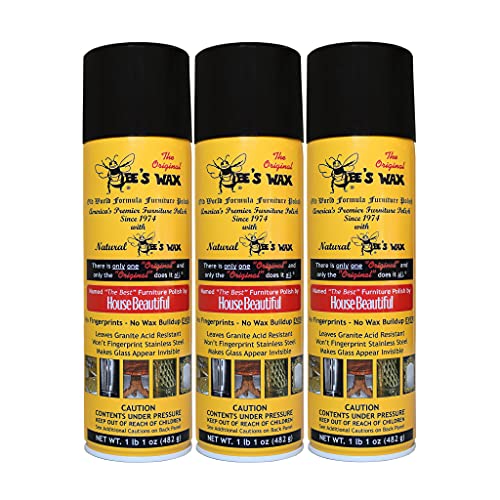


After treatment, applying a coat of polyurethane can seal the repairs and offer lasting durability. Choose a sheen that matches the surrounding area for a seamless blend. Regular maintenance with appropriate cleaners will also aid in preventing new marks from forming and keeping surfaces looking pristine.
Identifying the Type of Wood Finish
Begin by checking for a glossy surface indicative of varnish or polyurethane. These finishes create a protective layer, often providing a smooth and reflective look. If the surface appears more matte and feels somewhat oily, it may be an oil finish like linseed or tung oil, which penetrates the wood instead of sitting on top.
Water-Based vs. Oil-Based Finishes
To determine between water-based and oil-based options, look for the drying time. Water-based finishes usually dry quickly, in one to two hours, whereas oil-based varieties can take up to 24 hours. Additionally, a simple water test can help: if drops bead up, an oil-based finish is likely present.
Checking for Stain
If discoloration exists, a stain may have been applied beneath the finish. Rubbing a small area with denatured alcohol can reveal to what extent a finish is penetrating. If color transfers to the cloth, a stain is present. Different woods and finishes also dictate how pigments appear on the surface, so consider the original hue and pattern.
Using these observations, clarity on the finish type helps select the appropriate repair method, ensuring an effective restoration process. Always run a small test in an inconspicuous area before making broader adjustments.
Gathering Necessary Materials
A soft cloth for cleaning is fundamental. Choose a microfiber type to avoid further damage when wiping the surface. Next, a high-quality wood filler or wax stick is required for the best concealment results. These products come in various colors; select one that matches the surrounding area of the item. A putty knife can help with application, allowing for precise filling of the imperfections.
Additionally, having fine-grit sandpaper on hand might be beneficial for smoothing out the repair before applying any finish. A clear coat of polyurethane or varnish is optional but can enhance the durability of the repair once completed. Lastly, a clean sponge or brush will assist in applying any additional treatment needed for the finish, ensuring a polished appearance. Organizing these tools and materials beforehand streamlines the entire process.
Testing on a Hidden Area
Before applying any product to the visible surface, conduct a test on an inconspicuous section. This ensures compatibility with existing surfaces and minimizes potential damage.
- Select a small, hidden section such as the underside of a drawer or the back of a leg.
- Use a clean cloth to apply a modest amount of the chosen repair agent.
- Gently rub the area and observe for immediate reactions. Note any discoloration or texture change.
- Allow it to dry completely, usually for a few hours, then check the finish.
If the test area shows no adverse effects, proceed with the application on the damaged site. If any negative changes appear, reconsider the materials or techniques before moving forward.
Using Wax Sticks for Small Scratches
Wax sticks serve as a practical solution for minor blemishes on surfaces. Choose a wax stick that closely matches the hue of the item. This ensures better integration with the surrounding area.
Begin by cleaning the affected area thoroughly, ensuring it’s free from dust and debris. Lightly warm the wax stick with your hands. This will soften it, allowing for easier application.
Apply the wax directly to the imperfection, filling it in smoothly. Use a plastic scraper or your finger to level the wax with the rest of the surface. Allow it to set as per the manufacturer’s instructions, often just a few minutes.
If necessary, a gentle buffing with a soft cloth enhances the final appearance and blends the repair seamlessly. For lasting results, consider sealing the area with a suitable finish after the wax sets.
Applying Wood Stain for Deeper Scratches
Choose a stain that closely matches the original tone of the surface. Gel stains are particularly useful for achieving an even finish on deeper marks.
Follow these steps:
- Prepare the area around the blemish by cleaning it with a damp cloth to remove dust and debris.
- Use a small brush or a cotton swab to apply the stain directly into the affected area. Ensure it seeps into the scratch.
- Feather the edges of the stain slightly to blend it with the surrounding area.
- Allow the stain to sit for the recommended time indicated on the product label before wiping away excess with a clean, dry cloth for a uniform finish.
Once the first coat is dry, assess the coverage. If the mark remains visible, apply a second coat using the same technique. Aim for gradual enhancement in color depth rather than total concealment.
Finish with a clear coat to protect the area and restore shine. A polyurethane or lacquer can enhance durability while providing a consistent sheen across the entire piece.
Utilizing Furniture Repair Markers
I recommend selecting a furniture repair marker that matches the finish of your item. These specific markers are designed to mask imperfections effectively, providing a swift solution to unsightly blemishes.
To begin, cleanse the area around the damage thoroughly. This will ensure that no dust or debris interferes with the application process. Once the area is prepped, shake the marker well. It’s crucial to activate the ink properly for optimal application.
Carefully apply the marker directly onto the affected zone. Use smooth, even strokes, aiming to fill in the damaged area without overapplying. If the marker features a fine tip, it allows for greater precision, especially in tight spots.
After applying, assess the coverage. If the result appears too dark or saturated, gently dab the area with a cloth to lighten it, blending the repair with the surrounding surface.
If multiple shades exist for your chosen marker, test them on an inconspicuous section to identify the most suitable match. This step helps ensure a seamless repair.
| Marker Color | Suggested Wood Finishes |
|---|---|
| Light Oak | Natural, Honey Oak |
| Dark Walnut | Walnut, Mahogany |
| Cherry | Cherry, Maple |
Finally, allow the treated area to dry completely. After drying, assess the repair in different lighting angles to ensure the finish blends beautifully with the rest of the surface. Following these steps leads to a practically invisible touch-up, rejuvenating the look of the piece.
Employing DIY Solutions with Household Items
I recommend using natural ingredients found at home. Olive oil mixed with vinegar can enhance the aesthetics of lighter surfaces. Combine equal parts of both substances, apply a small amount to a soft cloth, and work it into the damaged area. This mixture not only camouflages imperfections but also nourishes the finish.
Baking Soda Paste
A paste made from baking soda and water can effectively minimize visibility in minor imperfections. Mix one part baking soda with one part water until a thick consistency forms. Gently rub this paste onto the blemish with a soft cloth, then wipe away excess with a damp cloth. Ensure it’s dry before using the surface again.
Banana Peel Rubbing
The inside of a banana peel is surprisingly beneficial for mending minor damage. Rubbing the flesh directly on the affected area can help reduce the appearance of flaws. After applying, buff with a soft cloth to remove residue and reveal a polished finish.
In addition to these methods, consider using coconut oil for a natural shine. Apply and let it absorb for a few hours before buffing. This not only rejuvenates the surface but can also disguise some of the flaws.
Maintaining Furniture After Repair
To ensure longevity and appearance of restored surfaces, routine care is necessary. Regular dusting with a microfiber cloth prevents dirt buildup that can cause further damage.
Apply a protective finish after any repair process. This serves as an additional barrier against future wear. Be cautious with products; test them on inconspicuous areas first to avoid adverse reactions.
Regular Conditioning
Incorporate conditioning oil into maintenance. It nourishes and hydrates the surface, keeping it from drying out and cracking. Use a soft cloth and apply sparingly, following the manufacturer’s guidelines. Doing this every few months is recommended, but adjust frequency based on environmental factors.
Environmental Considerations
Position pieces away from direct sunlight and heat sources. Excessive exposure can fade colors and weaken structural integrity. Use coasters and mats to shield the surface from spills and heat damage. This simple step preserves the beauty of the restoration.


