To tackle those unsightly blemishes on my patio set, I first gather my supplies: white vinegar and baking soda. I prepare a thick paste by mixing these two ingredients, applying it generously to the affected areas. After allowing it to sit for about 30 minutes, I grab a wire brush to scrub off the residues.
After the initial scrub, I rinse the surfaces with warm water to remove any remaining paste and loosened debris. A towel helps in drying the metal adequately, reducing the chances of any subsequent issues. For those hard-to-reach spots, I utilize an old toothbrush, ensuring every nook and cranny is addressed.
Once the surfaces are dry, I reach for a can of protective spray paint designed for metal. This step not only enhances the aesthetics but also adds a barrier against future deterioration. It’s a satisfying process that rejuvenates my outdoor treasures, allowing me to enjoy them season after season.
Removing Oxidation from Garden Assets
Apply a mixture of baking soda and water to the affected areas, forming a paste. This combination neutralizes acidic properties and loosens the flaky deposits. Use a nylon brush to gently scrub the surface until you see improvement.
Once the previous step is complete, rinse with clean water. Ensure all residue from the paste is removed to prevent further discoloration. After rinsing, dry the pieces thoroughly to minimize moisture retention.


I recommend applying a protective coating, such as a rust-inhibiting spray or a high-quality sealant designed for metal. This will create a barrier against future elements and extend the life of your items.
| Materials Needed | Purpose |
|---|---|
| Baking Soda | Removes corrosion |
| Nylon Brush | Prevents scratching |
| Sealant | Protective barrier |
For stubborn oxidation, white vinegar can serve as an alternative option. Soak a cloth in vinegar and apply it directly to the spots. Allow it to sit for at least 30 minutes, then scrape gently. Rinse and follow up with drying and sealing.
Regular maintenance and quick attention to any spots will ensure longevity and keep your outdoor assets looking pristine.
Assessing the Degree of Rust on Your Furniture
Begin by closely examining the surface for any visible discoloration or texture changes. Touch the metal parts to identify any rough patches that may indicate deterioration. Use a flashlight to enhance visibility in shaded areas for a detailed inspection.
Consider categorizing the damage into three levels:
- Light: Slight discoloration or surface marks present, but material remains intact. Light scrubbing may suffice.
- Moderate: Flaking or peeling noticeable, with patches of corrosion affecting the integrity. Requires more extensive treatment.
- Severe: Deep pitting or extensive erosion compromising structural stability. Replacement might be necessary in some cases.
Utilize a magnifying glass for minute details. After this examination, create a list of affected areas and note the extent of each section. This will guide the approach for any restorative efforts.
To understand the origin, assess previous environmental factors such as proximity to water sources, humidity levels, and location. This data will aid in future prevention strategies.
Taking photographs of the furniture at different angles can also assist in tracking progress during the restoration process. Consider documenting any improvements made after each treatment stage.
Choosing the Right Cleaning Supplies for Rust Removal
For effective treatment of oxidized surfaces, I opt for materials that specifically target corrosion. Here’s a list of supplies that work wonders:
- White Vinegar: A natural acid that loosens corrosion, perfect for soaked applications.
- Baking Soda: A gentle abrasive suitable for scrubbing surfaces without scratching them.
- Steel Wool: Great for tougher spots, but requires careful handling to avoid scratches.
- Sandpaper: Use a medium grit for initial removal and follow up with fine grit to smooth surfaces.
- Oxalic Acid: A powerful chemical often found in commercial cleaners, ideal for severe cases.
- Liquid Dish Soap: An effective degreaser, necessary to ensure the removal of oils before treatment.
- Protective Gloves: Essential to safeguard my hands when using harsh chemicals.
- Face Mask: Recommended to avoid inhalation of any dust or harmful particles during scrubbing.
- Spray Bottle: Useful for applying vinegar or pre-mixed cleaning solutions evenly.
Additionally, the choice of scrub brush depends on the surface texture. For delicate materials, a soft brush will suffice, while a wire brush can be used on sturdier items. I prefer a multi-tool that includes a scraper to address layered corrosion.
Optional Commercial Products
While DIY options are effective, numerous commercial products are specifically formulated for tackling oxidation. My favorites include:
- Rust Remover Gel: Sticks to vertical surfaces, preventing drips.
- Rust Converter: Turns corrosion into a stable compound, eliminating further deterioration.
- Preventative Coatings: After treatment, applying a protective spray helps maintain the newly treated surface.
Gathering the right tools and materials transforms the process into a straightforward task. With the right approach, restoration becomes much simpler and more rewarding.
Step-by-Step Guide to Removing Rust Using Chemical Products
I recommend wearing protective gloves and goggles before starting the process. Prepare the area by covering surrounding surfaces to prevent unintentional damage from splashes. Choose a well-ventilated location for the task.
Choosing a Chemical Remover
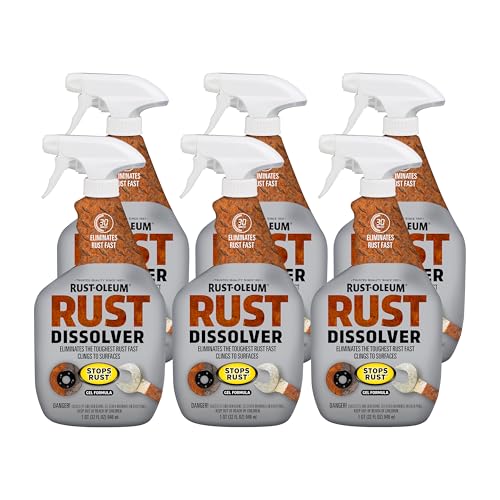
Select a commercial anti-corrosion solution or rust-dissolving agents. Look for products containing phosphoric or hydrochloric acid, which effectively convert rust into a removable layer. Read labels carefully for instructions and safety precautions.
Application Process
Apply the chosen product directly onto the affected areas using a brush or cloth. Ensure even coverage for maximum impact. Allow the solution to sit for the recommended duration mentioned in the guidelines, typically ranging from 15 minutes to several hours, depending on the severity of the corrosion.
After the waiting period, scrub the surface with a wire brush or steel wool to help lift the dissolved corrosion. Rinse thoroughly with water to neutralize any remaining chemicals, and dry the surface completely to prevent future issues.
To maintain the renovated structure, consider applying a protective coating or sealant after the surface is dry. This layer acts as a barrier, minimizing exposure to moisture and further deterioration.
DIY Methods for Rust Removal with Household Items
I recommend making a paste with baking soda and water for efficient elimination of corrosion. Apply the paste directly to the affected areas and let it sit for about 30 minutes before scrubbing with a brush. Rinse thoroughly after scrubbing.
An alternative is to use white vinegar, which is acidic and can help dissolve corrosion. Soak a cloth in vinegar and wrap it around the corroded areas, allowing it to sit for several hours. The corrosion will loosen, making it easier to wipe away.
Another option involves using lemon juice and salt. Sprinkle salt over the corroded spots, then squeeze lemon juice on top. Let this mixture work for a couple of hours, then scrub gently with a toothbrush to remove any remaining residue.
If you have aluminum foil, crumple a piece and use it to scrub the corroded areas. It works effectively due to the chemical reaction between aluminum and corrosion, lifting it away without damaging the surface.
For minor spots, combine hydrogen peroxide with baking soda for a potent cleaner. Apply the mixture, let it sit, then scrub and rinse thoroughly. This method is particularly useful for hard-to-reach spots.
An old toothbrush can be a handy tool for detailed cleaning in small crevices. Pair it with any of the above solutions for a thorough treatment.
Preventative Measures to Avoid Future Rust on Furniture
Applying a high-quality protective coating is my first step. I choose a weather-resistant paint or sealant specifically designed for metal surfaces. This creates a barrier against moisture and environmental elements.
Regular Maintenance
I make it a habit to wipe down my items after rain or heavy dew. This removes excess moisture that could lead to oxidation. Additionally, I inspect them periodically for any signs of wear, making repairs as needed.
Storage Solutions
When the weather turns harsh, I store my possessions in a dry, sheltered space. Using furniture covers that are breathable helps prevent condensation buildup. I also elevate items off the ground when possible, using pads or blocks, to promote airflow.
Restoring Finish After Rust Removal: Best Practices
Apply a high-quality primer to protect the surface before restoring the top coat. Choose a product suitable for the material of your item, ensuring compatibility to avoid peeling or bubbling.
Once the primer is dry, use a compatible paint or sealant, ideally formulated for outdoor use. Select a color that matches your original finish to maintain continuity in appearance.
Consider using a spray application for an even coat, and maintain a distance of about 12 inches to prevent drips. Apply multiple thin layers rather than one thick coat for better adhesion and a smoother result.
After the final layer has dried, enhance protection by applying a clear topcoat. This will not only add shine but also provide extra durability against moisture and UV rays.
Make sure to fully cure the finish according to the manufacturer’s instructions before placing your item back in service. This step is critical for the longevity of the restoration.
Regular maintenance, such as cleaning and periodic inspections, will help sustain the integrity of the finish and prevent future deterioration. Address any scratches or chips promptly with a touch-up application.


